
Handmade Christmas decorations can make a holiday tree feel more personal without requiring expensive supplies or professional crafting skills. The best DIY Christmas ornament ideas combine simple materials, thoughtful details, and designs that match your home. You can turn leftover ribbon into delicate hanging decorations, transform recycled cardboard into tiny festive shapes, or create personalized keepsakes that hold family memories for years.
These 22 projects cover different styles, from rustic farmhouse Christmas ornaments and Scandinavian-inspired baubles to colorful crafts for children and elegant decorations suitable for gifting. Some use materials you may already have at home, while others introduce techniques such as salt dough molding, decoupage, acrylic paint marbling, and felt crafting.
Each idea includes practical instructions, material suggestions, and finishing tips to help you create ornaments that look coordinated rather than cluttered. Whether you are decorating a full-size Christmas tree, a tabletop tree, or a few wrapped presents, you can choose projects that suit your time, budget, and crafting experience.
1. Clear Christmas Baubles Filled With Miniature Winter Scenes
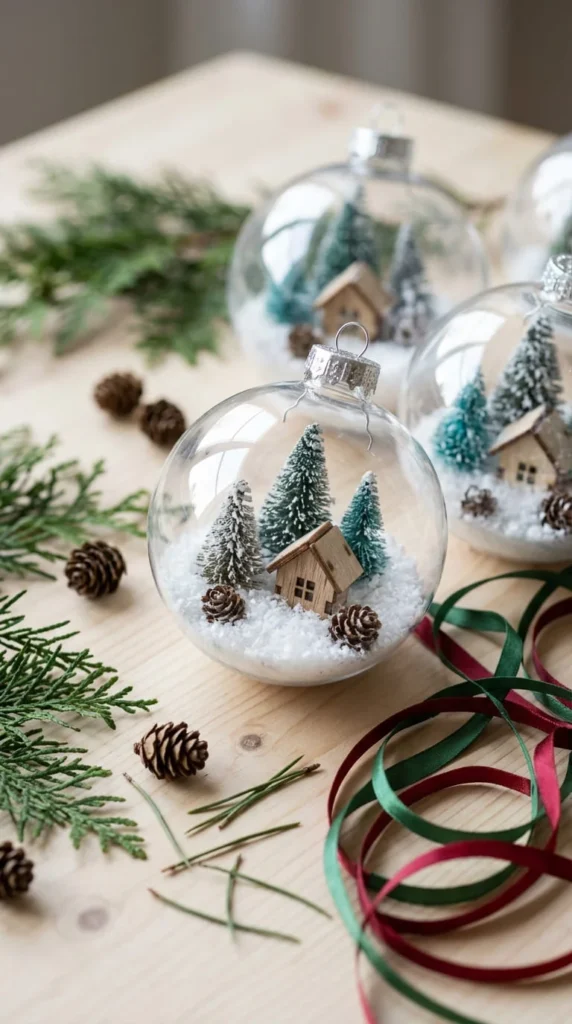
Transparent Christmas baubles are a great starting point when you want homemade ornaments with a polished appearance. Their clear shells let you create miniature winter landscapes without building anything complicated.
Choose fillable plastic ornaments if children or pets are around. They are lighter and less likely to shatter than glass alternatives.
Gather these materials:
- Clear fillable baubles
- Miniature artificial trees or tiny wooden houses
- White faux snow or white paper confetti
- Small tweezers
- Ribbon for hanging
Open each bauble and add a thin layer of faux snow. Place a miniature tree or house inside, adjusting its position with tweezers until the scene faces outward. Avoid packing the shell too tightly, because a little open space makes the details easier to see.
Close the ornament firmly and attach a velvet or satin ribbon through its hanging cap.
For a coordinated Christmas tree, make three variations using the same color palette. One can feature a snowy forest, another a tiny house, and a third a pair of miniature trees.
Styling tip: Use ivory, pale green, and natural wood for a quiet winter look. A little metallic ribbon adds sparkle without distracting from the scene.
2. Salt Dough Handprint Ornaments for Family Keepsakes

A salt dough handprint ornament captures a small moment in childhood and turns it into a Christmas decoration you can bring out every year. It also makes a thoughtful present for grandparents.
Mix 2 cups all-purpose flour, 1 cup salt, and about ¾ cup water. Add the water gradually until the dough holds together without becoming sticky. Knead it until smooth, then roll it to around ¼ inch thick.
Press a child’s hand gently into the dough. Use a knife to trim the outline into a circle, star, or mitten shape. An adult can make a small hanging hole near the top with a drinking straw. Keep the hole far enough from the edge to prevent cracking.
Place the ornament on a lined baking tray. Dry it in a low oven at about 200°F (95°C) until firm, checking regularly. Thick ornaments can take several hours, so allow extra time. Let each piece cool completely before painting.
Use acrylic paint for the handprint and add a contrasting border. Once dry, seal the surface with a suitable clear craft sealer.
Write the child’s name and year on the back if desired. Keep the ornament away from moisture, and supervise young children throughout the process because the dough contains a large amount of salt and is not edible.
3. Dried Orange Slice Ornaments With Cinnamon and Twine
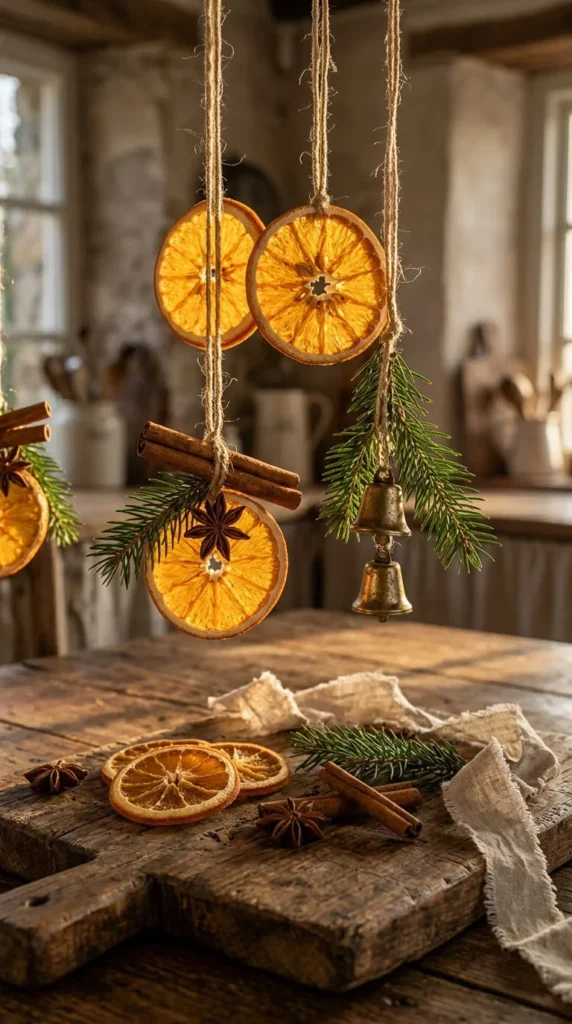
Dried orange ornaments suit rustic, farmhouse, and nature-inspired Christmas decorations. Their amber color looks beautiful against green pine branches, while cinnamon and star anise add a traditional seasonal scent.
Slice oranges into even rounds, roughly ⅛ inch thick. Blot both sides with a paper towel to remove excess juice. Arrange the slices in a single layer on a wire rack set over a baking tray.
Dry them in an oven at approximately 200°F (95°C), turning occasionally. The exact time depends on slice thickness and moisture, so check them regularly. Remove pieces as they become dry and translucent, then allow them to cool completely.
Make a small hole near the edge with a skewer if one is not already available. Thread through jute twine or narrow ribbon to create a hanging loop.
For a more decorative version, tie a short cinnamon stick and a small evergreen sprig to the same loop. A star anise pod can sit at the center of the ribbon knot.
A simple design rule: Let the orange remain the main feature. Too many embellishments can hide its natural pattern.
Use these ornaments on an indoor tree, wreath, or wrapped gift. Store them in a dry container after the season, and discard any pieces that develop mold or become damp.
4. Rustic Wood Slice Ornaments With Personalized Details
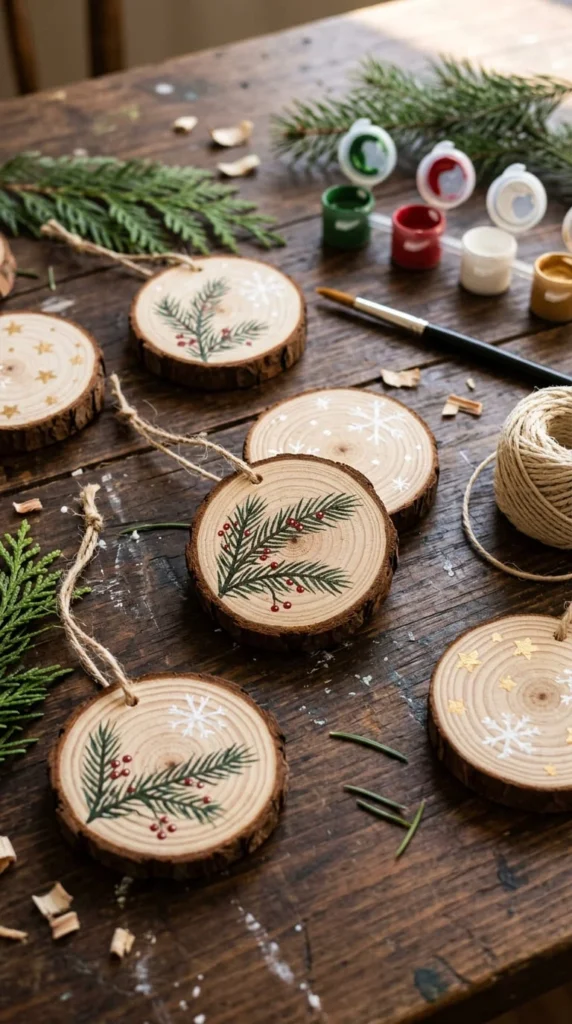
Wood slice ornaments bring a natural look to Christmas trees and work particularly well with linen ribbon, jute twine, and warm white lights. Each slice has a slightly different grain pattern, so even simple artwork looks individual.
Buy ready-made wood slices with smooth edges and predrilled holes. This avoids the extra work of cutting and sanding branches. If using homemade slices, allow them to dry thoroughly before decorating.
Wipe away dust and choose a design that suits your tree. Small pine branches, red berries, stars, and snowflakes are easy motifs for beginners. Sketch the design lightly in pencil before adding acrylic paint with a fine brush.
For a personalized version, paint a first name, initials, or a meaningful year. A vinyl cutting machine can help with neat lettering, but a paint marker also works for simple designs. Allow the paint to dry before adding a clear craft sealer suitable for wood.
Thread natural twine through the hole and tie a secure loop.
For a coordinated collection, use the same paint colors on every ornament but vary the illustration. This creates a handmade set that looks planned rather than identical.
These wood slice decorations also work as gift tags that become keepsakes. Attach one to a wrapped present, then invite the recipient to hang it on their tree in later years.
5. No-Sew Felt Mittens for a Cozy Christmas Tree
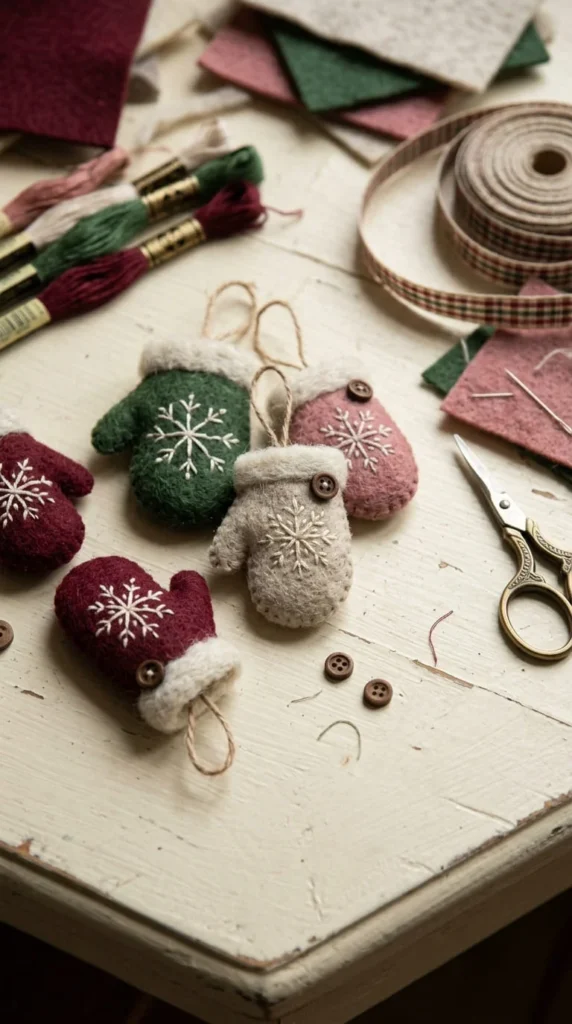
Miniature felt mittens give a Christmas tree a soft, cozy appearance. They are lightweight, easy to hang, and useful for making a matching collection without purchasing expensive materials.
Start by drawing a mitten shape on paper. Cut out the template, fold a piece of felt, and cut two matching mitten pieces at once. Leave the cuff slightly wider than the wrist so you have room to add a contrasting band.
Apply fabric glue around the edges, leaving the cuff open. Press the two pieces together and let the adhesive dry according to its instructions. For a decorative edge, use blanket stitches instead, if you are comfortable with a needle.
Cut a narrow strip of white, cream, or patterned felt and glue it across the cuff. Add a small felt snowflake, embroidered star, or wooden button. Keep decorations lightweight so the mitten hangs naturally.
Attach a ribbon loop at the top. You can place a tiny rolled paper note inside the cuff for a personalized gift, provided the ornament is kept away from small children who might pull the pieces loose.
Color idea: Combine burgundy mittens with cream cuffs and green loops for a traditional tree. For a Scandinavian look, use white, gray, and muted green.
Make a few in different sizes and hang them at varied heights among the branches. They also look charming tied to knitted gifts or handmade stockings.
6. Popsicle Stick Christmas Stars for a Family Craft Session
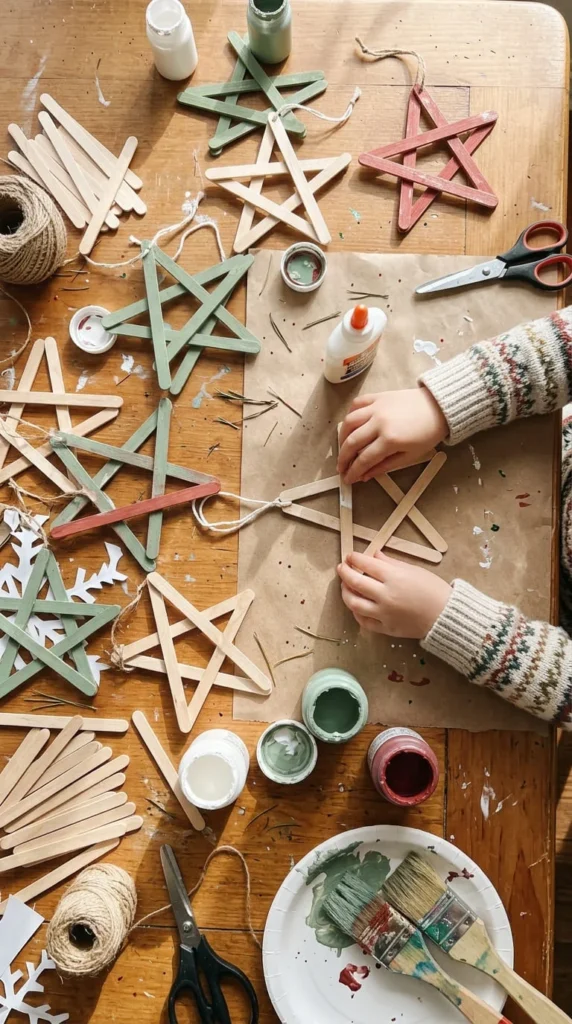
Craft sticks are an inexpensive way to make sturdy star ornaments for a family decorating afternoon. Their simple shape makes them suitable for children, while a limited color palette can give the finished pieces a grown-up appearance.
For each star, arrange five craft sticks into a five-point star shape. Move the ends until the shape looks balanced, then have an adult secure the overlapping joints with craft glue. Follow the adhesive’s drying instructions before lifting the star.
Paint the frame with acrylic or washable craft paint, depending on the age of the children. Natural wood also looks attractive, especially with a little white paint brushed lightly across the edges.
Decorate the joints with small felt circles, paper snowflakes, or tiny pom-poms. If using glitter, apply it over a tray to catch loose particles and allow the glue to dry fully before hanging.
Tie a short cotton cord around an upper point to form a hanging loop. Check that the joint is strong enough to support the ornament.
For a classroom or group activity, prepare the stick shapes in advance and let each child choose the colors and decorations. This reduces waiting time and keeps the session manageable.
Avoid small beads with very young children, and keep hot glue guns in adult hands. A child-safe craft adhesive is suitable for many simple versions, though it may require more drying time.
7. Crochet Mini Christmas Ornaments for a Handmade Tree
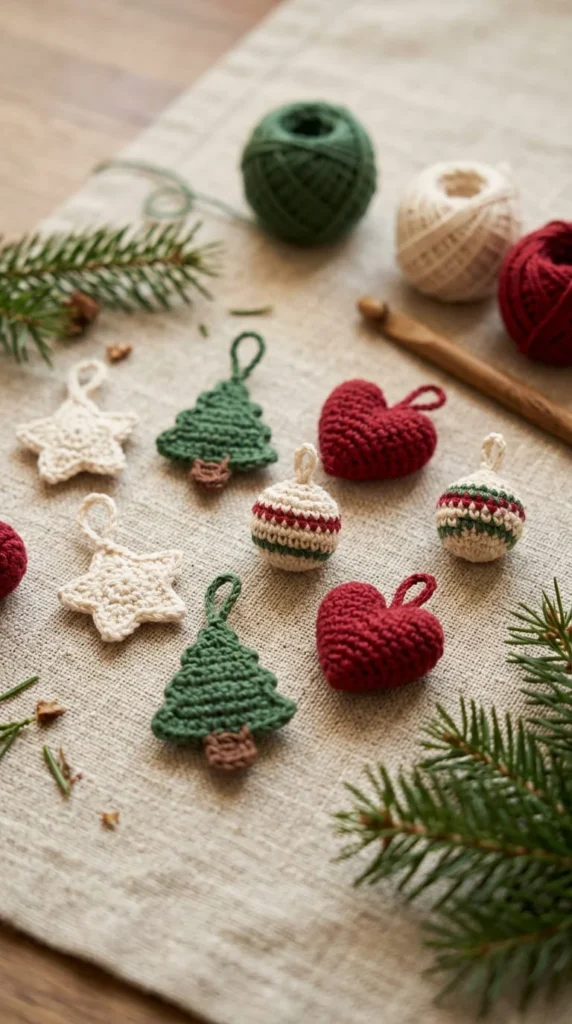
Crochet Christmas ornaments are ideal for anyone who enjoys yarn crafts or wants decorations with a soft, handmade finish. They are light enough for small trees and can be reused year after year when stored carefully.
Cotton yarn works well because it holds its shape and comes in many colors. Choose a hook that creates a firm fabric, following the yarn label or pattern instructions. Loose stitches can reveal stuffing, so keep the tension consistent.
Begin with a flat star, mini tree, or simple round bauble. A beginner can crochet two matching flat shapes and join their edges with slip stitches, leaving a small opening if a little stuffing is desired. Close the opening and weave in all loose yarn ends.
For a miniature tree, make a triangle from rows of stitches and add a short brown trunk. Tiny embroidered dots can represent ornaments without adding beads or other detachable pieces.
Finish with a chain loop or a securely attached length of yarn. Before hanging, check the attachment and trim any loose fibers.
To create a coordinated set, use three shades such as cream, sage, and dark green. Add one contrasting color for a little visual interest.
Useful tip: Make ornaments with similar dimensions so they hang evenly on the tree. Flat crochet shapes are particularly suitable for narrow branches and small tabletop trees.
These little decorations can also become handmade stocking fillers or thoughtful additions to gifts for people who appreciate crochet.
8. Glitter-Filled Clear Ornaments for a Sparkling Tree
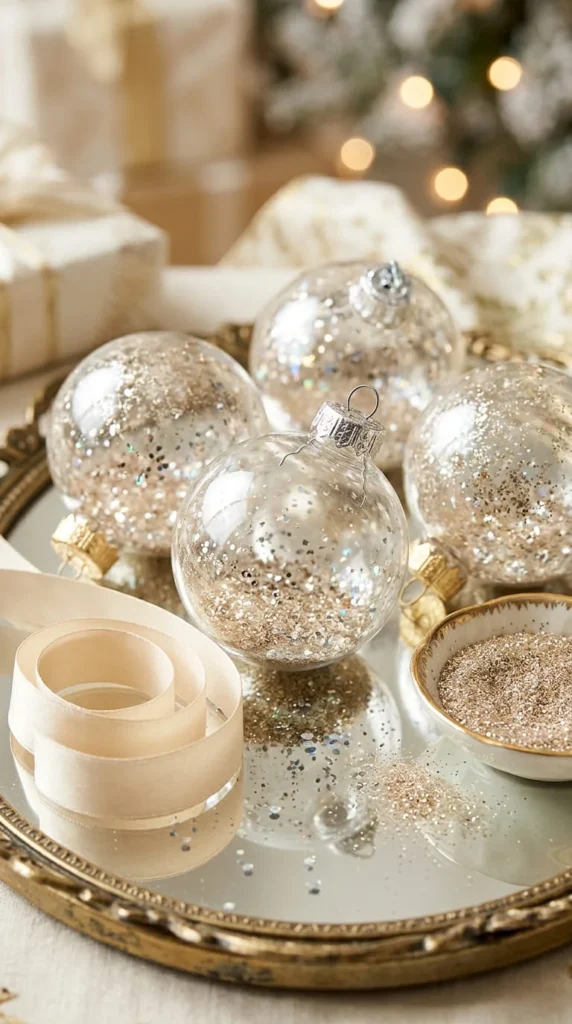
Glitter ornaments add sparkle without requiring detailed painting or sewing. They are especially useful when you want to decorate several branches in a coordinated style on a small budget.
Choose clear fillable plastic baubles and fine craft glitter. Place a sheet of paper beneath your work area so you can collect excess glitter and return it to its container.
Open the ornament carefully. Add a small amount of glitter, close the cap, and rotate the bauble gently to distribute the particles. If you prefer larger flakes or confetti, use a small funnel to guide them through the opening.
For a layered appearance, combine two compatible shades, such as champagne and ivory or silver and pale blue. Avoid filling the ornament completely; leaving some clear space creates a lighter look.
Attach a satin ribbon in a matching color. A narrow ribbon often looks neater than a large bow on a small bauble.
If you want a glitter coating on the inside rather than loose particles, use a craft adhesive specifically suitable for the ornament material and follow its directions. Keep the opening clean so the cap closes securely.
Glitter can spread easily, so work away from food and keep it out of children’s reach. Fine glitter is also difficult to clean from soft furnishings.
Styling idea: Hang glitter baubles near warm white tree lights, where the reflective surfaces can catch the glow. Pair them with plain matte ornaments to prevent the tree from looking overly busy.
9. Pinecone Ornaments With a Woodland Look
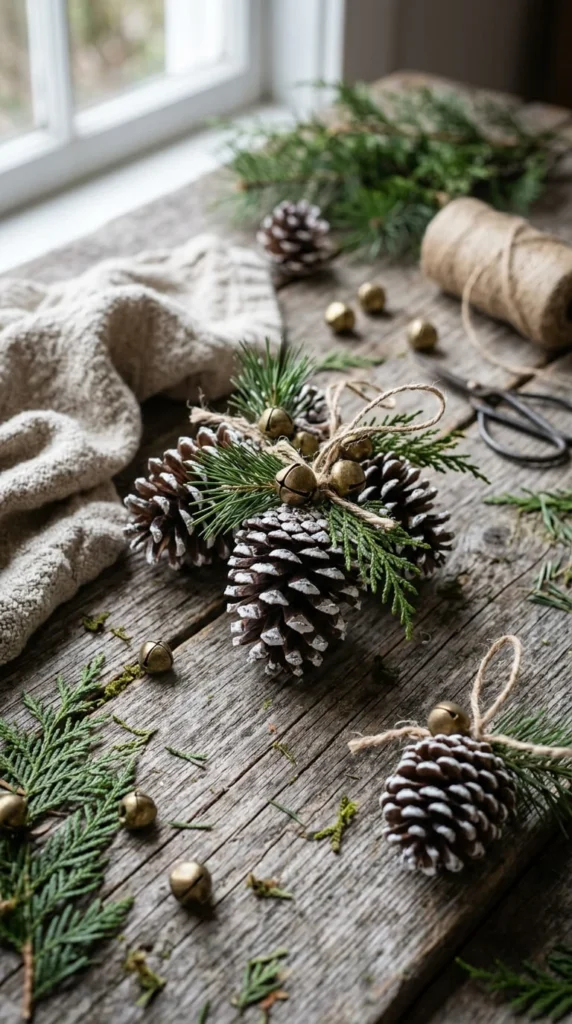
Pinecones provide natural shape and texture, making them a good choice for woodland Christmas ornaments. They also work well with rustic garlands, wooden decorations, and neutral tree themes.
Select dry pinecones with intact scales. If gathering them outdoors, inspect them for insects, dirt, and mold. Brush away loose debris and let them dry completely before decorating. Avoid collecting natural materials where local rules prohibit it.
For a snowy finish, use a small brush to dab white acrylic paint lightly onto the tips of the scales. Do not cover the whole pinecone unless you prefer a solid painted look. A little metallic paint on a few tips can add warmth.
To create a hanging loop, tie twine securely around the upper scales or attach it to a small screw eye installed by an adult. Test the connection gently before hanging it.
Add a narrow ribbon bow or a tiny brass bell if you want more detail. Keep the additions light so the pinecone does not pull the branch downward.
For a cohesive woodland tree, alternate these ornaments with dried orange slices, simple wood stars, and plain green baubles. The repeated natural materials create a connected appearance without making every ornament identical.
These decorations also make attractive gift toppers. Tie one onto brown wrapping paper with twine for a rustic finish.
Avoid placing pinecones close to candles or other heat sources, and inspect stored pieces before reusing them the following year.
10. Folded Paper Star Ornaments From Leftover Wrapping Paper
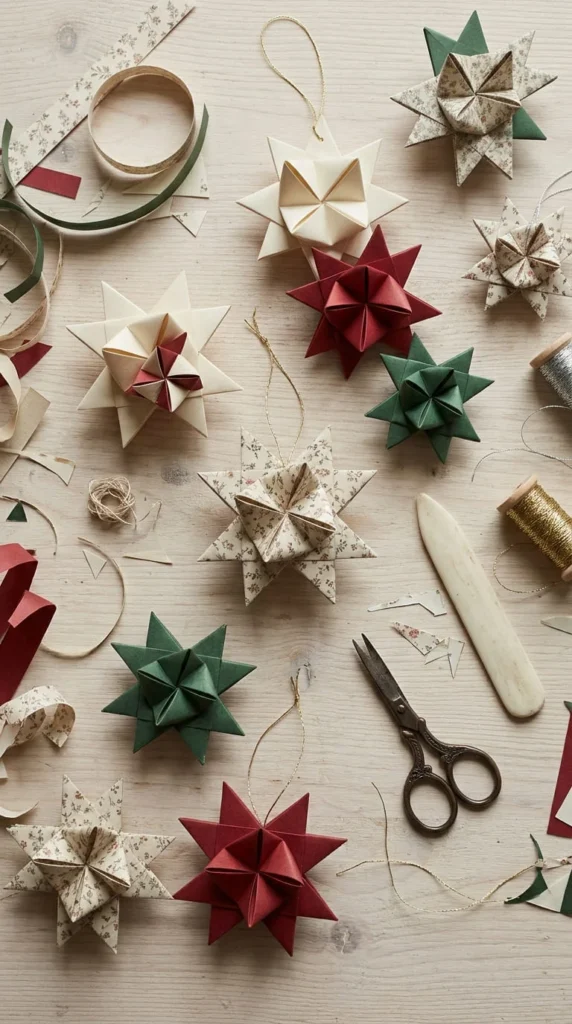
Paper stars are a lovely way to reuse wrapping paper, old greeting cards, or decorative paper scraps. Their folded points create dimension without adding weight to a Christmas tree.
Choose paper that folds cleanly but is not too thick. Thin cardstock works for sturdy stars, while ordinary wrapping paper is easier to fold into delicate shapes. If you are learning a particular origami star pattern, cut several identical squares before starting.
Make sharp creases with a bone folder or the back of a spoon. Work slowly through each fold, checking that the corners meet neatly. Uneven folds can make the star twist or sit flat on one side.
For a simple decorative option, cut two matching star shapes from patterned paper and glue them back-to-back around a thread loop. Gently curve the points with a pencil to add a little dimension.
For a traditional folded star, follow a consistent paper-folding pattern and use a small amount of glue only where the design calls for it. Too much adhesive can wrinkle lightweight paper.
Attach metallic thread or narrow ribbon near the top. These ornaments are light, so a fine hanging loop is usually enough.
Design tip: Repeat one paper pattern throughout the tree and add a few plain stars for contrast. This is an affordable way to create a vintage-inspired theme using materials already in your craft drawer.
Store paper ornaments flat in a dry box to protect their points and folds.
11. Mason Jar Lid Ornaments With Mini Wreaths
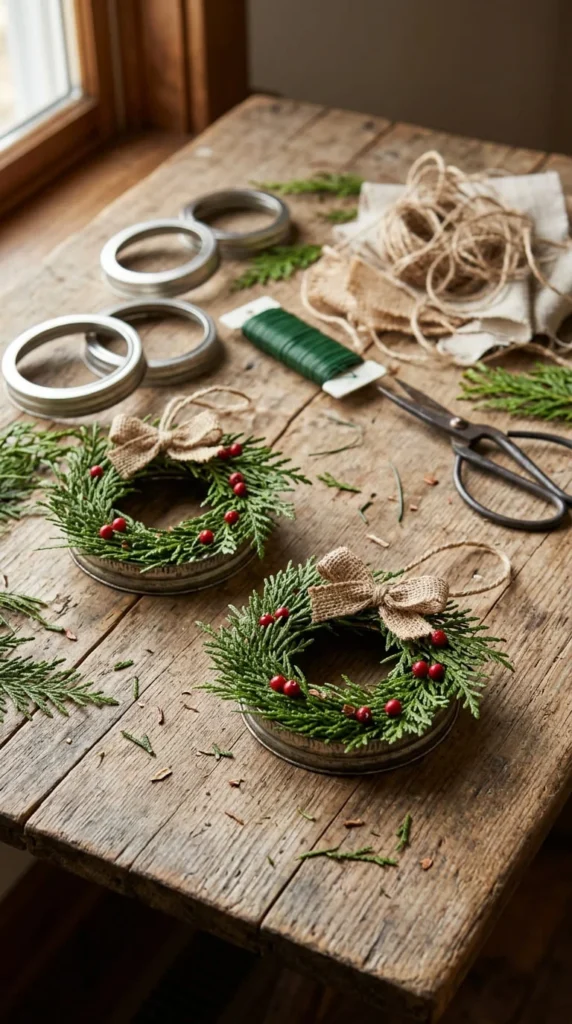
Empty mason jar rings can become small farmhouse Christmas wreaths with very little extra material. This is a useful upcycling project if you have spare canning rings or metal rings left over from other crafts.
Clean and dry each ring before decorating. Check the edges for sharp spots, and do not use any ring that is bent or damaged.
Wrap the ring with jute twine, narrow burlap ribbon, or green yarn. Secure the material at the back with a suitable craft adhesive. Keep the wrapping snug so the metal does not show through.
Add a short piece of artificial cedar or fir across the lower third of the ring. Thin floral wire can hold the greenery in place. Finish with two or three small red berries, a wooden bead, or a tiny ribbon bow.
If you prefer a simpler look, wrap the ring entirely in neutral yarn and attach a single felt star. The result suits a Scandinavian or minimalist Christmas tree.
Attach a hanging loop at the top and test it before placing the ornament on a branch. These mini wreaths can be displayed in small groups, but leave some space between them so the circular shapes remain visible.
For gift packaging, tie one to a parcel with matching twine. It acts as both a decoration and a small keepsake.
Avoid adding too much greenery or heavy embellishment. The ring should remain visible, and the ornament should sit flat rather than tipping forward.
12. Painted Acorn Ornaments for a Natural Christmas Theme
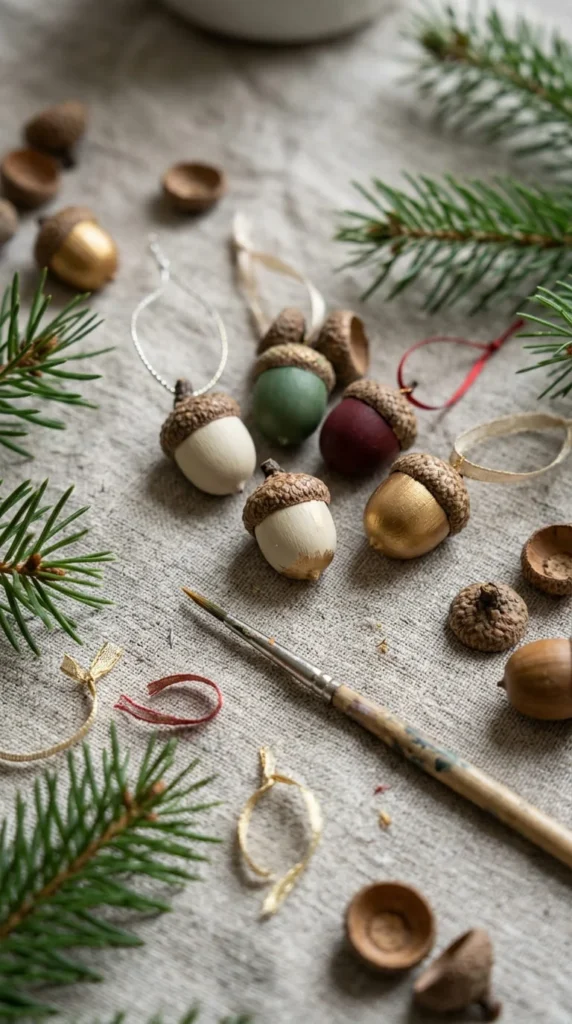
Acorn ornaments are small, delicate decorations that suit miniature trees, woodland themes, and gift wrapping. Their compact size also makes them useful when you have limited space between branches.
Collect intact acorns with their caps still attached, or use clean craft-store acorns. If gathering outdoors, inspect them for insects and mold. Allow them to dry thoroughly before painting, and discard any that show signs of decay.
Apply a thin coat of acrylic paint to the nut while leaving the cap natural, or paint the cap metallic gold for contrast. A fine brush gives better control over such a small surface. Let each coat dry before handling the ornament.
To make a hanging loop, tie fine thread around the stem beneath the cap if the shape allows it. For a more secure attachment, an adult can use a suitable small eye pin and craft adhesive. Allow the adhesive to cure fully before hanging.
Acorns can also be placed in a clear fillable bauble with a few miniature pinecones, provided the pieces fit without forcing the shell. This protects the small natural objects and creates a tiny woodland display.
Use three or four paint colors across the collection rather than decorating every acorn differently. The repeated palette will look intentional against evergreen branches.
Because acorns can be mistaken for food by pets and young children, keep them out of reach. Choose larger, firmly attached decorations for homes where loose small parts could pose a hazard.
13. Personalized Photo Ornaments to Preserve Favorite Memories
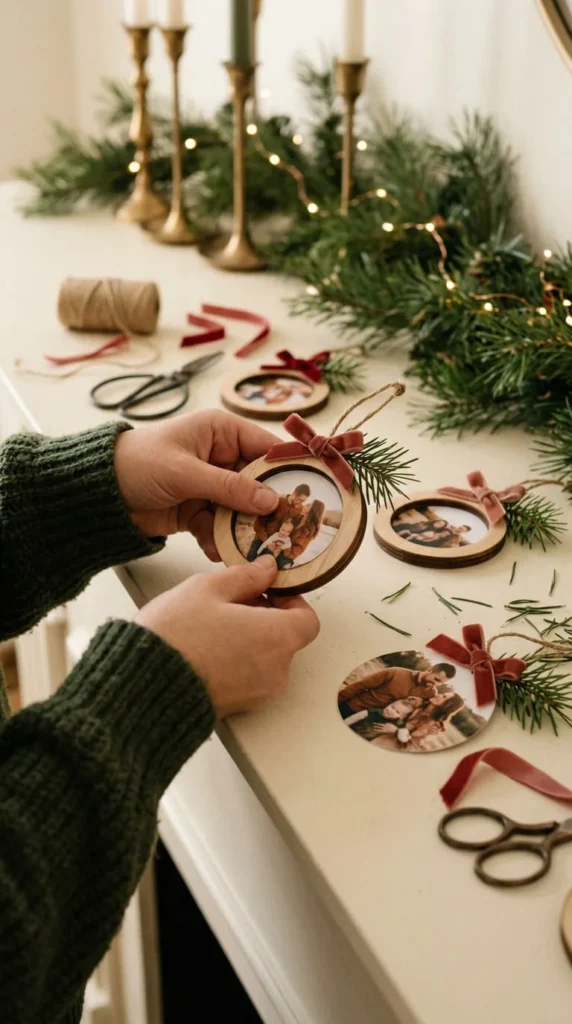
Photo ornaments turn ordinary family pictures into holiday keepsakes. They are especially meaningful for a baby’s first Christmas, a wedding year, a family reunion, or a pet’s first holiday at home.
Choose a lightweight wooden frame, a flat clear ornament, or a small cardboard frame. Print the photograph at a size that fits the base, leaving a narrow border if you want the image to stand out.
For a wooden version, trim the photo carefully and attach it with an adhesive suitable for both materials. If using a decoupage medium, test it on a spare print first because some inks may smudge. Allow the surface to dry completely before sealing it.
For a clear bauble, roll the photograph gently if the opening allows it, then position it so the picture faces outward. Do not force a thick print into a narrow opening, as it may crease.
Decorate the frame with a small ribbon, a painted border, or a tiny evergreen accent. Keep embellishments away from the face in the photograph.
Add a year or name on the back using a paint marker if you want to record the occasion. You can also keep a small note inside a larger ornament.
Create a yearly tradition by making one new photo ornament each December. Over time, the tree becomes a collection of family milestones rather than simply a display of decorations.
Use secure hanging loops and store photo keepsakes in padded boxes to protect the pictures from scratches and moisture.
14. Marbled Christmas Ornaments With Swirls of Color

Marbled baubles offer a modern alternative to traditional solid-color Christmas decorations. Each ornament develops its own pattern, even when you use the same paints.
Use clear fillable ornaments that can be opened and closed. Select two or three compatible colors of acrylic paint that are suitable for the ornament’s material. Check the paint instructions before beginning, because some paints adhere poorly to certain plastics.
Remove the cap and add a few small drops of paint inside the bauble. Rotate the ornament slowly so the colors travel along the inner surface. Avoid vigorous shaking, which can turn distinct swirls into a muddy mixture.
If the paint is too thick to move, use a small amount of a manufacturer-approved thinner rather than adding water without checking compatibility. Let excess paint drain into a disposable container if the product directions call for it.
Set the ornament in a stable holder with the opening facing downward, where appropriate, and let it dry according to the paint instructions. Keep the opening clear so the cap can be replaced securely.
For a refined look, try forest green with ivory and copper, or dusty blue with white and silver. A velvet ribbon can add texture without competing with the marbled pattern.
Important: Protect your work surface, wear gloves if recommended, and keep the room ventilated according to the product label. Do not mix craft chemicals unless the manufacturer specifically permits it.
Hang the finished baubles among plain matte ornaments so the swirling colors remain the main feature.
15. Recycled Cardboard Tube Ornaments for a Low-Cost Holiday
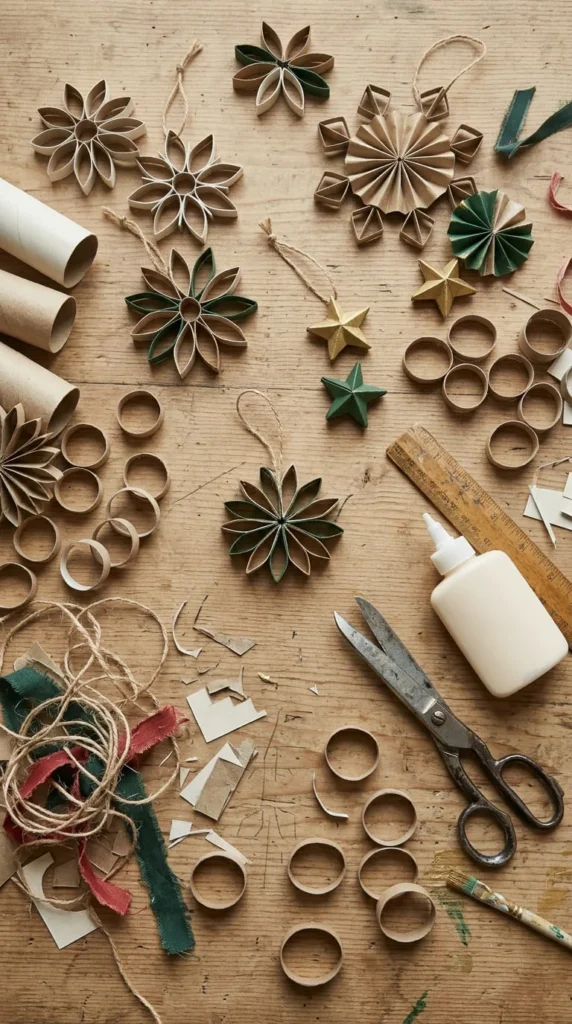
Cardboard tube ornaments are useful when you want to make Christmas decorations from materials already at home. Toilet paper rolls and paper towel tubes can be cut into rings and reshaped into decorative flowers, stars, and snowflakes.
Flatten a clean, dry cardboard tube gently and mark even sections along its length. Cut the tube into rings of equal width. Each ring forms one petal or segment of the final design.
Arrange five or six rings in a circle to create a flower shape, or combine several pieces into a star-like pattern. Glue the meeting points together and hold them in place until secure. Let the structure dry fully before painting.
Use acrylic paint in a limited palette. Ivory creates a snowflake effect, while deep green or burgundy gives the ornament a traditional appearance. A small amount of metallic paint on the edges adds detail without requiring glitter.
Attach a thread loop through one of the upper sections. Reinforce the connection with a small paper tab if the cardboard is thin.
For children, prepare the cardboard rings in advance and allow them to arrange and paint the pieces. Adults should handle sharp scissors, especially when cutting narrow rings.
These ornaments are lightweight and suitable for indoor trees, garlands, and window decorations. They are not waterproof, so keep them away from damp areas.
Budget tip: Make several ornaments from one tube and use leftover wrapping paper to cover a few for a patterned variation.
16. Mini Christmas Gnomes Made From Yarn and Felt
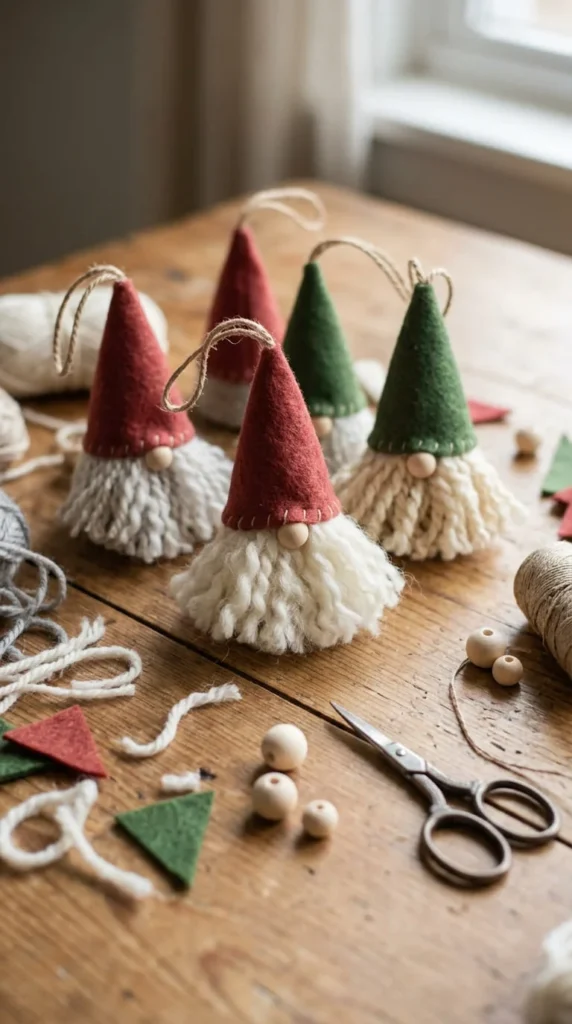
Miniature gnome ornaments add a playful Scandinavian touch to a Christmas tree. Their soft hats and yarn beards make them stand out among shiny baubles and wooden decorations.
For the body, use a small cardboard cone, a felt-wrapped cork, or a tightly rolled piece of felt. Cut a triangle of felt for the hat and shape it into a cone, securing the edge with fabric glue.
Make the beard from short lengths of white, cream, or gray yarn. Arrange the strands below the hat and secure them with craft glue. A small wooden bead can serve as the nose, placed where the beard meets the hat.
If you do not have wooden beads, make a small rounded nose from felt instead. Avoid loose tiny parts when the ornament will hang within reach of young children.
Attach a loop of embroidery thread or narrow cord to the top of the hat. Press the glued areas gently and let everything dry before hanging the gnome.
For a matching set, use hats in three colors and keep the beards neutral. A tiny checked fabric strip can create a country-style detail, while plain cream felt gives a more minimal appearance.
These gnomes also work as gift toppers for handmade presents, especially knitted scarves, crochet accessories, and winter gift baskets.
Keep the design small and lightweight so it does not pull down the tree branch. Store the ornaments in a dry box, and reshape the yarn beard gently when unpacking them next season.
17. Dried Pasta Snowflakes for a Delicate Winter Design
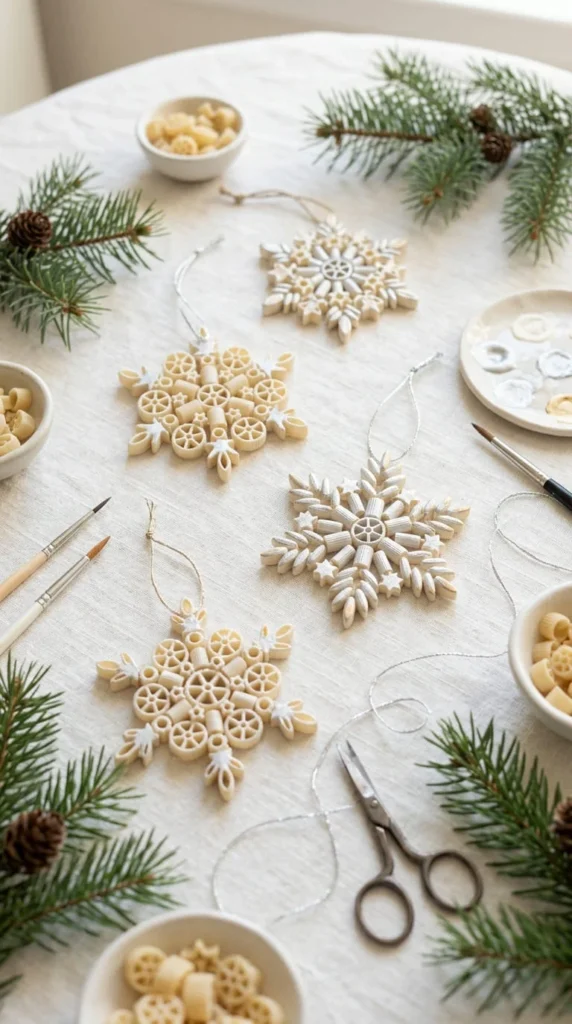
Pasta snowflakes are an inexpensive craft that can turn simple pantry shapes into delicate Christmas tree decorations. Different pasta varieties provide useful shapes for building symmetrical designs.
Choose dry pasta pieces such as small shells, elbows, or short tubes. Arrange six pieces around a central point to form the arms of a snowflake. Add smaller pieces between the arms if you want a more detailed pattern.
Glue the pieces together on a sheet of parchment paper. Use a craft adhesive suitable for the materials and allow the entire design to dry before lifting it. An adult should handle hot glue if a stronger, quicker bond is required.
Paint the snowflake with white or ivory acrylic paint. For a little sparkle, brush silver or gold onto the raised edges after the base coat dries. A thin coat of clear craft sealer can help protect the surface if the product is suitable for the chosen materials.
Attach a lightweight thread loop through one of the upper arms. Check the glued joints gently before hanging.
The best results come from repeating the same basic pattern rather than making each snowflake completely different. You can change the color or size while keeping a consistent shape.
This craft is suitable for supervised family activities, but pasta pieces and small decorations can pose choking hazards. Keep them away from young children who might put craft materials in their mouths, and do not leave the finished ornaments where pets can chew them.
Store the snowflakes in a dry box because moisture can soften the pasta and weaken the adhesive.
18. Miniature Gingerbread House Ornaments From Cardboard
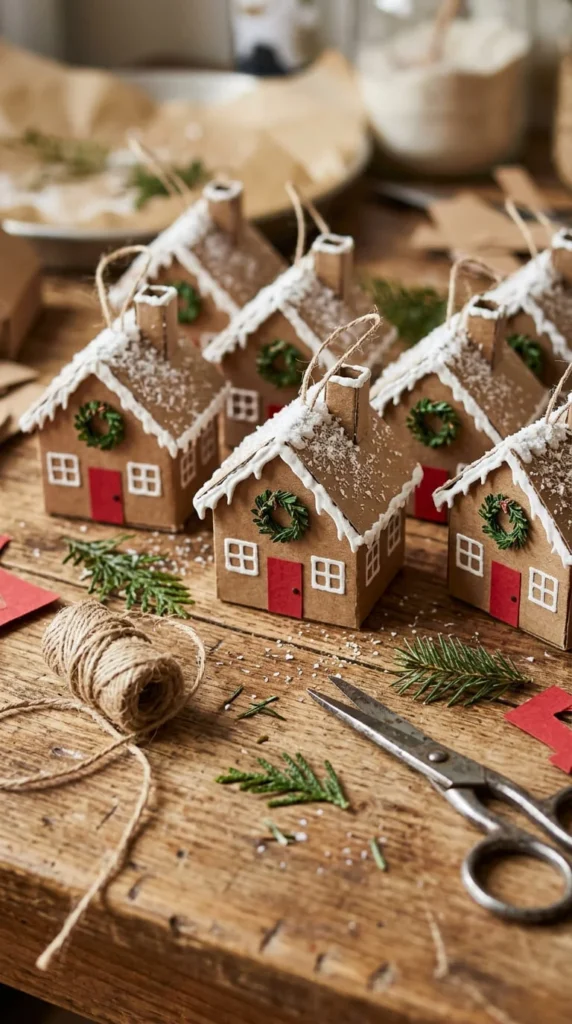
Gingerbread house ornaments create a storybook feel without requiring actual baking. Cardboard gives you a lightweight base, and painted details can imitate icing, candy, and snowy roofs.
Draw a small house net on cardboard, including the front, back, two sides, and roof panels. Keep the structure simple, with straight edges and a small door. Cut out the shape and score the fold lines lightly with an adult’s help.
Fold the panels and secure the tabs with craft glue. Hold the house together until the adhesive sets, then let it dry completely before decorating.
Paint the cardboard a warm gingerbread brown. Add white lines along the roof and windows to resemble icing. Small red or green paper shapes can become a wreath, door, or candy-like decoration.
For a more detailed ornament, attach a narrow strip of white paper around the roof edge and cut small scallops to imitate icing drips. Use only lightweight decorations so the house does not become too heavy for a tree branch.
Attach a thread loop at the roof peak. Reinforce the inside with a small cardboard patch if necessary.
Make a tiny village by creating houses in slightly different shapes while repeating the same color palette. Hang them together on a larger tree or display them on a mantel with miniature bottlebrush trees.
These decorations are intended for indoor use and should be kept dry. Their charm comes from the handmade details, so small imperfections can make each little house feel more individual.
19. Fabric Scrap Candy Cane Ornaments
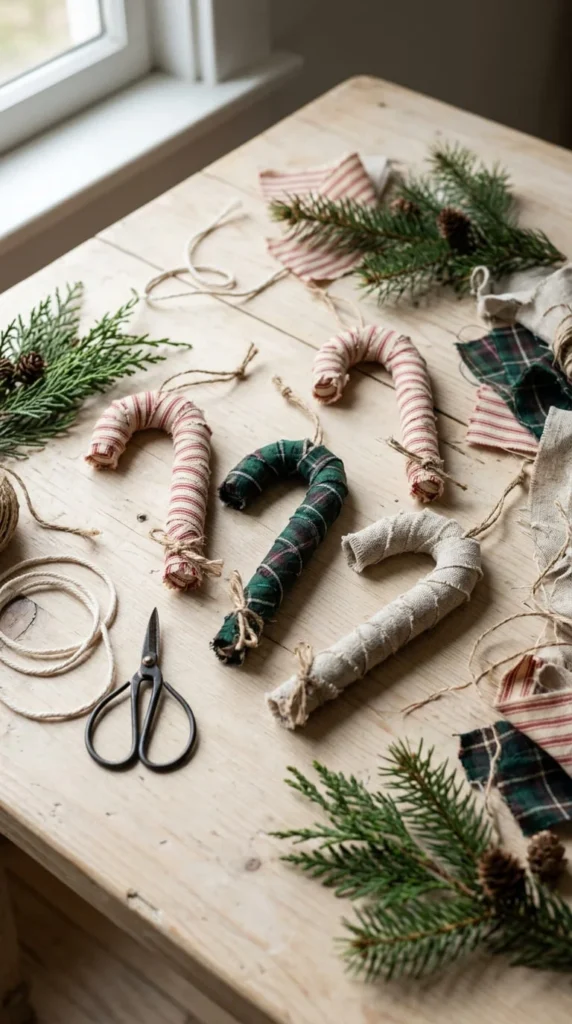
Fabric scrap candy canes are a practical way to use leftover cotton from sewing projects. The fabric adds a soft texture that works beautifully with farmhouse decorations and handmade stockings.
Start with a lightweight candy cane-shaped base made from thick craft wire, flexible cardboard, or a purchased plain ornament form. If using wire, an adult should shape it and cover any sharp ends before decorating.
Cut fabric into narrow strips. Apply fabric glue to a small section of the base, then wrap the strip diagonally around it. Overlap each turn slightly to hide the base and create a continuous pattern.
Alternate red-and-cream fabric with green plaid or neutral linen for different styles. Secure the final end at the back with a small amount of glue and allow it to dry fully.
Tie a small loop of cotton cord around the upper curve. A tiny ribbon bow can cover the attachment point, but keep the ornament simple enough that the candy cane shape remains clear.
For a coordinated set, use one fabric pattern throughout the tree and add a second pattern only as an accent. This makes good use of small fabric remnants without making the tree look crowded.
These ornaments can also decorate gift bags, wreaths, or a seasonal garland. They are light and easy to store flat between sheets of tissue paper.
Avoid placing them near open flames or hot bulbs, particularly when the base contains wire and the wrapping fabric is flammable. Keep the ornaments away from small children if the base has exposed or detachable components.
20. Elegant Gold Leaf Ornaments for a Glam Christmas Tree
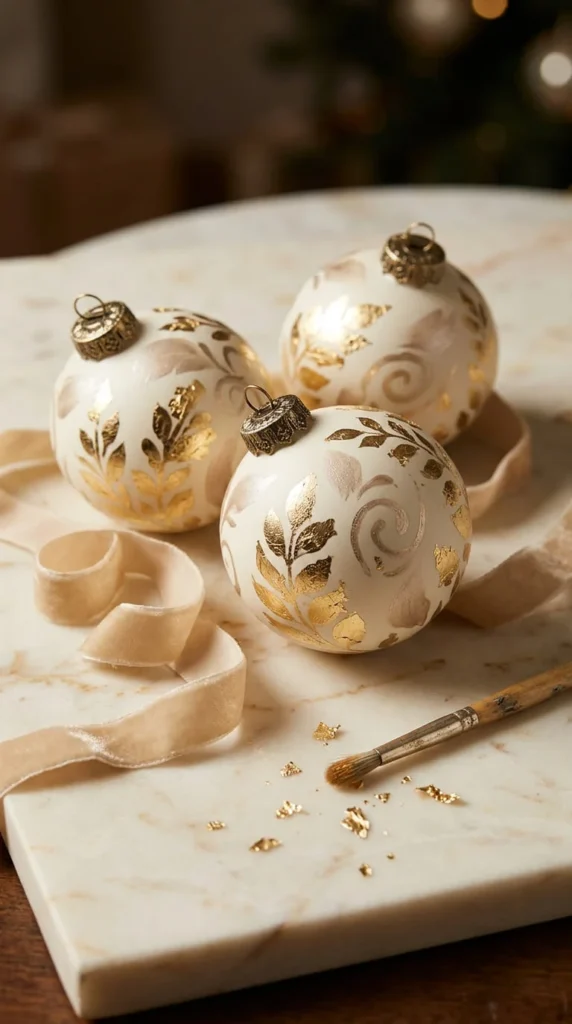
Gold leaf can make plain ornaments look refined without covering them in glitter. A small amount of metallic detail is often enough to create a polished finish for an elegant Christmas tree.
Begin with clean, smooth baubles. Matte ivory, deep green, black, and burgundy provide attractive backgrounds for gold accents. Use a product intended for the ornament’s surface, and read the instructions before applying gilding adhesive.
Brush a thin layer of the recommended adhesive onto selected areas, such as one side of the bauble, a narrow band around the middle, or a few irregular patches. Wait for the adhesive to reach the tacky stage specified by the manufacturer.
Lay small pieces of gold leaf over the prepared areas and press gently with a soft brush. Lift away excess leaf without rubbing too hard. Small gaps and uneven edges can add an attractive handmade quality.
Allow the finish to dry, then apply a compatible protective coating if recommended. Some metallic finishes can lose their shine when paired with the wrong sealer, so test the materials on a spare surface first.
Attach a velvet ribbon in cream, burgundy, or dark green. Keep the bow small to let the metallic surface remain the main feature.
Use these ornaments alongside plain matte baubles and a few natural wood decorations. This contrast keeps the tree elegant rather than overly shiny.
Work in a ventilated area when product instructions call for it, and keep adhesives and leaf fragments away from children and pets.
21. Miniature Pom-Pom Ornaments Made With Leftover Yarn
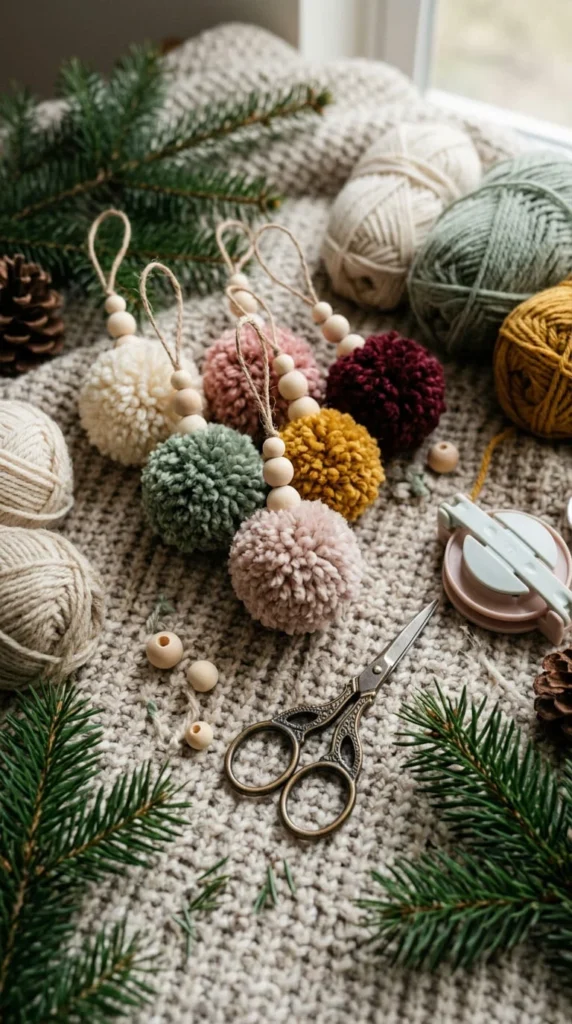
Pom-pom ornaments are a cheerful option for anyone with leftover knitting or crochet yarn. They feel soft, add color to a tree, and can be made in different sizes without buying many supplies.
Use a small pom-pom maker or wrap yarn around two cardboard circles with a hole in the center. The more yarn you wrap, the fuller the pom-pom will be. Tie the center tightly with a separate strand before cutting the loops.
Trim the yarn into a rounded shape, rotating the pom-pom as you cut. Take small snips rather than removing too much at once. A well-trimmed pom-pom looks fuller and hangs more neatly.
Use the long center strand to create a hanging loop, or attach a separate length of yarn securely. If adding a wooden bead, place it above the pom-pom and secure it so it cannot slide off.
Choose a limited palette for a coordinated Christmas tree. Cream and sage work well with natural wood ornaments, while burgundy and dusty pink create a softer traditional look.
For a playful version, combine two yarn colors in one pom-pom. Wrap each color over part of the maker to create sections, or mix small amounts of yarn for a speckled appearance.
These ornaments are especially suitable for small tabletop trees and gift toppers. They are lightweight, so they will not pull down delicate branches.
Keep loose yarn and small beads away from pets and young children, and store the finished pieces in a dry container to prevent dust from settling into the fibers.
22. Quick Ribbon-Wrapped Ornaments for Last-Minute Decorating

When Christmas is approaching and there is little time left for crafting, ribbon-wrapped baubles are an easy way to give an existing collection a new look. You can use plain old ornaments, inexpensive shatterproof baubles, or spare decorations from previous seasons.
Choose narrow ribbon that bends smoothly around the ornament. Velvet creates a rich finish, satin reflects light, and plaid cotton gives the tree a farmhouse style.
Begin at the top of the bauble and secure the ribbon near the hanging cap with a small amount of suitable craft adhesive. Wrap it around the surface in even rows, keeping the edges close together. For a striped effect, leave small gaps between the rows rather than covering the entire bauble.
Trim the ribbon and secure its end at the back. Add a short bow near the cap if desired, but avoid bulky knots that could prevent the ornament from hanging straight.
You can also wrap ribbon around only the middle of a bauble, leaving the top and bottom visible. This uses less material and creates a neat band of color.
For a coordinated tree, choose two ribbon patterns and one plain color. Repeat the same combinations across several ornaments to create a consistent appearance.
This project is useful for refreshing decorations that have faded or no longer match your current color scheme. It also makes a quick handmade gift when paired with a simple gift box.
Let all adhesive dry before hanging, and keep fabric ribbon away from open flames and hot light sources.
Conclusion
Handmade Christmas ornaments can be simple, inexpensive, and full of personality. From miniature crochet trees and rustic pinecones to personalized photo keepsakes and elegant gold leaf baubles, these projects offer plenty of ways to decorate your tree in a style that feels personal to your home.
You do not have to make all 22 decorations to create a beautiful handmade collection. Start with two or three projects that use materials you already own. Choose a color palette, repeat a few details, and mix different textures to give your tree a coordinated appearance.
If you are crafting with children, begin with paper stars, felt shapes, or painted craft sticks. For meaningful gifts, try photo ornaments, wood slices, or salt dough handprints. And if you are short on time, ribbon-wrapped baubles and glitter-filled ornaments are easy places to start.
Gather your supplies, choose your favorite idea, and make a few decorations this season. Your handmade Christmas ornaments may become the keepsakes your family looks forward to hanging on the tree every year.