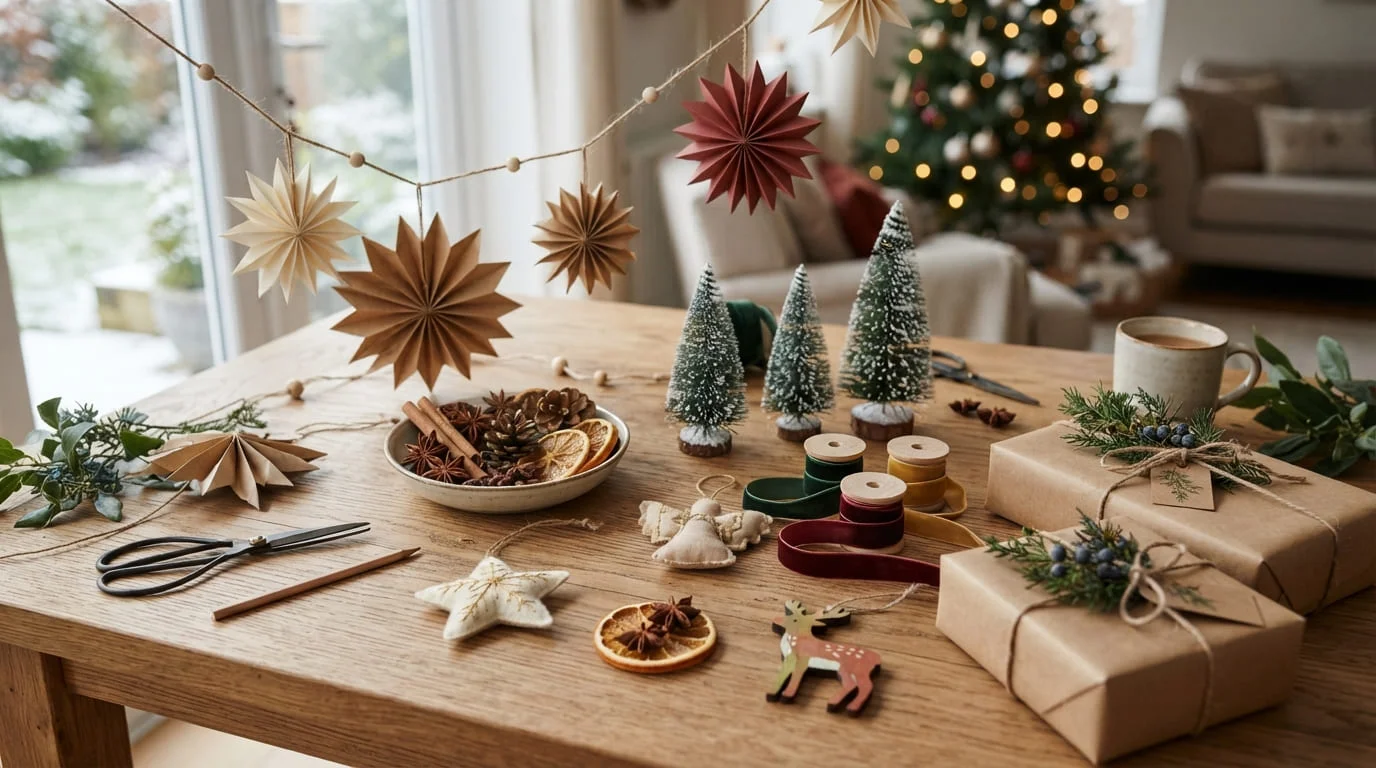

Christmas decorating can be affordable, creative, and surprisingly simple when you work with materials you already have at home. From handmade tree ornaments and paper snowflakes to natural wreaths and miniature Christmas trees, there are plenty of easy DIY Christmas crafts that can make your home feel festive without filling your shopping cart with expensive decorations. The secret is choosing projects that fit your available time, budget, and crafting experience. Some take just 15 minutes, while others are lovely weekend activities to enjoy with family. You can also turn leftover wrapping paper, fabric scraps, cardboard tubes, and pinecones into decorations that look thoughtful rather than homemade in a hurry. This collection of 24 Christmas craft ideas covers different decorating styles, from rustic and Scandinavian-inspired designs to colorful projects for children. Each idea includes practical materials, simple instructions, and styling suggestions to help you create something you will actually want to display. Whether you are decorating a small apartment, preparing a holiday table, or making personalized gifts, you can find a project that suits your space and schedule.
1. Folded Paper Snowflakes for Windows and Walls
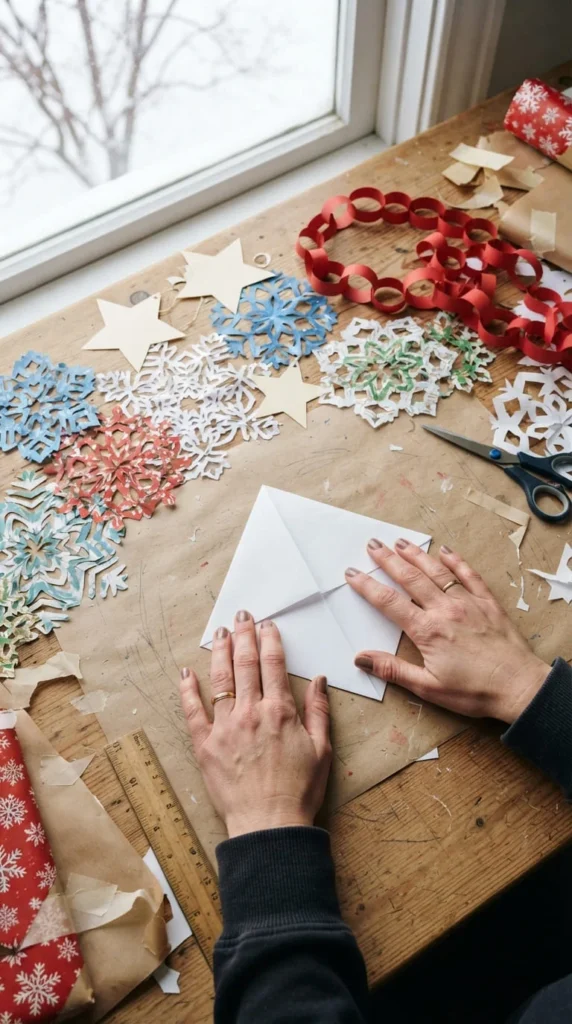
Paper snowflakes are among the simplest Christmas decorations to make, yet a well-planned arrangement can look beautiful in almost any room. They are particularly useful when you want seasonal decorating without buying bulky ornaments or damaging your walls.
Materials:
- White printer paper or lightweight cardstock
- Scissors
- Removable tape or clear thread
Start with a square sheet of paper. Fold it diagonally into a triangle, then fold it again into a smaller triangle. Fold the triangle into thirds to create a narrow wedge. Trim the uneven top, then cut small triangles, curves, and narrow slits along the folded edges.
Open the paper slowly to reveal your snowflake. For your first attempt, use simple cuts rather than removing large sections, which can weaken the design.
Make several snowflakes in different sizes. Smaller designs work well around window corners, while larger ones can become a focal point on a plain wall.
Styling tip: Combine white snowflakes with a few pale blue or silver paper stars for a winter-inspired display.
If you are crafting with children, prepare the folded shapes in advance and let them decorate the finished snowflakes with washable markers. Younger children should use age-appropriate safety scissors with adult supervision.
The best part is that you can recycle most paper snowflakes after the holidays. Store any particularly attractive designs flat inside a folder if you want to reuse them next year.
2. Salt Dough Christmas Ornaments With Personal Details
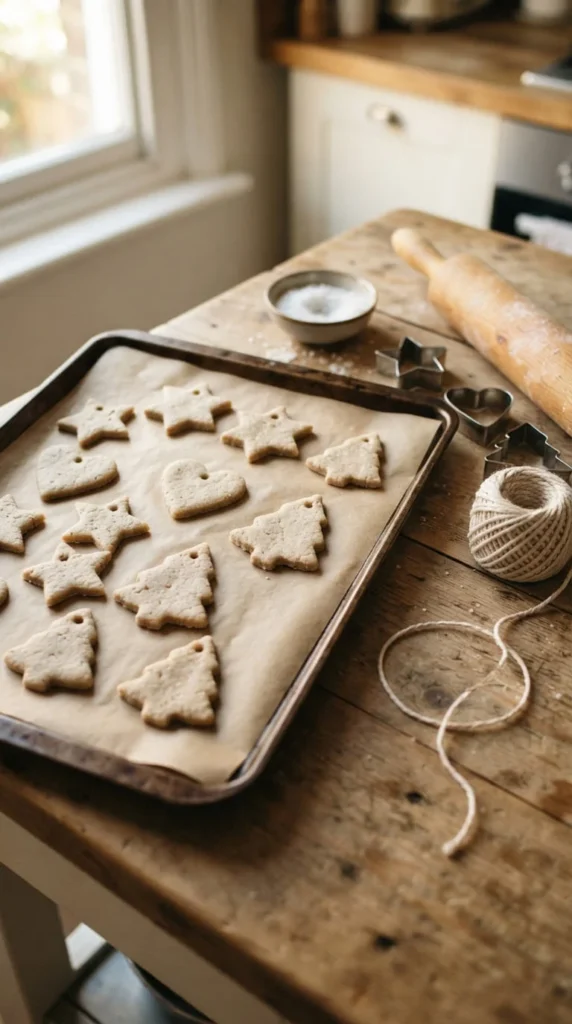
Salt dough ornaments are a budget-friendly way to make decorations that can be personalized for family members, friends, or children. Each ornament can have a different shape, color, or surface pattern, making the finished collection feel personal rather than store-bought.
Materials:
- 2 cups all-purpose flour
- 1 cup salt
- About ¾ cup water
- Cookie cutters
- Drinking straw and cotton string
Mix the flour and salt in a bowl. Add water gradually until the mixture forms a firm dough. Knead it until smooth, then roll it to approximately ¼ inch thick.
Cut out stars, hearts, circles, or Christmas tree shapes. Use a drinking straw to make a hanging hole near the top of each ornament.
Place the shapes on a lined baking tray and dry them in a low-temperature oven, around 200°F (95°C), checking regularly until they are hard. Drying time depends on thickness and moisture. An alternative is to let them air-dry for several days, turning them occasionally.
Allow the ornaments to cool fully before painting them with acrylic paint. Finish with simple dots, painted initials, or a small year marking.
Styling tip: Use cream paint, muted green, and thin red ribbons for a coordinated tree display.
These ornaments can also become gift tags or place-setting decorations. Keep them away from moisture, since salt dough is not waterproof or edible. Adults should supervise oven use and handle hot trays.
3. Dried Citrus Ornaments for a Natural Christmas Tree

Dried orange and lemon slices bring warm color and natural texture to Christmas decorating. They suit rustic homes, neutral interiors, and traditional trees filled with greenery and wooden ornaments.
Materials:
- Oranges or lemons
- Baking tray and parchment paper
- Cotton string or narrow ribbon
- Optional cinnamon sticks
Wash the fruit and cut it into evenly sized slices about ⅛ inch thick. Blot both sides with a clean kitchen towel to remove excess juice.
Arrange the slices in a single layer on a parchment-lined baking tray. Dry them in an oven at approximately 200°F (95°C), turning occasionally and checking frequently. The process may take several hours, depending on thickness and moisture.
Let the slices cool completely. Make a small hole near the edge and thread cotton string through it. Tie a loop for hanging.
For a more decorative finish, tie a short cinnamon stick or rosemary sprig to the string. You can also group three slices with different sizes to create a layered ornament.
Styling tip: Hang citrus slices among dark green branches, wooden beads, and cream ribbons for a natural color palette.
These ornaments work on Christmas trees, garlands, and wrapped presents. Store them only when completely dry, in a clean, dry container, and discard any that develop mold. Their scent may fade over time, so treat them primarily as decorative pieces rather than long-lasting air fresheners.
4. Scandinavian Felt Christmas Trees
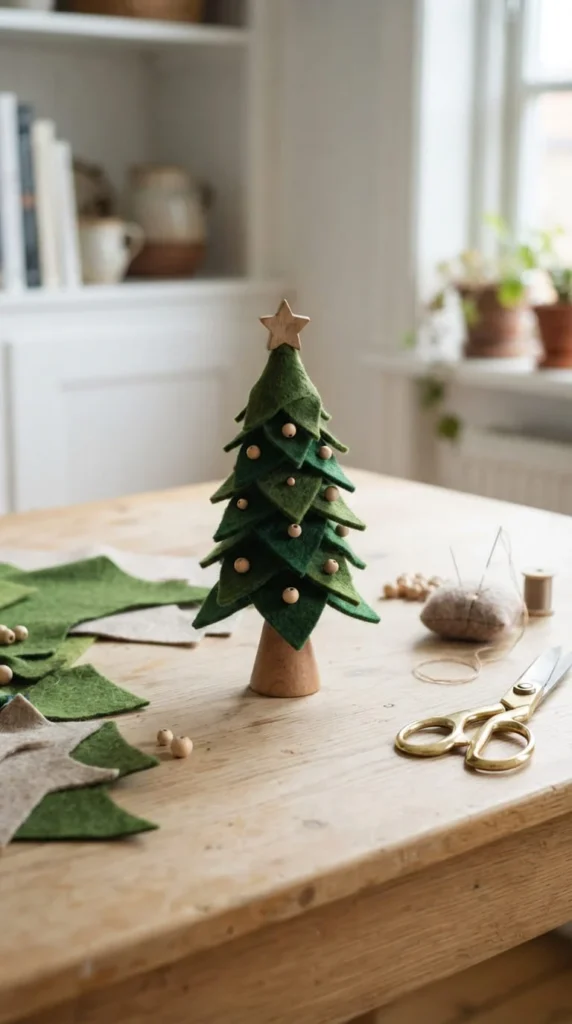
Felt Christmas trees are ideal for anyone who prefers simple shapes, soft textures, and a calm holiday color palette. They look attractive on bookshelves, office desks, mantelpieces, and small side tables where a full-size Christmas tree might feel overwhelming.
Materials:
- Green felt
- Cardboard or a small wooden cone
- Scissors
- Fabric glue or needle and thread
- Small wooden beads
Cut several felt triangles in different sizes. Arrange them from largest at the bottom to smallest at the top, overlapping the layers to resemble evergreen branches.
Attach the felt pieces to a cardboard cone or another stable backing. Fabric glue is suitable for a simple no-sew version, while hand stitching gives the project a more durable finish.
Decorate the tree sparingly with wooden beads, small felt circles, or a tiny fabric star. Leave some areas undecorated so the layered texture remains visible.
If you want to make several trees, vary their heights and use a combination of forest green, sage, cream, and dusty blue.
Styling tip: Display three trees together on a wooden tray, with one taller tree in the center and smaller versions on either side.
For a child-friendly adaptation, use large felt shapes and washable craft glue. Avoid small decorative beads around children who may put objects in their mouths.
These miniature trees can be packed flat if made from layered felt without a rigid cone. They also work well as reusable decorations for desks and windowsills long after the main tree has been taken down.
5. A Simple Evergreen Wreath With Velvet Ribbon

An evergreen wreath creates a traditional Christmas focal point without requiring complicated construction. You can make a small version for an interior door or a larger arrangement for a covered entrance.
Materials:
- A wire wreath frame
- Evergreen clippings
- Thin floral wire
- Velvet ribbon
- Pruning scissors
Choose sturdy evergreen branches such as fir, pine, or cedar. Trim them into manageable pieces, keeping the stems long enough to attach securely.
Place a small bundle against the frame and wrap floral wire around the stems. Add another bundle, overlapping the previous one so the stems are hidden. Continue around the frame until the greenery looks evenly distributed.
Tuck any exposed stems beneath neighboring branches. Attach a wide velvet ribbon at the top or bottom, depending on the look you prefer.
For a traditional arrangement, use burgundy ribbon and a few pinecones. For a quieter design, choose a cream or dark green ribbon and leave the greenery mostly undecorated.
Styling tip: Hang the wreath on a plain wooden door or above a console table where its natural texture stands out.
Fresh greenery gradually dries indoors, so keep the wreath away from heaters, fireplaces, and other heat sources. For outdoor display, check whether your greenery and attachments are suitable for the local weather. Use a secure hanging method and avoid blocking the door’s normal operation.
If you prefer a reusable version, substitute artificial greenery and store it carefully after the holidays.
6. A Textured Mini Christmas Tree Made With Pipe Cleaners
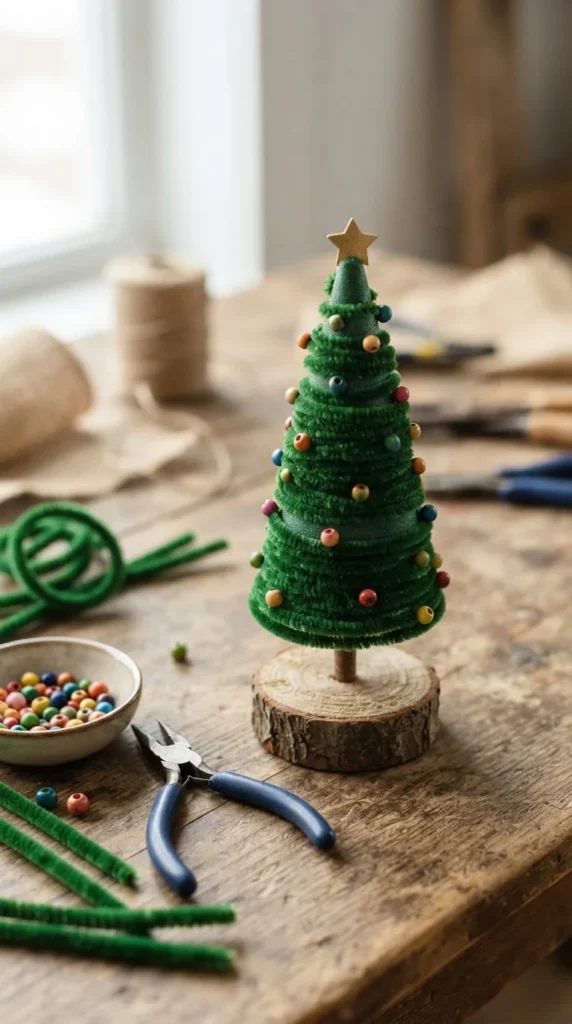
A pipe-cleaner tree is a good choice when you want a small decoration that takes little space and offers plenty of texture. The materials are inexpensive, and the finished tree can sit on a desk, bookshelf, or holiday table.
Materials:
- Green pipe cleaners
- A small foam cone
- Craft glue or a low-temperature glue gun
- Wooden base or sturdy cardboard circle
- Optional wooden beads
Wrap a pipe cleaner around the base of the cone, securing the end with a small amount of craft glue. Continue upward in a spiral, keeping each row close enough to cover the cone beneath it.
If you want a fuller appearance, add shorter pieces between the main rows. Trim uneven ends carefully so the shape stays balanced.
Attach the cone to a wooden base or a thick cardboard circle. Add a few wooden beads as ornaments, or leave the tree plain for a minimalist look.
For a different color scheme, make one tree in cream and another in deep green. A group of three trees in varied heights can look more polished than a single small decoration.
Styling tip: Place the trees on a tray with a few pinecones and a folded linen napkin to create a miniature holiday display.
An adult should handle sharp cutting tools and hot glue. For younger children, use a larger base and avoid tiny beads.
This craft is also useful for using up leftover pipe cleaners from school projects. Store the finished tree in a box with enough room to prevent its soft branches from becoming crushed.
7. Recycled Paper Stars for a Rustic Holiday Display
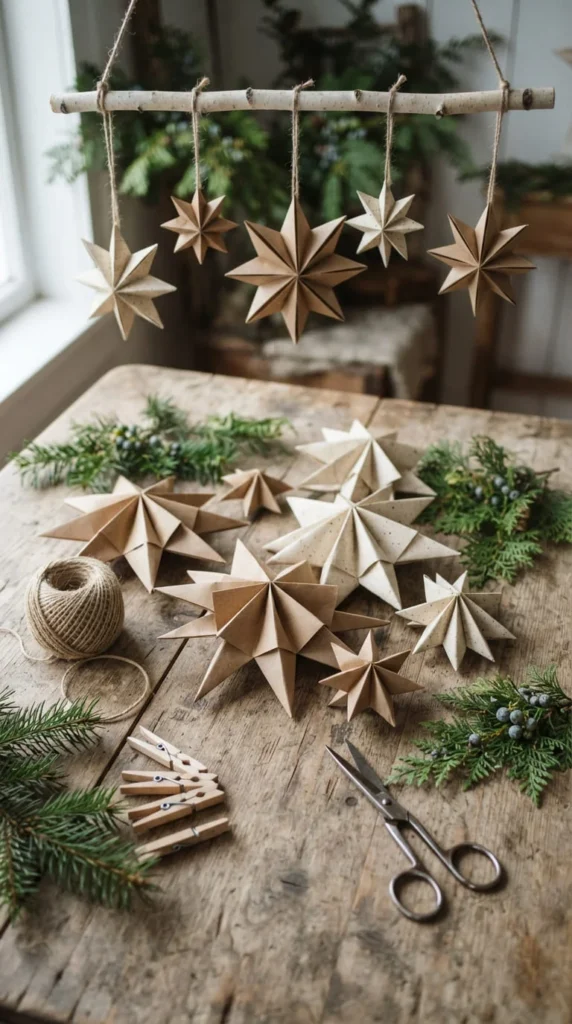
Paper stars can decorate a Christmas tree, a window, or a plain wall. Using leftover wrapping paper or paper shopping bags gives them a coordinated appearance without requiring a new pack of craft supplies.
Materials:
- Recycled wrapping paper or kraft paper
- Scissors
- Glue stick
- Pencil and ruler
- Cotton thread
Cut several paper strips of equal width. Fold each strip into an accordion, keeping the folds as even as possible. Fold the accordion in half to form one side of the star.
Repeat the process for the remaining sections, then glue the folded sections together to create a complete star. Hold the joins until the adhesive sets.
If you prefer a simpler version, cut two matching star shapes from cardstock, decorate them with small cutouts, and glue them together with a thread loop between the layers.
Mixing plain kraft paper with cream or metallic paper creates contrast without making the display look too busy.
Styling tip: Hang the stars at different heights in a window or attach them to gifts instead of buying plastic package toppers.
Paper stars are lightweight, so removable hooks or thin thread can support small designs. Larger stars may need a stronger hanging point.
Keep the finished decorations away from open flames, candles, and hot light fixtures. When the season ends, flatten reusable stars carefully and store them between sheets of cardboard to protect their folds.
8. A Pinecone Centerpiece for the Christmas Table

Pinecones can become an attractive holiday centerpiece with very little decoration. Their natural shapes add texture to a table, and they work with both traditional red-and-green styling and neutral winter themes.
Materials:
- Clean, dry pinecones
- Evergreen clippings
- A shallow wooden bowl or tray
- Dried citrus slices
- Optional ribbon or small decorative berries
Choose pinecones that are dry and free from insects or visible mold. Brush away loose dirt with a dry brush.
Arrange the largest pinecones toward the center of the bowl. Add smaller cones around the edges, then tuck evergreen clippings and dried citrus slices into the gaps. Keep the arrangement low enough for guests to see one another across the table.
If the bowl looks too plain, place a folded strip of linen beneath it or tie a narrow ribbon around the outside.
For a winter-white version, use cream-painted pinecones and pale dried branches. Apply paint in a ventilated area and allow everything to dry fully before arranging the pieces.
Styling tip: Repeat one material elsewhere on the table, such as small pinecones beside napkins, to connect the centerpiece with the rest of the setting.
Keep natural materials away from open flames and hot candle containers. If you use candles on the table, position them separately from the greenery and pinecones.
After Christmas, remove any perishable material. Store dry pinecones for future projects or return untreated natural material to an appropriate outdoor setting where permitted.
9. Handmade Gift Tags With Natural Decorations
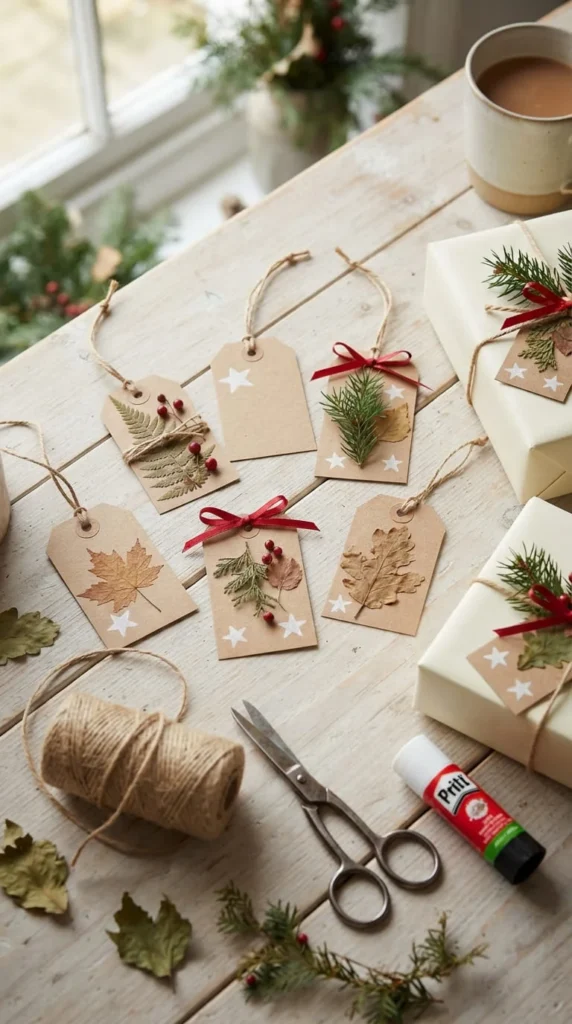
Gift tags are a practical craft because they add personality to presents while helping you use up leftover paper and ribbon. Unlike large decorations, they require very little storage space and can be made in batches before the holiday rush.
Materials:
- Kraft cardstock or leftover gift boxes
- Scissors or a paper cutter
- Cotton twine or ribbon
- Craft glue
- Small dried leaves or evergreen sprigs
Cut the cardstock into rectangles, circles, or simple house shapes. Trim the corners if you want a softer outline, then punch a hole near the top.
Glue a small dried leaf or a short evergreen sprig onto each tag. Keep the decoration flat so the tags sit neatly against wrapped packages.
You can also make a matching set from leftover wrapping paper. Cut small shapes from the patterned paper and attach them to plain cardstock as decorative borders.
Leave enough blank space for the recipient’s name and a short message. If you are making tags for several gifts, choose one shape and repeat it across the batch.
Styling tip: Pair kraft tags with cream paper, natural twine, and a narrow red ribbon for a coordinated wrapping style.
These tags can be prepared weeks in advance and stored in an envelope. For gifts that will travel through the mail, avoid bulky decorations that could snag or detach.
You can also make a few larger tags with a hanging loop, allowing the recipient to reuse them as small ornaments. This gives the craft a second purpose beyond gift wrapping.
10. A Color-Coordinated Paper Garland
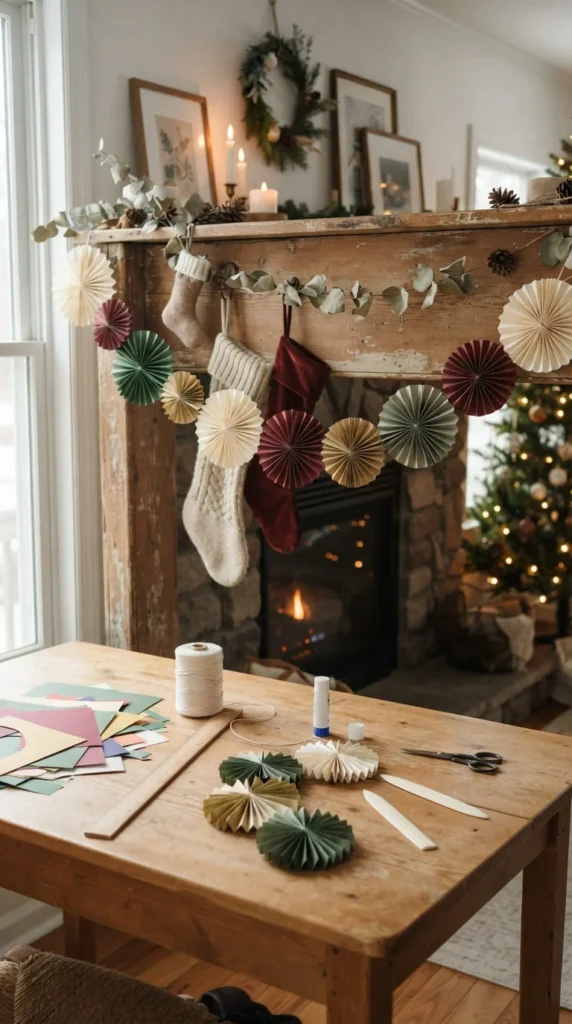
Paper garlands are useful when you want to decorate a mantel, bookshelf, window, or party table without spending much money. They can be adapted to match nearly any color scheme, and leftover paper makes them particularly economical.
Materials:
- Colored paper or cardstock
- Scissors
- Glue stick
- Cotton thread or string
- Pencil
Cut the paper into equal circles, small stars, or simple leaf shapes. If you want a three-dimensional garland, cut pairs of matching shapes and glue them together around the thread.
For a classic Christmas look, combine burgundy, forest green, and cream. A Scandinavian-inspired version might use white, kraft paper, and muted green.
Arrange the shapes on the floor before attaching them. This makes it easier to balance the colors and avoid long sections containing only one shade.
Apply a small amount of glue around the thread and press each shape into place. Leave enough space between the pieces so the garland hangs naturally rather than forming a stiff strip.
Styling tip: Drape the garland loosely rather than pulling it completely straight. Gentle curves create a softer display.
Use removable hooks on suitable surfaces, and avoid placing paper decorations directly over heaters or close to candles. For outdoor use, choose a sheltered location because paper can absorb moisture and tear.
When the season ends, wind the garland around a piece of cardboard to reduce tangles. You can reuse it next year or cut intact shapes into gift tags and card decorations.
11. Pleated Cupcake-Liner Ornaments
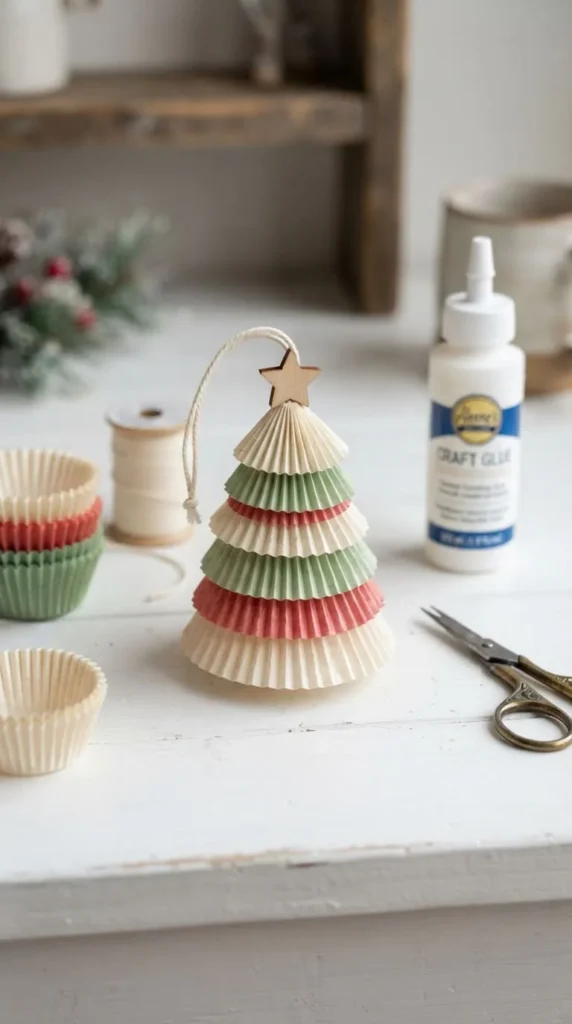
Cupcake liners are inexpensive, easy to fold, and available in many colors. They make lightweight tree ornaments that are especially suitable for quick family crafting sessions.
Materials:
- Paper cupcake liners
- Cotton thread
- Craft glue
- Small cardboard circles
- Optional wooden beads
Flatten several cupcake liners and fold each one into quarters. Stack the folded pieces to create a layered tree, fan, or flower-like shape.
For a Christmas tree design, arrange the pleated liners from largest at the bottom to smallest at the top. Glue each layer to a narrow cardboard backing so the ornament keeps its shape.
Attach a thread loop at the top before closing the final layer. A small wooden bead can cover the attachment point and add a natural detail.
You can also create round ornaments by gluing folded liners around a cardboard circle. Alternate colors to form a simple striped pattern.
Styling tip: Choose only two or three colors so the paper texture remains the main feature.
This project works well with children because the materials are light and easy to handle. Adults can prepare the cardboard bases and help with any small cutting tasks.
Cupcake liners should be clean and unused for craft purposes. Avoid placing paper ornaments near lights that become hot or near open flames.
Because the finished decorations are lightweight, they can hang from delicate branches without pulling them down. Store them in a shallow box after Christmas to protect the pleats from being flattened.
12. A Miniature Snow Globe From a Reused Jar
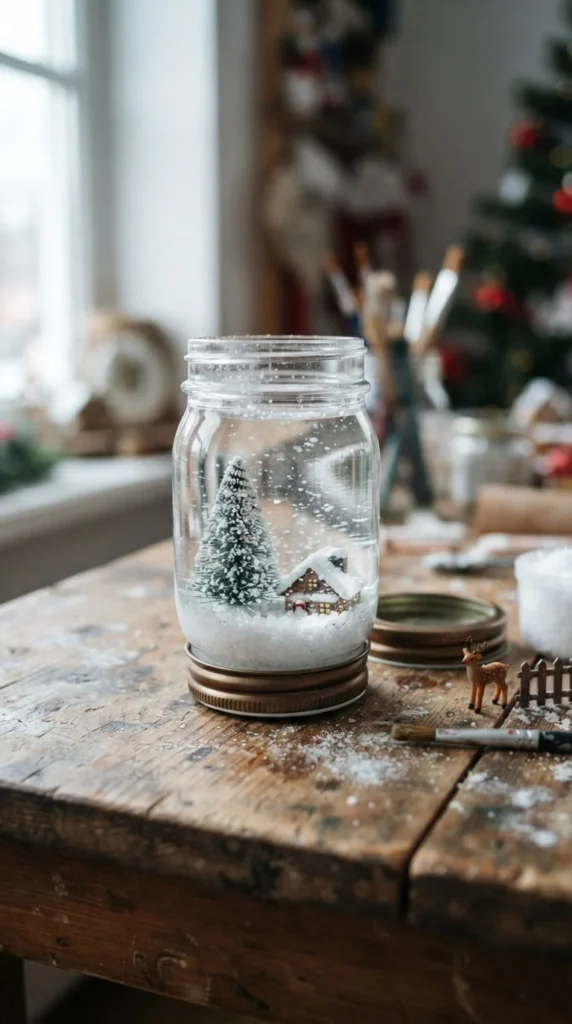
A homemade snow globe adds a winter scene to a shelf or bedside table. Using a clean jar you already own keeps the project affordable, while miniature trees and tiny houses let you create a scene that suits your decorating style.
Materials:
- A clean, dry jar with a secure lid
- Small waterproof miniature decorations
- Waterproof adhesive suitable for the materials
- White decorative snow
- Optional ribbon
Check that the jar has no cracks and that the lid fits securely. Attach a miniature tree or small winter figure to the inside of the lid using an appropriate waterproof adhesive.
Allow the adhesive to cure according to its instructions. Add a small amount of artificial decorative snow to the jar, then screw the lid on firmly.
Turn the jar upside down to see how the scene looks. If the decoration shifts or blocks the view, adjust the arrangement before sealing the lid permanently.
For a simple dry version, keep the jar free of liquid. This avoids leaks and is easier to maintain. A liquid-filled version requires compatible materials, a suitable sealing method, and extra care to prevent leakage.
Styling tip: Use one miniature house and one tree rather than crowding the jar with too many figures.
Place the finished globe on a stable surface away from the edge of a table. Keep it out of reach of very young children because glass jars and small parts can break or present choking hazards.
A dry snow globe can be reopened if the lid is not permanently sealed, making it easier to repair or update the miniature scene next Christmas.
13. A No-Sew Fabric Scrap Wreath
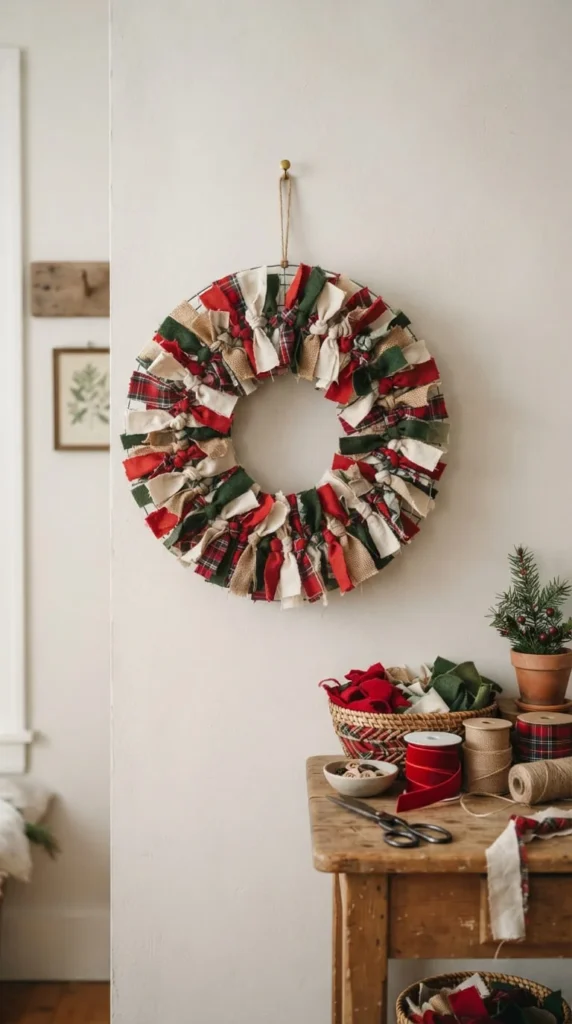
A fabric wreath is a useful way to turn leftover material into soft, colorful Christmas décor. It suits craft rooms, bedrooms, and interior doors, and you can choose fabric colors that match your existing decorations.
Materials:
- A circular wreath frame
- Fabric scraps
- Scissors
- Ribbon for hanging
Cut the fabric into strips of similar length and width. Cotton and lightweight woven fabrics are easy to knot, while thicker material creates a fuller appearance.
Tie each strip around the frame with a simple double knot. Push the knots close together so the frame is covered, alternating colors as you work.
If you prefer a more orderly look, arrange the fabric strips in repeating groups of red, cream, and green. For a softer modern design, use neutral fabrics with just one muted red accent.
Trim any unusually long ends after completing the circle. Attach a ribbon loop to the back for hanging.
Styling tip: Use fabrics with different textures but a similar color palette. Small checks, plain cotton, and subtle stripes can work together without making the wreath feel crowded.
This project is a good option for people who want to avoid sewing. However, cutting tools should be handled carefully, and loose fabric should be kept away from open flames and heat sources.
For a child’s room, use washable fabrics and secure every knot tightly. Before storing the wreath, check for loose pieces and remove any dust.
Since the frame is reusable, you can change the fabric colors in a later season rather than buying another wreath.
14. Wooden Clothespin Reindeer Ornaments
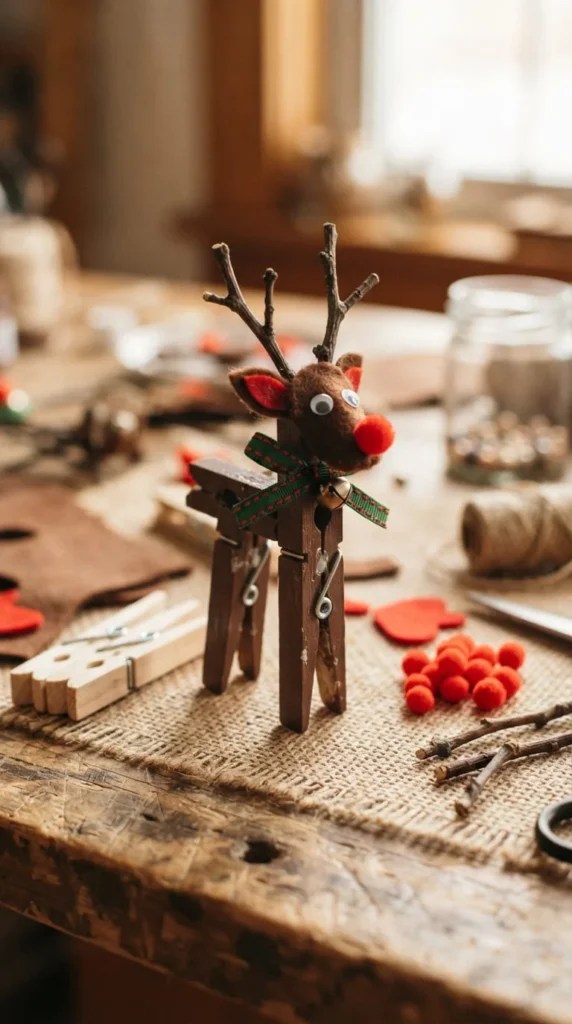
Wooden clothespins can be turned into small reindeer decorations with a few simple additions. The finished ornaments look charming on a Christmas tree, attached to a gift bag, or arranged around a holiday centerpiece.
Materials:
- Wooden clothespins
- Brown felt or paper
- Small red pom-poms
- Craft glue
- Cotton string
- Optional small twigs
Place two clothespins side by side to create the reindeer’s body and legs, or use a single clothespin for a simpler hanging ornament.
Cut small ears from brown felt and attach them near the top. Add short twig antlers or antlers cut from cardstock. Glue a small red pom-pom at the front to create the familiar red nose.
Use a dark marker to add eyes, allowing the ink to dry before handling the ornament. Attach a cotton string loop to the back if you plan to hang it on the tree.
For a less colorful version, leave the wooden surface natural and use cream felt details. This creates a rustic decoration that works with kraft paper and wooden ornaments.
Styling tip: Make several reindeer with slightly different antler shapes for a small woodland-themed display.
Adults should handle hot glue, sharp scissors, and any twig trimming. Small pom-poms and decorative pieces can pose choking hazards for young children, so choose larger details when crafting with them.
The completed ornaments are lightweight and easy to store. If you use them as gift decorations, attach them firmly to the ribbon so they do not fall off during handling.
15. A Cotton-Ball Santa for a Family Craft Afternoon
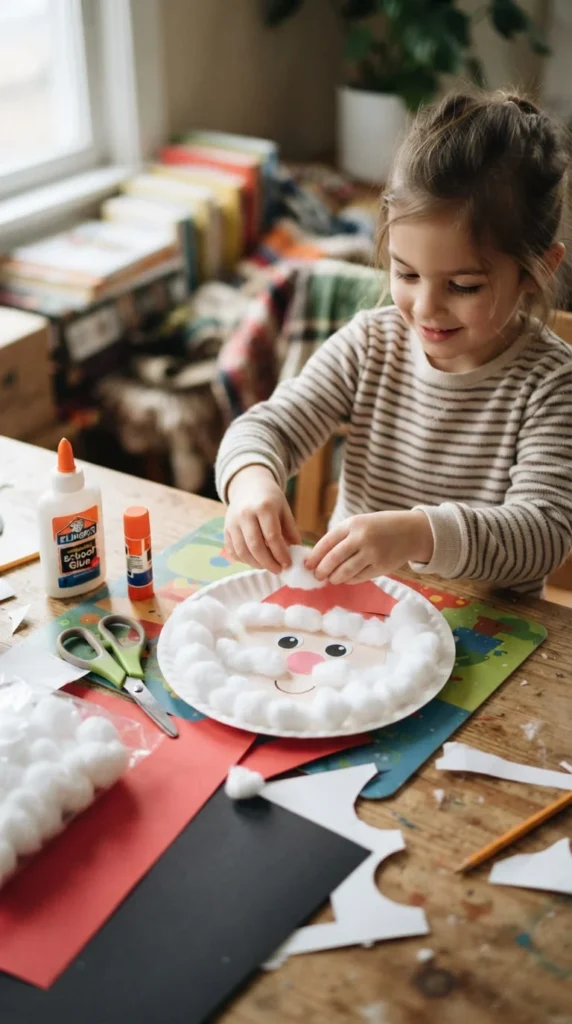
A paper-plate Santa is an easy Christmas activity for children who enjoy working with familiar holiday characters. It requires only a few supplies and gives children plenty of room to arrange the beard, hat, and facial features themselves.
Materials:
- White paper plate
- Red cardstock
- Cotton balls
- Black paper
- Craft glue
- Washable markers
Cut a triangle from red cardstock to create Santa’s hat. Glue it to the top edge of the paper plate, then add a strip of white paper or cotton along the bottom.
Spread glue across the lower half of the plate and press cotton balls into place to form the beard. Leave the upper face area clear.
Cut two large black circles for the eyes and a smaller pink or red circle for the nose. Glue them into place, then add a few cotton balls to the hat’s tip.
Let the project dry on a flat surface before moving it. If the plate bends under the weight of the cotton, attach a second paper plate behind it for support.
Styling tip: Make a small collection of Santa faces with different hat shapes and beard lengths, then hang them along a hallway wall.
This craft is suitable for supervised family activities, although very young children should not handle loose cotton balls or small paper features without close adult attention.
You can adapt the same basic method to make a snowman or reindeer face. That makes it easy to plan a complete afternoon of Christmas crafts using the same table setup and basic supplies.
16. A Layered Cardstock Christmas Tree
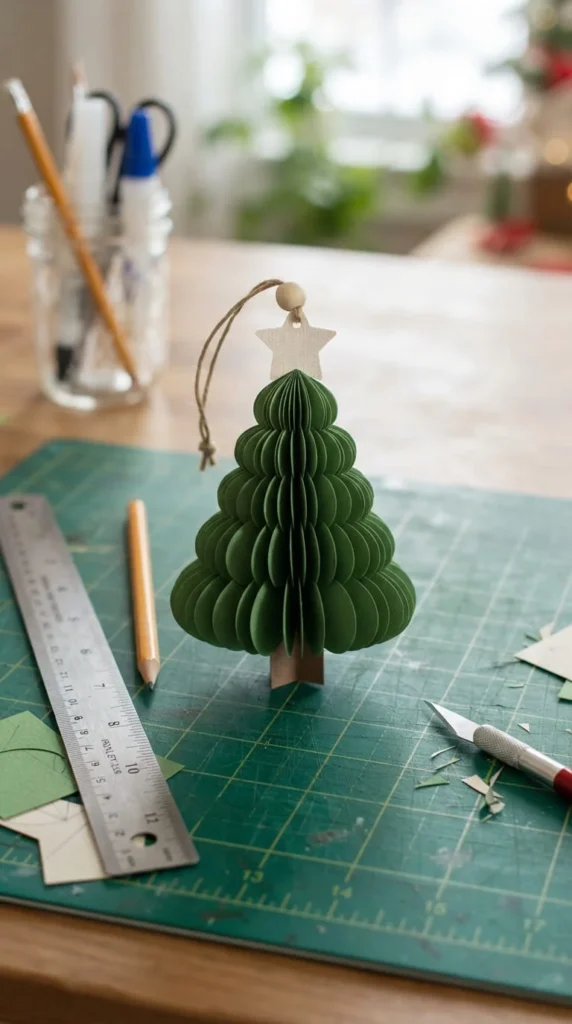
A paper Christmas tree is a practical decoration for shelves, office desks, and small spaces. Unlike a full-size tree, it requires no electrical lights or large stand, and it can be made from cardstock left over from other projects.
Materials:
- Green cardstock
- Brown cardstock
- Craft glue
- Scissors
- Small paper star
Cut several pairs of tree shapes from green cardstock. Fold each shape vertically down the center, then glue the halves together to create a three-dimensional form.
Repeat with the remaining shapes, attaching them one at a time so the folded edges line up. Add a small brown paper trunk at the bottom and a cream or gold paper star at the top.
For a wider tree, use more layers. For a flatter decoration that can hang on a wall, use fewer pieces and attach a thread loop at the top.
You can decorate the branches with tiny paper circles or leave them plain for a cleaner appearance.
Styling tip: Place the tree on a small wooden block or a firm cardboard base if it will stand on a table.
Choose cardstock that is thick enough to hold its shape but not so heavy that the glue struggles to support it. Allow the adhesive to dry fully before displaying the tree.
This is also a useful classroom or group project because each person can choose a different shade of green. Store the finished trees upright in a box to prevent the folded branches from becoming crushed.
17. A Felt Christmas Stocking With Simple Appliqués

A small felt stocking can hold candy, gift cards, or tiny presents. It also makes a thoughtful handmade decoration for a bedroom door, mantel, or holiday gift basket.
Materials:
- Red and white felt
- Needle and thread
- Paper stocking template
- Fabric scissors
- Ribbon for hanging
Draw a stocking shape on paper and cut it out to create a template. Trace the shape twice onto red felt, then cut out both pieces.
Place the felt pieces together and sew around the sides and bottom, leaving the top open. Use simple running stitches or blanket stitches, keeping the seams evenly spaced.
Cut a white felt rectangle for the cuff and sew or glue it around the top edge. Add a few small felt stars or snowflakes to personalize the stocking.
If you prefer a no-sew version, use fabric glue suitable for felt and follow the manufacturer’s drying instructions. A glued stocking is better suited to lightweight decorations than heavy gifts.
Styling tip: Use one small stocking for each family member and vary the accent color to distinguish them.
For children, pre-cut the felt shapes and let them choose the decorations. Adults should supervise needles and scissors, and all embellishments should be firmly attached.
You can make the stocking reusable by keeping the design simple and choosing sturdy felt. Store it flat after the holidays so it retains its shape.
18. A Reusable Pocket Advent Calendar
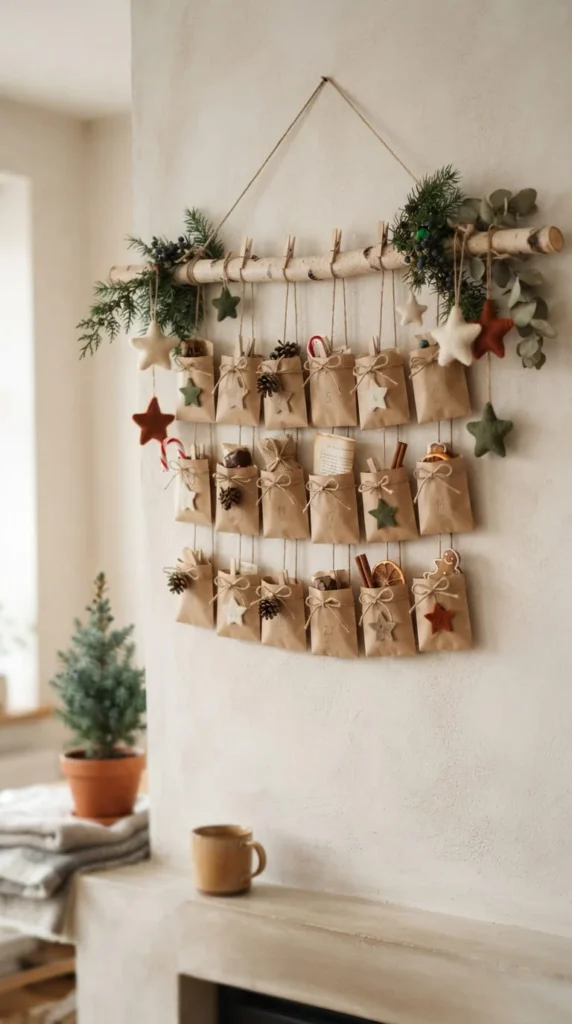
An advent calendar adds a small daily ritual to December. A fabric or paper-pocket version can be reused each year, and you can fill it with inexpensive surprises rather than buying a new disposable calendar.
Materials:
- Twenty-four small fabric or kraft paper pockets
- Cotton string or ribbon
- Wooden clips
- A sturdy branch or hanging rail
- Small treats or activity cards
Prepare twenty-four pockets in a matching size. Fabric pockets can be sewn from scraps, while kraft paper pockets can be folded and glued along the sides.
Attach a short loop or clip to each pocket. Hang them from a wooden branch or arrange them in rows on a board.
Fill the pockets with small wrapped sweets, stickers, simple puzzles, family activity ideas, or handwritten notes. You can also include suggestions such as making paper snowflakes together or choosing a Christmas film for the evening.
Keep the contents lightweight so the pockets do not tear or pull away from their fastenings.
Styling tip: Use a limited palette of cream, kraft brown, green, and red for a calendar that coordinates with other decorations.
If you include food, check allergy requirements and use individually wrapped items where appropriate. Avoid tiny objects for young children and keep the calendar away from heat sources.
Once December ends, empty the pockets and store them flat or folded. A reusable calendar can become part of your family’s yearly decorating routine, with different activities and treats added each season.
19. A Geometric Paper Star Tree Topper
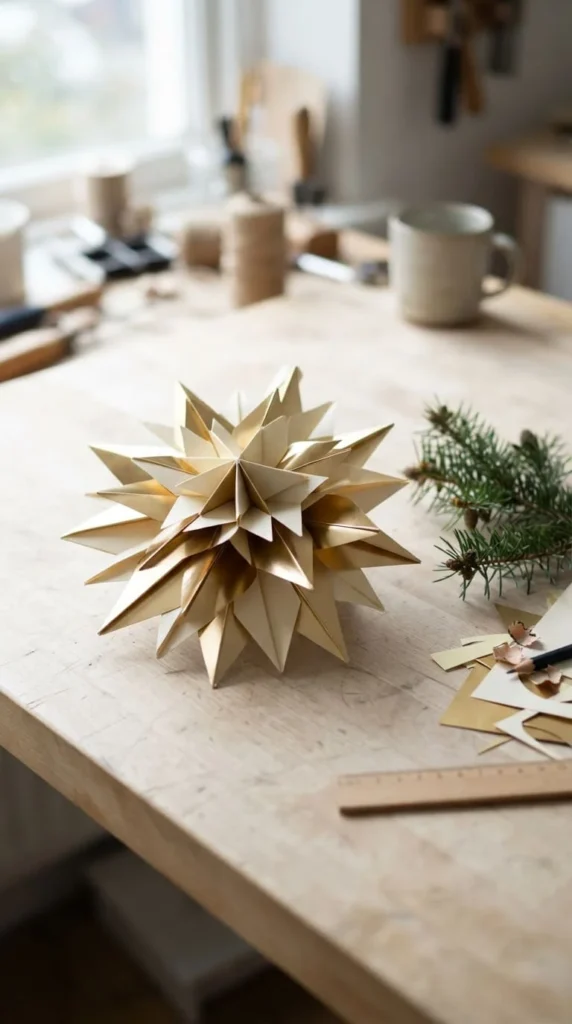
A handmade paper star is an affordable way to finish a Christmas tree, especially if you want a decoration that matches your existing color scheme. Its geometric shape looks attractive even without glitter or elaborate embellishments.
Materials:
- Gold, cream, or white cardstock
- Pencil and ruler
- Scissors
- Craft glue
- A small cardboard support
Draw a five-pointed star template on paper, or print a simple outline and trace it onto cardstock. Cut out two matching stars.
Score light fold lines from each point toward the center using a blunt scoring tool. Fold the lines carefully to give the star a dimensional appearance.
Glue the two shapes together, leaving a small opening at the bottom for the support. Attach a folded cardboard tube or another lightweight holder that can sit securely over the top branch.
Test the fit before adding any final decorations. The star should stand upright without pulling the branch sideways.
Styling tip: Match the topper to two or three smaller ornaments elsewhere on the tree to create a coordinated look.
Avoid using heavy materials or metal wire that could damage the tree’s upper branches. Keep the topper away from hot bulbs and open flames.
For a small tabletop tree, create a miniature version from lightweight paper. You can also use the same template to make hanging stars for windows or gifts, giving the design more than one use throughout the holiday season.
20. Natural Napkin Decorations for a Christmas Dinner
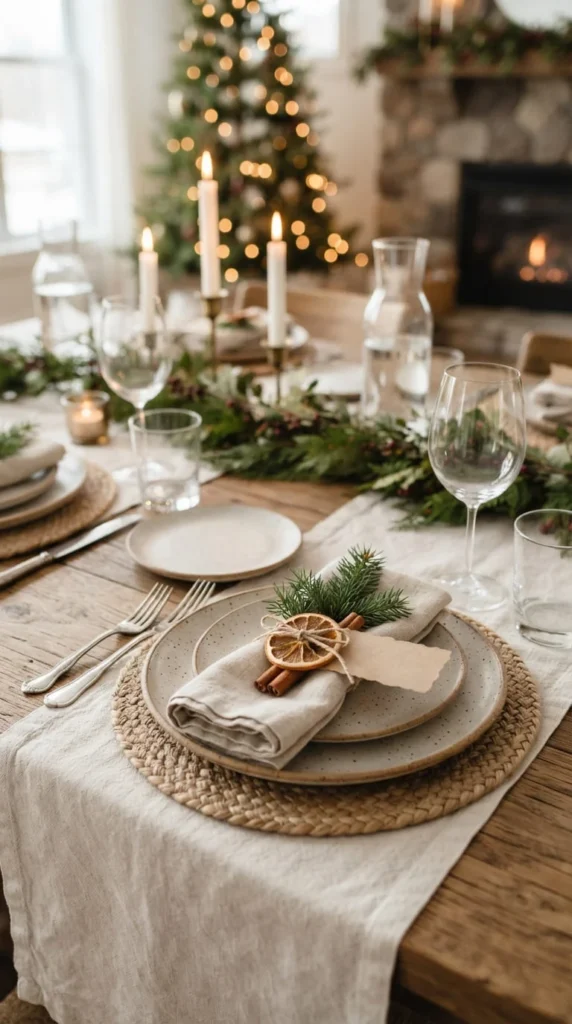
A small handmade napkin decoration can make a holiday meal feel thoughtfully arranged without requiring expensive table accessories. This project uses natural materials that complement simple plates, linen napkins, and wooden tableware.
Materials:
- Linen or cotton napkins
- Cotton twine
- Evergreen sprigs
- Dried orange slices
- Cinnamon sticks
Fold each napkin into a rectangle or loose roll. Wrap cotton twine around the middle, leaving enough space to tuck in a short evergreen sprig.
Add a small dried orange slice or a cinnamon stick to create a natural accent. Tie the twine firmly enough to hold the arrangement but not so tightly that it creases the fabric.
For a more formal table, keep the decoration small and repeat the same arrangement at every place setting. For a relaxed family dinner, vary the greenery slightly while keeping the colors consistent.
Styling tip: Use one shared centerpiece with similar natural materials so the individual napkin decorations feel connected to the rest of the table.
Prepare the dry elements ahead of time, but add fresh greenery shortly before guests arrive. This helps it retain its appearance.
Keep the decorations away from candles and hot serving dishes. Remove the greenery before washing the napkins, and avoid placing fragrant or resinous plant material directly against delicate fabrics if staining is a concern.
After the meal, save any reusable twine and decorative slices that remain in good condition for future crafts.
21. Coordinated Christmas Gift Wrapping With Handmade Toppers

Gift wrapping can become part of your Christmas decorating scheme when you use a consistent set of colors and handmade details. It also gives small paper crafts a practical purpose beyond hanging on the tree.
Materials:
- Recycled brown wrapping paper
- Leftover ribbon or cotton twine
- Small paper stars
- Dried citrus slices or evergreen sprigs
- Tape and scissors
Wrap each gift with plain paper, folding the edges neatly and securing them with tape. Use different ribbon widths to create variation while keeping the overall palette consistent.
Make small paper stars from leftover cardstock and attach them beneath the ribbon. For a natural finish, tuck in a dried orange slice or a short evergreen sprig.
Use reusable fabric ribbon when available. You can also cut paper from clean shopping bags or reuse wrapping paper that is still in good condition.
Styling tip: Group wrapped presents by color beneath the tree. Even inexpensive materials can look coordinated when the shapes and colors repeat.
For parcels that will be shipped, avoid bulky natural decorations that might break or become trapped during handling. Secure all attachments and use enough protective packaging for the contents.
Keep decorative plant material away from food gifts unless it is safely separated from the food itself.
Save intact ribbon, sturdy boxes, and clean paper after opening presents. Sorting reusable materials immediately makes it easier to plan next year’s gift wrapping without buying everything again.
22. Wooden-Bead Ornaments With Minimalist Shapes
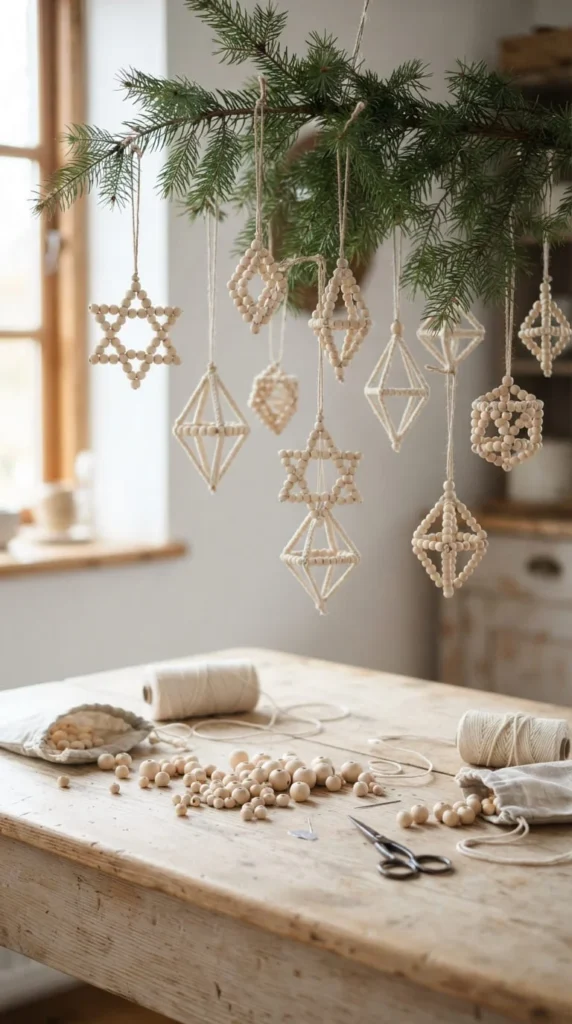
Wooden-bead ornaments suit people who prefer understated Christmas decorations. Their natural finish works well with neutral interiors, evergreen branches, and simple paper ornaments.
Materials:
- Wooden craft beads in several sizes
- Cotton cord
- Thin craft wire, if suitable for the design
- Scissors
- Optional felt or paper shapes
For a simple diamond ornament, thread wooden beads onto cotton cord and arrange them into a geometric outline. Tie the ends securely, then add a loop at the top for hanging.
To create a star, form five short sections from beads and join them into a star-shaped frame. A premade wooden star base can simplify the process if you prefer not to shape the structure yourself.
Vary the bead sizes to create contrast, or keep them uniform for a cleaner appearance. You can also paint a few beads cream or muted red while leaving the rest natural.
Styling tip: Hang the ornaments against dark green branches so the wood grain stands out.
Use cord that is strong enough to support the finished decoration, and test each knot before hanging it. Adults should handle wire cutters and other sharp tools.
Because loose beads are small, this craft is not suitable for unsupervised young children. For a child-friendly alternative, make larger ornaments from chunky wooden shapes that are easier to handle.
Store the finished pieces in a small box with tissue paper between them to protect painted surfaces and prevent the cords from tangling.
23. Soft Felt Candy Canes for Tree Decorations
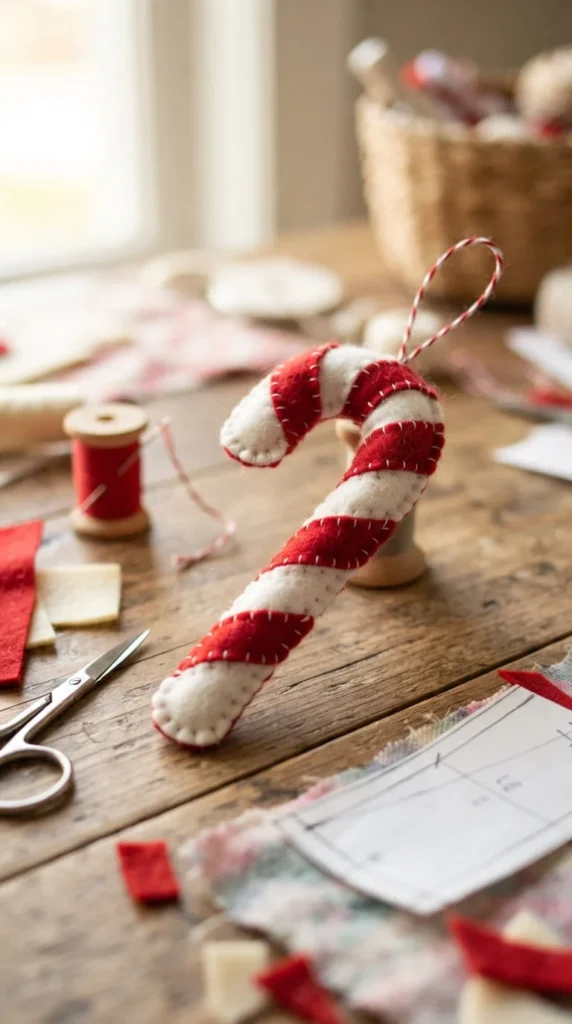
Felt candy canes add a playful touch to a Christmas tree without relying on glass ornaments or shiny plastic decorations. Their soft texture works particularly well with handmade stockings, fabric wreaths, and other textile projects.
Materials:
- Red and white felt
- Paper candy cane template
- Fabric scissors
- Needle and thread
- Cotton stuffing
- Ribbon or cotton cord
Draw a candy cane outline on paper and trace it twice onto white felt. Cut matching shapes, then cut narrow red felt strips for the stripes.
Attach the red strips to one white shape using small stitches or suitable fabric glue. Place the second white shape behind it and sew around the edge, leaving a small opening.
Add a little stuffing to give the candy cane a rounded shape. Close the opening and attach a ribbon loop near the top.
If you prefer a flat decoration, skip the stuffing and join the two felt shapes directly. This version is quicker to make and easier to store.
Styling tip: Mix the candy canes with plain cream ornaments to balance their strong red stripes.
Choose firmly attached details and avoid long loose threads that could catch on branches. Adults should supervise needle use, particularly during family crafting sessions.
These ornaments can also decorate gift baskets, wreaths, and holiday garlands. Make several in one sitting using the same template, then store them in a dry container to keep the felt clean and ready for next Christmas.
Conclusion
Decorating for Christmas does not have to mean buying a new collection of ornaments every year. With paper, felt, pinecones, citrus slices, fabric scraps, and a few basic craft supplies, you can make handmade decorations that suit your home and your budget. Start with one project that fits the time you have available, such as paper snowflakes, gift tags, or a natural centerpiece. If you are crafting with children, choose larger pieces and simple steps, keeping scissors, hot glue, and other sharp or hot tools under adult supervision. For a coordinated look, select two or three colors and repeat them across your wreath, tree ornaments, gift wrapping, and table decorations. Save reusable materials as you work, and store finished crafts carefully after the holidays. Choose your favorite easy DIY Christmas crafts, gather the supplies you already own, and make one small decoration today. A few handmade details can give your home a personal holiday style without stretching your decorating budget.