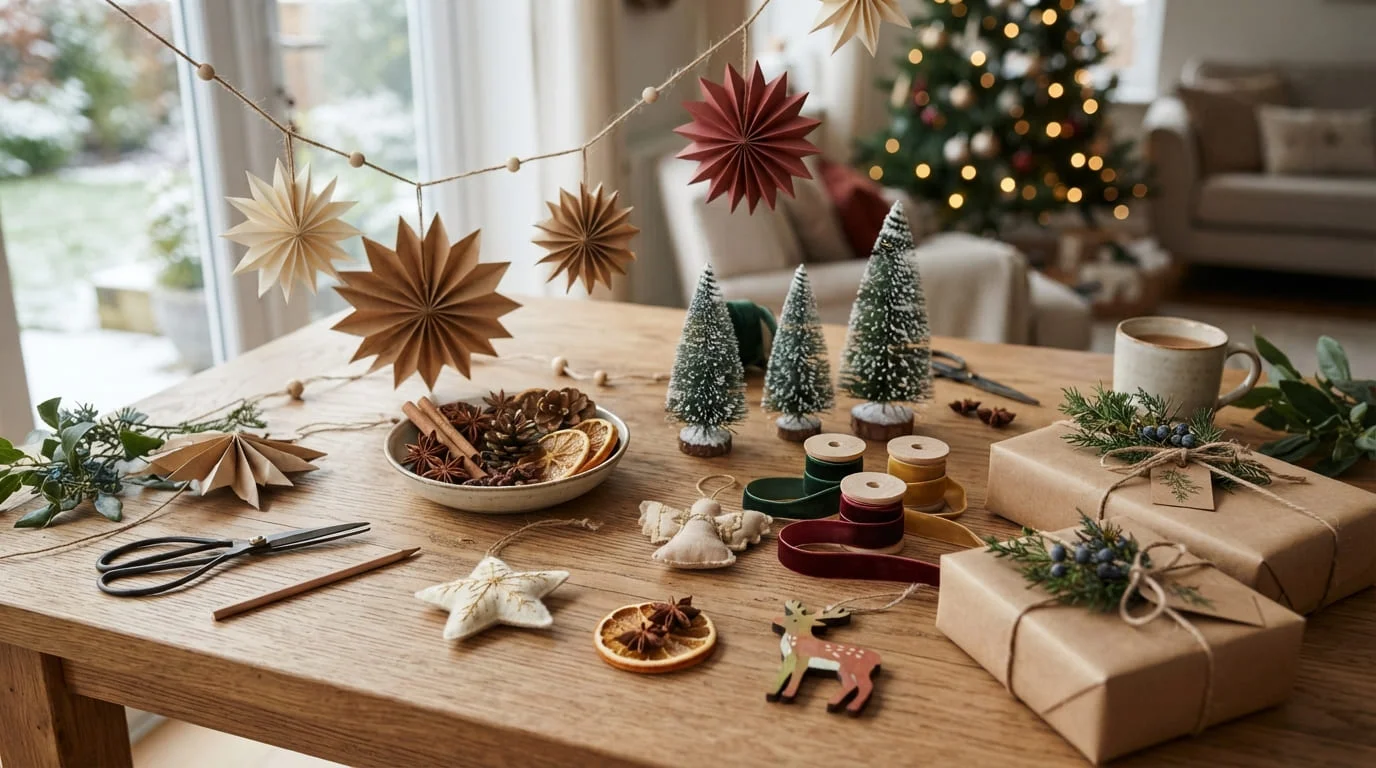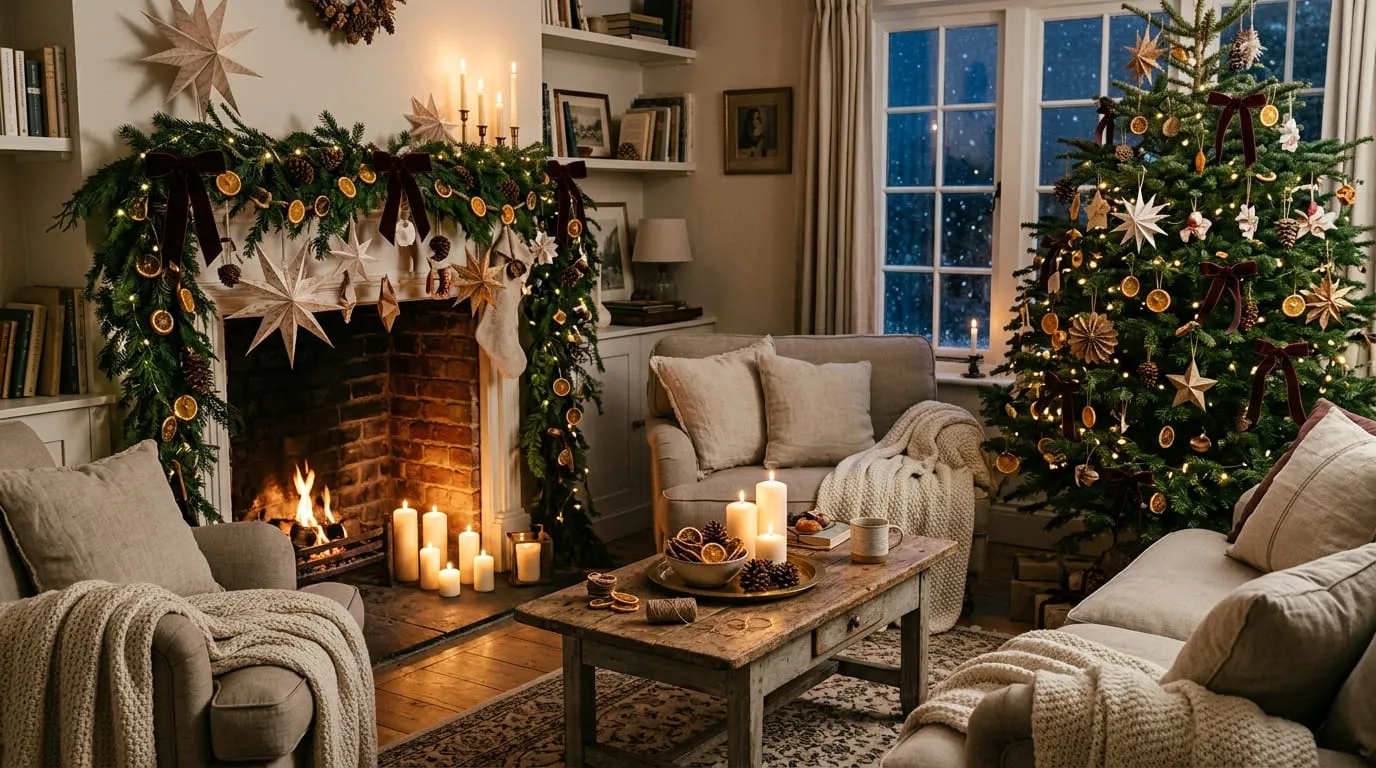
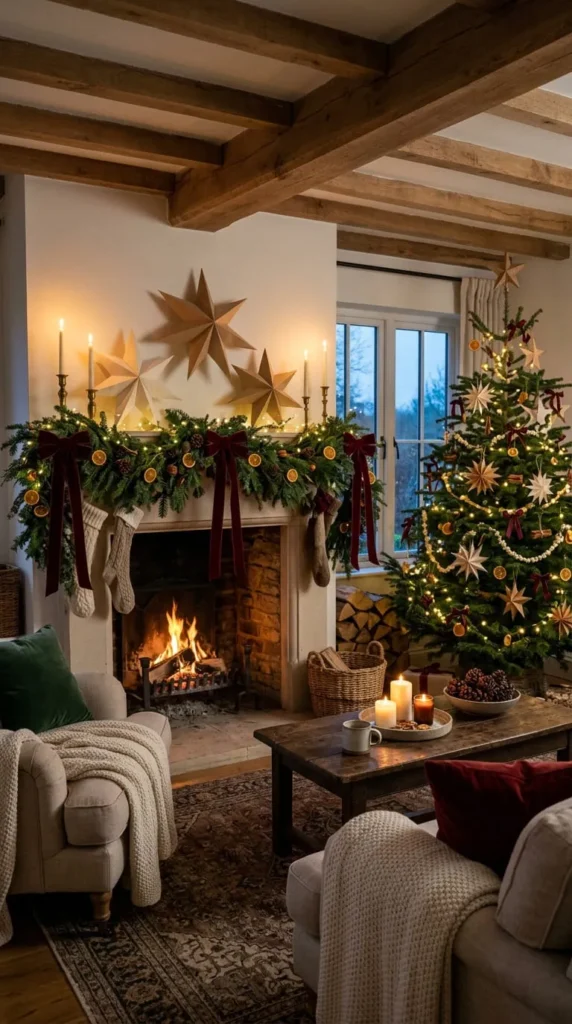
Christmas decorating does not have to mean buying boxes of expensive ornaments or filling every corner of your home with store-bought accessories. With a few everyday supplies, natural materials, and some creative touches, you can make your home feel warm, festive, and personal. These DIY Christmas decorations include simple handmade ornaments, beautiful Christmas garlands, cozy table centerpieces, and clever projects for apartments or small rooms. You will find ideas using items such as mason jars, leftover wrapping paper, fabric scraps, pinecones, cinnamon sticks, and warm fairy lights. Some projects take only 15 minutes, while others offer a relaxing afternoon of crafting with family. Whether you love rustic farmhouse details, traditional red and green, vintage Christmas charm, or a rich burgundy-and-gold color scheme, these Christmas decoration ideas can fit your space and budget. Choose a few projects that work with decorations you already own, and create a festive home without unnecessary clutter.
1. Dried Orange and Cinnamon Garland for a Natural Christmas Look

A dried orange garland brings natural color, gentle fragrance, and cottage-style charm to your holiday decorating. It works beautifully across a fireplace mantel, along a shelf, around a window frame, or above a dining table.
Materials:
- 3–4 oranges
- Natural twine or cotton string
- A large needle
- Cinnamon sticks
- Optional wooden beads and cranberries
How to make it:
- Slice the oranges into thin, even rounds.
- Pat the slices dry with paper towels.
- Arrange them on a lined baking tray and dry them in an oven at approximately 90–100°C (195–210°F), turning occasionally. Drying can take several hours, depending on thickness.
- Allow the slices to cool completely.
- Carefully thread the dried oranges onto the twine, spacing them with cinnamon sticks and wooden beads.
For a polished finish, keep the spacing consistent and leave a little extra string at both ends for hanging.
Budget tip: Use leftover ribbon or string from previous craft projects instead of buying new supplies. Store the completely dry garland in a breathable container after Christmas to help prevent moisture damage.
2. Velvet Bow Christmas Decorations for a Luxury Finish

Velvet bows are a simple way to give ordinary Christmas decorations a richer, more coordinated appearance. Their soft texture works especially well with evergreen branches, wooden furniture, brass accents, and traditional holiday colors.
Materials:
- Burgundy, forest-green, or cream velvet ribbon
- Sharp fabric scissors
- Thin floral wire or reusable ornament hooks
How to make them:
- Cut ribbon into lengths suitable for the area you want to decorate.
- Form each length into a bow, leaving two long tails.
- Secure the center with floral wire or a small knot.
- Trim the ends diagonally or into a V shape.
- Attach the bows to tree branches, wreaths, curtain rods, or the backs of dining chairs.
For a traditional look, combine burgundy bows with deep green foliage and warm gold ornaments. For a softer cottage-style room, choose cream ribbon and natural wood accents.
Styling tip: Repeat the same ribbon in two or three areas of the room. For example, place bows on the tree, tie one around a wreath, and add another to a decorative basket.
This creates a connected look without requiring a complete room makeover. Store the bows flat in a box after the holidays so you can reuse them next year.
3. Mason Jar Fairy Lights for a Cozy Evening Glow
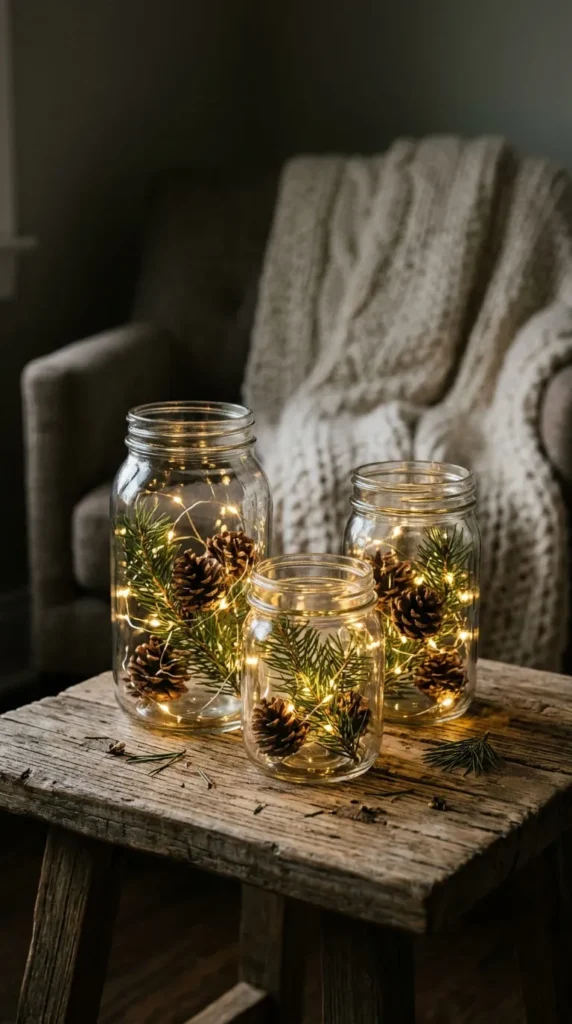
Mason jar lights are ideal for a side table, bookshelf, bedroom dresser, or small entryway. They provide a gentle glow without taking up much room, making them useful for apartments and compact homes.
Materials:
- Two or three clean glass jars
- Battery-powered LED fairy lights
- Pinecones or small evergreen clippings
- Optional twine or ribbon
How to make them:
- Wash the jars and dry them completely.
- Place a battery-operated light string inside each jar.
- Arrange a few pinecones or small decorative sprigs around the lights without covering the battery pack.
- Tie twine around the rim if you want a rustic finish.
- Group the jars on a tray to keep the arrangement tidy.
Use jars of different heights to create visual interest. You can also place one jar on a stack of old books and another beside a small ceramic Christmas tree.
Safety tip: Choose LED lights designed for indoor decorative use. Keep batteries and electrical components dry, and never place real candles inside a closed or decorated jar.
If you already own glass jars and fairy lights, this project may cost very little. Once the season ends, remove the seasonal fillers and reuse the jars for everyday lighting or storage.
4. Handmade Salt Dough Ornaments for a Personal Tree

Salt dough ornaments are affordable keepsakes that can be customized to match almost any Christmas tree. Their simple shapes suit rustic, Scandinavian-inspired, and traditional holiday decorating styles.
Materials:
- 2 cups all-purpose flour
- 1 cup salt
- About ¾ cup water
- Cookie cutters
- A straw or skewer
- Paint and ribbon, if desired
How to make them:
- Mix the flour and salt in a bowl.
- Add water gradually until a firm dough forms.
- Roll the dough to about 5–6 mm thick.
- Cut out stars, trees, hearts, or other shapes.
- Make a hanging hole near the top of each ornament.
- Bake at a low temperature, around 120°C (250°F), until completely dry. Thick shapes may take several hours.
- Cool before decorating.
Paint the ornaments in cream, sage green, burgundy, or muted gold. You can also press evergreen sprigs or textured fabric into the dough before drying to create surface patterns.
Family idea: Let each person make one ornament that represents a favorite memory from the year.
These decorations are not edible, and they should be kept dry. Seal them with a suitable clear craft finish if desired, then store them in padded boxes to prevent breakage.
5. Pinecone Wreath for a Rustic Front Door
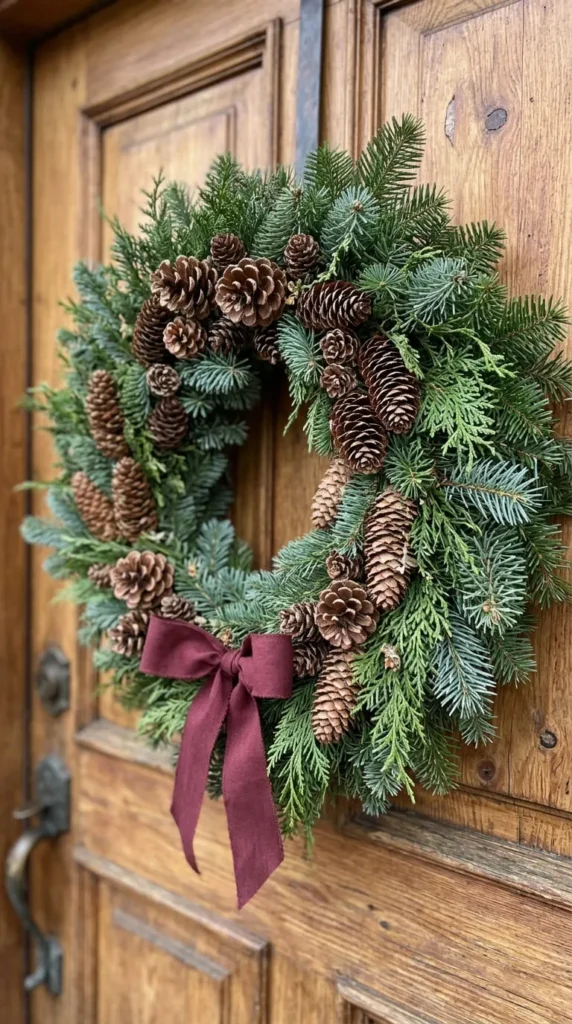
A pinecone wreath gives your entrance a woodland-inspired Christmas look. It can also hang above a fireplace, on an interior door, or over a large mirror.
Materials:
- A wire or sturdy grapevine wreath base
- Clean, fully dry pinecones
- Evergreen clippings or artificial greenery
- Floral wire
- Ribbon
- Wire cutters
How to make it:
- Lay the pinecones around the wreath base before attaching anything.
- Position larger pinecones along the lower half and smaller ones near the sides.
- Secure each pinecone with floral wire, taking care to keep sharp ends away from the surface of the door.
- Fill visible gaps with greenery.
- Add a ribbon at the top or bottom.
For a natural finish, allow the pinecones to remain unpainted. If you prefer a more formal design, brush the tips lightly with cream craft paint and pair them with burgundy ribbon.
Durability tip: Gather pinecones from a suitable location, check for insects, and clean them before crafting. Keep the finished wreath sheltered from heavy rain if it contains untreated natural materials.
A reusable wreath base makes future decorating easier. Next year, remove the old seasonal additions and replace them with new ribbon or greenery instead of buying an entirely new wreath.
6. Paper Christmas Stars for Walls and Windows
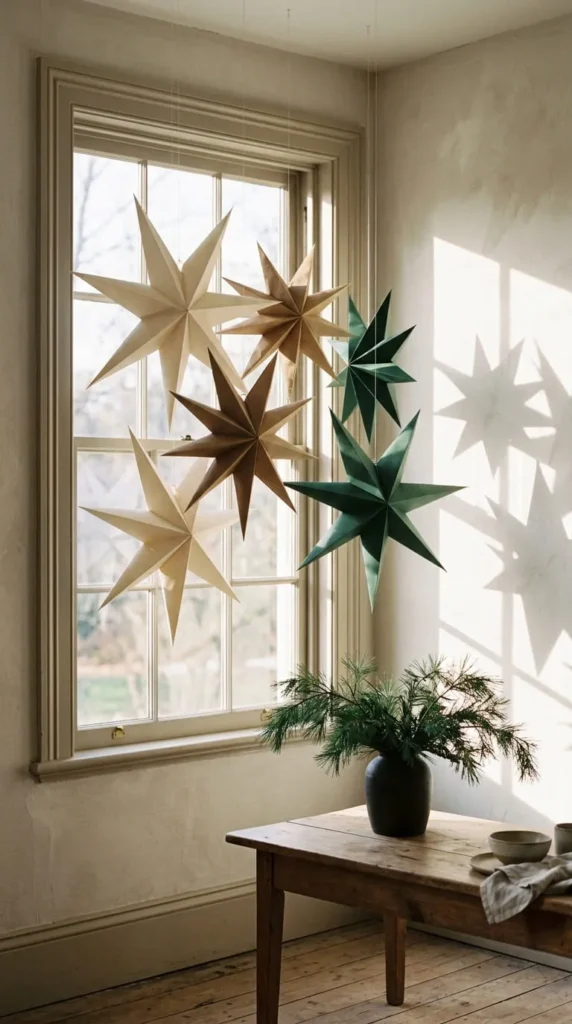
Paper stars create a striking holiday display from inexpensive craft supplies. They are especially useful when you want to decorate a rental home without drilling holes or filling the floor with extra accessories.
Materials:
- Thick craft paper or cardstock
- Pencil and ruler
- Scissors
- Glue suitable for paper
- Cotton thread
- Removable adhesive hooks
How to make them:
- Select a paper template with clear fold lines.
- Trace the shape onto cardstock.
- Cut carefully and fold along the marked lines.
- Glue the required tabs to form a three-dimensional star.
- Attach a short thread to the top for hanging.
Make several stars in different sizes but keep the color palette limited. Cream and kraft paper create a natural appearance, while forest green and burgundy give the display a traditional holiday character.
Hang them at staggered heights in a window, above a console table, or along a wall. For a layered look, place a larger star at the center and smaller ones around it.
Small-space tip: Use lightweight paper and removable hooks approved for your wall surface. Avoid hanging paper close to heaters, open flames, or hot light bulbs.
When Christmas ends, flatten any foldable stars and store them between sheets of cardboard so the points remain neat.
7. A Christmas Card Display Made with Ribbon
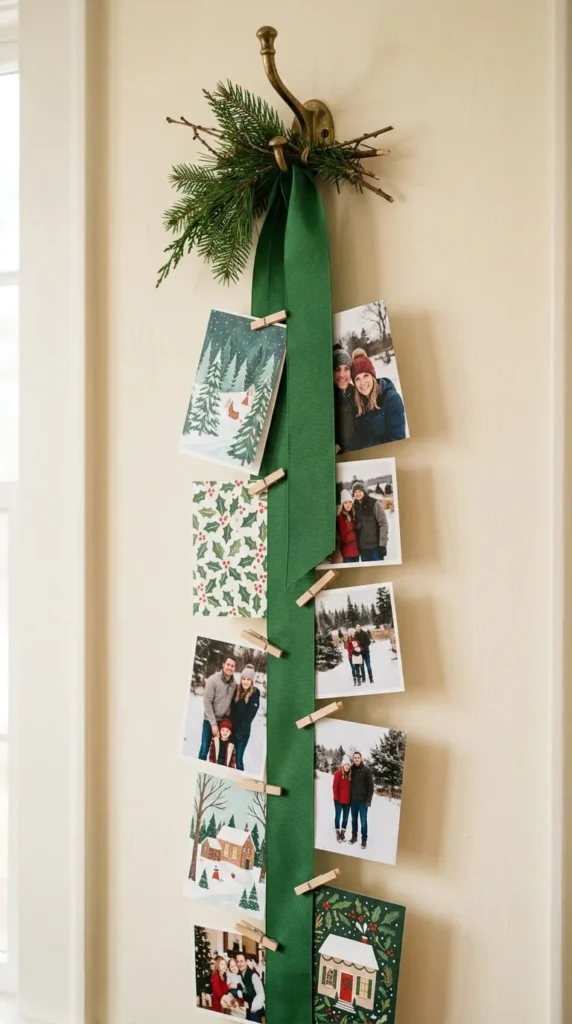
Christmas cards often end up scattered across tables or tucked into drawers. Turn them into part of your seasonal decorating with a simple ribbon display that also works for family photographs and handmade greetings.
Materials:
- Wide ribbon in green, burgundy, or cream
- Small wooden clothespins
- Removable wall hooks
- Scissors
- Optional artificial greenery
How to make it:
- Cut two or three ribbon lengths to suit your wall.
- Attach the ribbon vertically or horizontally using suitable removable hooks.
- Clip cards and photographs along each ribbon.
- Add a small bow at the top or a short evergreen sprig near the side.
For a narrow hallway, create one vertical ribbon strip. In a larger living room, arrange several strips side by side to make a gallery-style display.
Keep the arrangement visually balanced by alternating photographs with greeting cards. You can also leave small spaces between items so the ribbon remains visible.
Personal touch: Include handmade cards from children or photographs from previous Christmas celebrations. This makes the display meaningful rather than purely decorative.
Choose lightweight cards and check the weight limit of your wall hooks. If you rent your home, test removable products according to their instructions before hanging the display.
8. Upcycled Christmas Baubles with Fabric Scraps
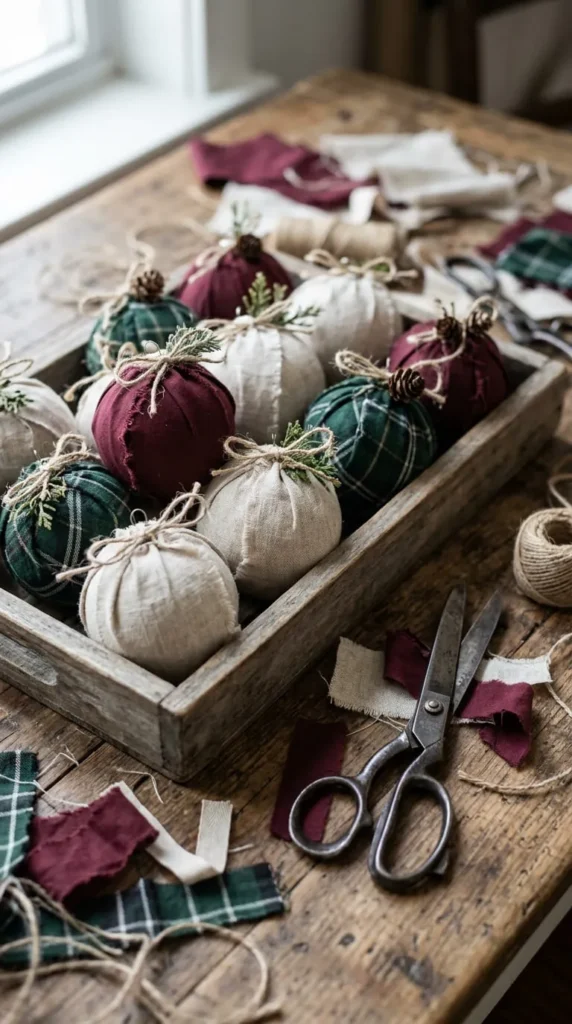
Old Christmas ornaments can gain a new look with fabric you already have at home. This is a practical way to reuse decorations that no longer match your tree while avoiding the cost of a completely new ornament collection.
Materials:
- Clean, unbroken baubles
- Fabric scraps
- Ribbon or twine
- Fabric-safe craft glue
- Scissors
How to make them:
- Remove dust from each bauble and let it dry.
- Cut fabric into small strips or squares.
- Apply a thin layer of suitable glue to the ornament.
- Smooth the fabric around the surface, overlapping edges neatly.
- Allow the glue to dry according to its instructions.
- Finish with twine or ribbon around the top.
For a traditional look, combine tartan fabric with burgundy ribbon. Cream linen and sage-green cotton create a softer, rustic style.
If wrapping the entire ornament looks bulky, cover only half and leave the remaining surface visible. This gives the finished decoration a more deliberate design.
Practical tip: Test the adhesive on an inconspicuous area first. Some glues can damage painted or plastic finishes. Avoid covering cracked glass ornaments, especially if children will handle them.
Keep the finished baubles together in a padded storage box, separated by tissue paper.
9. A Mini Christmas Tree for Small Spaces
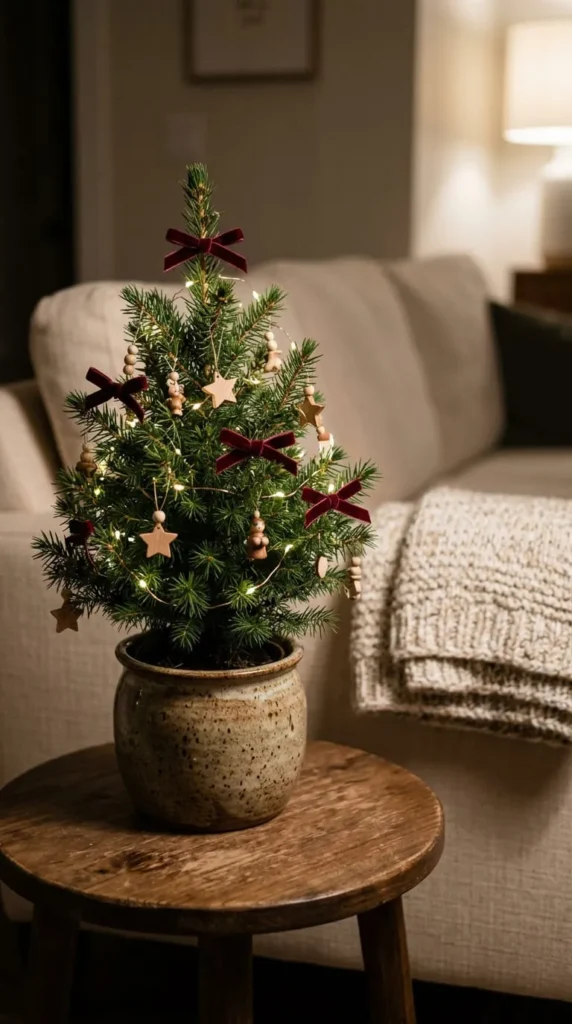
You do not need a large floor-standing tree to create a festive room. A tabletop Christmas tree works well on a desk, bedside table, kitchen counter, or apartment entryway.
Materials:
- A small potted evergreen or reusable artificial tree
- A decorative pot or basket
- Lightweight ornaments
- Thin ribbon
- Battery-powered LED lights, if desired
How to style it:
- Choose a tree that fits comfortably on your chosen surface.
- Place it inside a stable pot or basket.
- Add a small number of lightweight ornaments.
- Tie narrow ribbon bows between the branches.
- Finish with a few warm lights, keeping wires tidy.
For a natural cottage look, use wooden ornaments, dried orange slices, and simple cream ribbon. For a nostalgic Christmas style, combine colorful baubles with small pieces of tinsel.
The secret to a polished mini tree is scale. Large ornaments can overwhelm small branches, while too many decorations can hide the shape of the tree.
Space-saving tip: Place the tree on a tray with one or two complementary decorations. The tray makes the display easy to move when you require the table for everyday use.
Keep the arrangement away from cooking splashes, heaters, and unstable edges. A compact tree is easy to store and can become part of your regular holiday tradition.
10. A Christmas Table Centerpiece with Greenery and Fruit
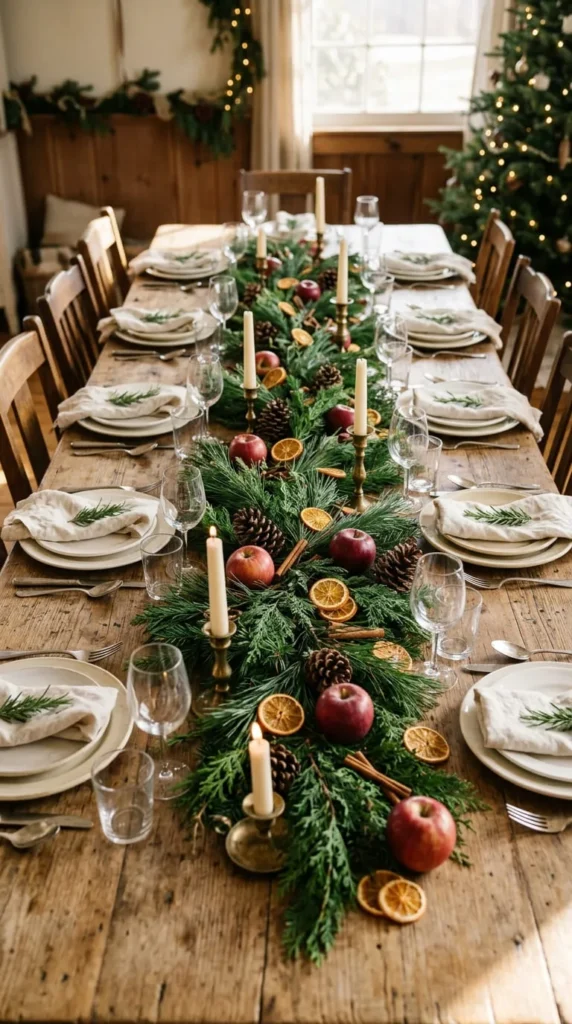
A handmade Christmas centerpiece can make an ordinary dining table feel ready for a holiday meal. Natural greenery and seasonal fruit add color without requiring expensive floral arrangements.
Materials:
- A shallow tray or wooden board
- Clean evergreen clippings
- Apples or other decorative fruit
- Pinecones
- Dried orange slices
- Candle holders or LED candles
How to arrange it:
- Place the tray in the middle of the table.
- Spread evergreen clippings loosely across the base.
- Add fruit in small groups rather than a straight line.
- Fill open spaces with pinecones and dried citrus.
- Position candle holders between the decorative elements.
Keep the centerpiece low enough for guests to see one another across the table. A simple arrangement of three main elements—greenery, fruit, and candlelight—often looks more coordinated than a crowded display.
For a traditional palette, use green foliage, red apples, and brass details. For a rustic cream-and-brown scheme, choose pears, pinecones, and natural linen.
Safety tip: Keep real flames well away from foliage, dried fruit, fabric, and paper. Never leave burning candles unattended. Battery-operated candles offer an easier option for family gatherings.
Remove perishable fruit after the meal and store reusable components separately.
11. Felt Gingerbread Ornaments for a Playful Tree

Felt gingerbread ornaments bring a soft, playful detail to Christmas trees, children’s bedrooms, and handmade holiday garlands. Unlike edible gingerbread, these decorations can be stored and reused each year.
Materials:
- Brown felt
- Cream and colored felt scraps
- Paper template
- Fabric scissors
- Needle and thread
- Cotton stuffing
- Ribbon
How to make them:
- Draw a simple gingerbread-person shape on paper.
- Cut two matching pieces from brown felt.
- Add small felt details to the front, such as a bow tie, buttons, or decorative icing shapes.
- Stitch around the edges, leaving a small opening.
- Add a little stuffing, then close the opening.
- Sew a ribbon loop onto the top.
For a coordinated set, make stars, hearts, gingerbread houses, and candy-cane shapes from the same felt colors.
You can hand-stitch the pieces or use a sewing machine if you prefer. Younger children can help choose colors and arrange the decorations while an adult handles sharp tools.
Budget tip: Use leftover felt from previous school or craft projects. Small scraps are enough for the details, so very little material goes to waste.
Keep small buttons and loose parts away from toddlers and pets. Store the ornaments in a dry container after the season to protect the fabric.
12. A Hanging Christmas Branch for a Natural Wall Display
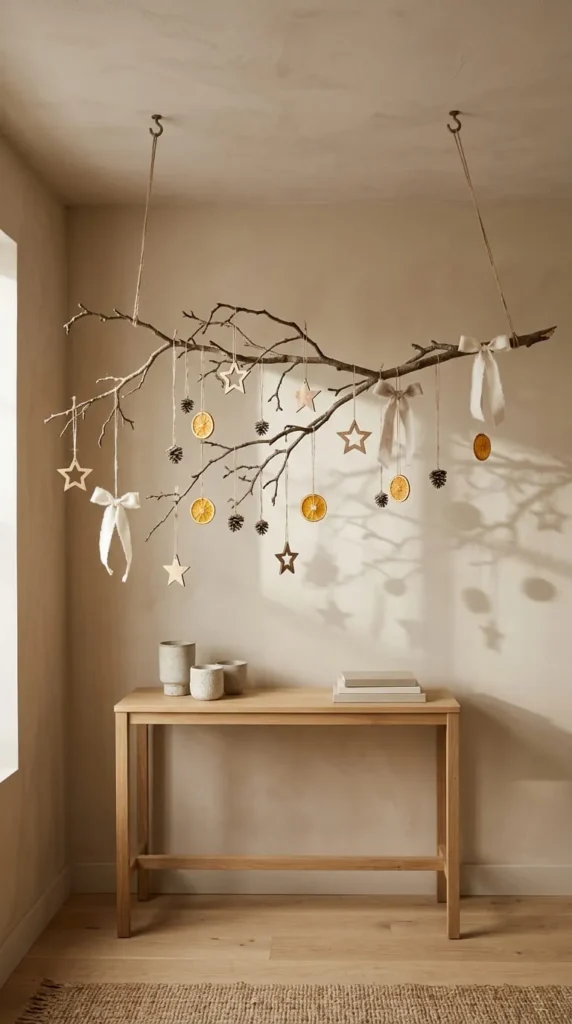
A hanging branch is an alternative to a traditional Christmas tree when floor space is limited. Its open shape feels light and natural, making it suitable for apartments, narrow hallways, and small dining areas.
Materials:
- A sturdy, dry branch
- Strong cord or decorative rope
- Lightweight ornaments
- Ribbon
- Ceiling or wall hardware rated for the intended load
How to make it:
- Select a branch without loose bark, signs of rot, or sharp broken ends.
- Clean it and allow it to dry completely.
- Tie cord securely near each end.
- Attach the cord to properly installed hooks or another suitable support.
- Hang lightweight decorations at varied heights.
Combine wooden stars, small paper ornaments, and dried citrus slices for a woodland-inspired display. If you prefer a colorful look, add red baubles and ribbon.
Renter-friendly alternative: Place the branch in a tall, stable vase on a console table rather than suspending it from the ceiling. This gives you a similar decorative effect without drilling overhead holes.
Avoid hanging heavy glass ornaments above seating or walkways. Check the support before adding decorations, and keep the branch clear of ceiling fans and hot light sources.
The branch can be stored for reuse if it remains dry and intact, or returned to an appropriate outdoor composting system where local rules allow.
13. A Christmas Window Display with Paper Snowflakes
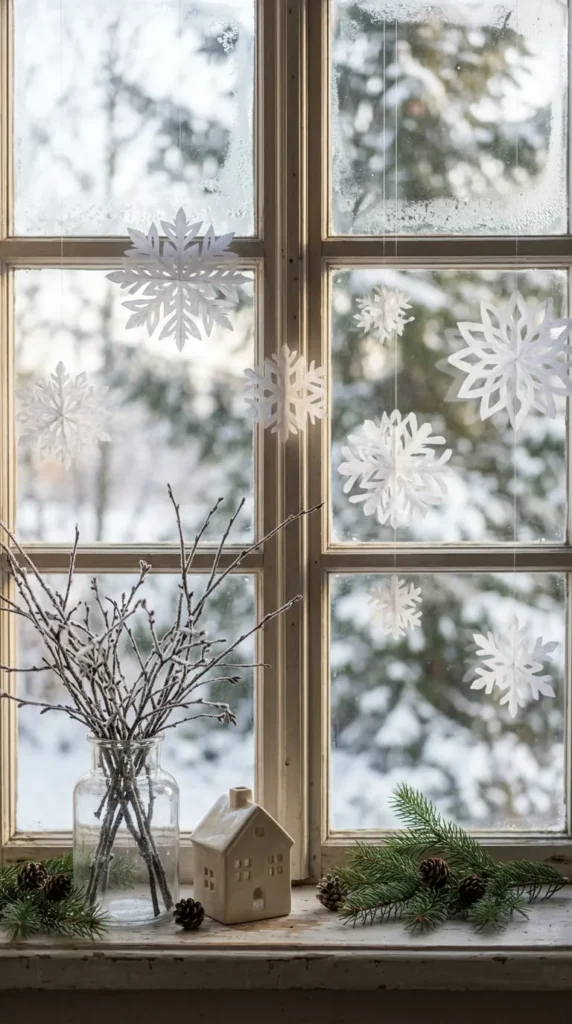
Paper snowflakes are an inexpensive way to decorate windows without taking up shelves or floor space. Their delicate shapes look beautiful during the day, while warm indoor lighting can make the display feel cozy after sunset.
Materials:
- White paper or lightweight cardstock
- Scissors
- Pencil
- Clear thread or removable window-safe adhesive
- Optional paper in cream or pale kraft shades
How to make them:
- Fold a square sheet of paper into a triangle.
- Fold it again to create a smaller triangle.
- Cut small shapes along the folded edges, leaving some folded sections intact.
- Carefully unfold the paper to reveal the snowflake pattern.
- Attach a thread or use suitable removable adhesive to display it.
Create several designs rather than making every snowflake identical. Large shapes can anchor the display, while smaller ones fill gaps.
For a layered effect, suspend a few snowflakes inside the window and attach others directly to the glass. Keep the arrangement loose enough to let daylight enter the room.
Budget tip: Reuse plain printer paper or the clean reverse sides of old sheets. For a stronger display, choose thicker paper, but avoid heavy cardstock if the snowflakes will be suspended from delicate thread.
Use window-safe materials and avoid blocking the view completely. After Christmas, flatten the snowflakes between sheets of paper and store them in a folder.
14. A Cozy Christmas Cushion Cover Using Old Fabric
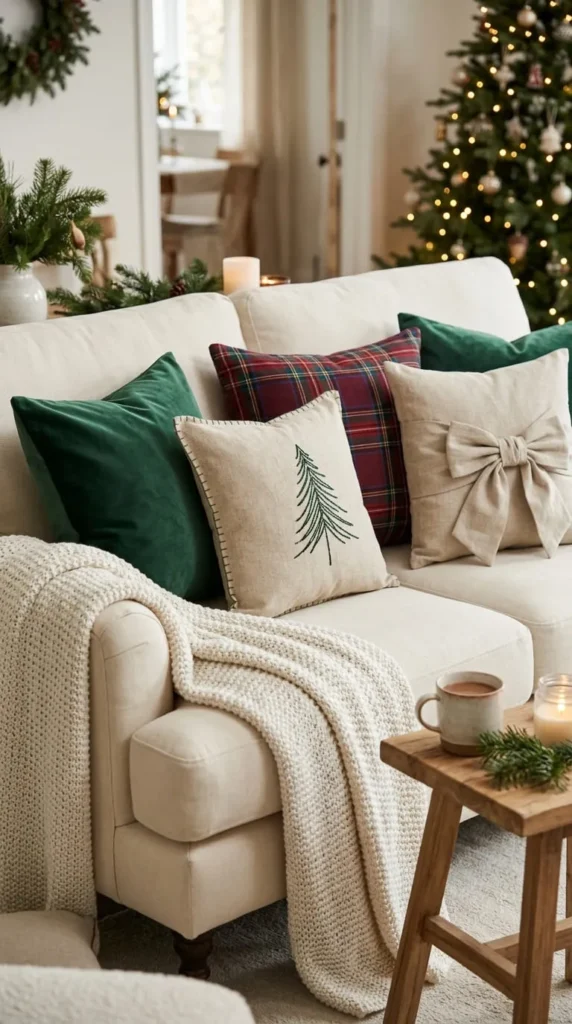
Changing cushion covers is a simple way to make a living room feel festive without replacing large pieces of furniture. Old fabric, unused scarves, and leftover upholstery material can become seasonal soft furnishings.
Materials:
- An existing cushion cover or cushion insert
- Suitable fabric scraps
- Fabric scissors
- Needle and thread, or fabric-safe adhesive
- Ribbon or felt for decorative details
How to make it:
- Measure your cushion insert or an existing cover.
- Cut fabric to fit, leaving room for seams if sewing.
- Sew or secure the fabric into a cover with an opening for the insert.
- Add a simple tree shape, star, or bow using felt or ribbon.
- Insert the cushion and arrange it with your everyday pillows.
Choose two main colors and one accent to keep the arrangement cohesive. For example, cream, forest green, and burgundy work well together. A single tartan cushion can also add a traditional Christmas touch to a neutral sofa.
If sewing is not your preference, use an existing cushion cover and tie a wide ribbon around it like a gift. This temporary method requires no cutting or permanent changes.
Care tip: Check fabric washing instructions before decorating, particularly if you add glue or non-washable trim. Remove temporary ribbons before washing the cover.
15. A Wall-Mounted Christmas Tree Made with String Lights
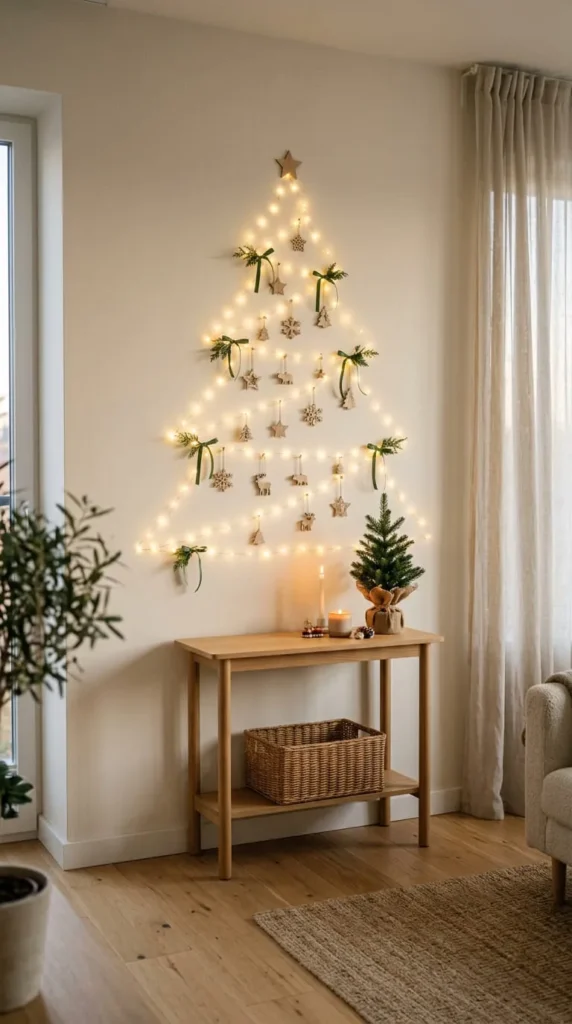
A wall-mounted light tree offers the festive outline of a Christmas tree without taking up floor space. It is particularly useful for studio apartments, shared rooms, or homes where furniture already fills most of the room.
Materials:
- Indoor-rated LED string lights
- Removable hooks suitable for your wall
- Lightweight ornaments
- Measuring tape
- Pencil
How to make it:
- Mark a triangular outline on the wall using light pencil marks.
- Place removable hooks at the top, bottom corners, and along the sides as required.
- Arrange the light string in a zigzag pattern to form the tree.
- Add a few lightweight ornaments to selected points.
- Hide excess wire neatly near the power source or battery pack.
For a simple design, use lights alone. If you want more color, add a handful of burgundy bows or wooden stars rather than filling every gap.
A small woven basket or wrapped empty boxes beneath the display can make the arrangement feel complete without adding bulky furniture.
Safety tip: Follow the light manufacturer’s instructions, keep electrical connections dry, and avoid placing cords where people might trip. Check that the removable hooks suit your wall finish and the weight of the lights.
16. Painted Wooden Craft-Stick Christmas Trees
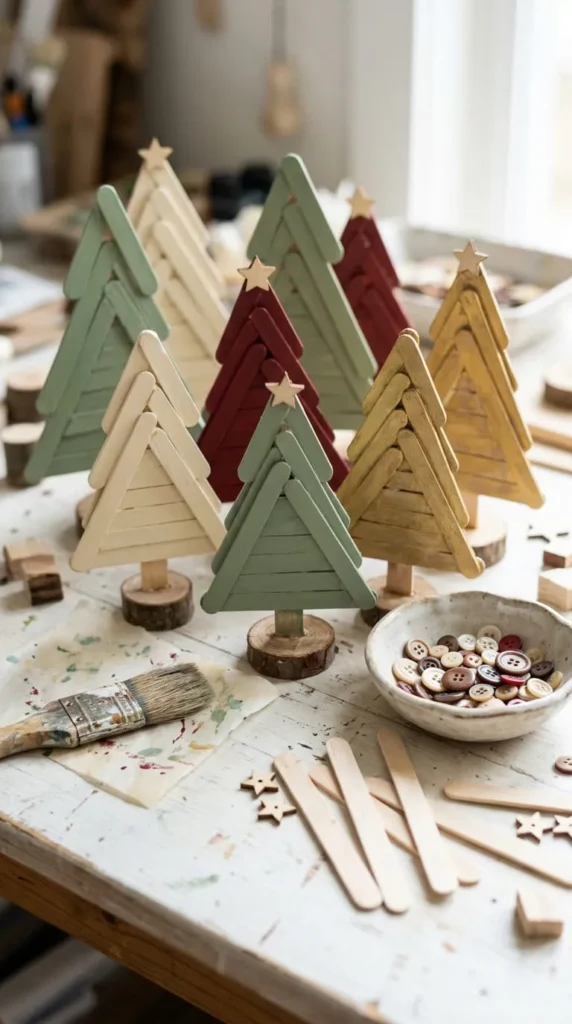
Wooden craft-stick trees are a beginner-friendly project that can become shelf decorations, place settings, or handmade ornaments. They also work well as a family activity because the shapes are easy to assemble and personalize.
Materials:
- Wooden craft sticks
- Child-safe craft paint
- Craft glue
- Small wooden stars or felt shapes
- Twine, if making hanging ornaments
- A small piece of cardboard for the backing
How to make them:
- Arrange three craft sticks into a triangle.
- Glue the ends together and allow them to dry.
- Attach shorter sticks horizontally inside the triangle to resemble branches.
- Paint the tree and leave it to dry completely.
- Add a small star or a few decorative dots.
- Attach cardboard at the back if you want a sturdier ornament.
To make a tabletop version, attach the finished tree to a wooden base. For a hanging version, add a loop of twine at the top.
Use muted green and cream for a rustic display, or paint several trees in traditional red, green, and gold.
Family crafting tip: Adults can handle hot glue or sharp tools, while children can paint and choose decorations using age-appropriate supplies. Avoid tiny detachable pieces around young children.
Arrange three trees of different heights on a shelf for a miniature winter forest.
17. A Christmas Garland Made from Recycled Book Pages
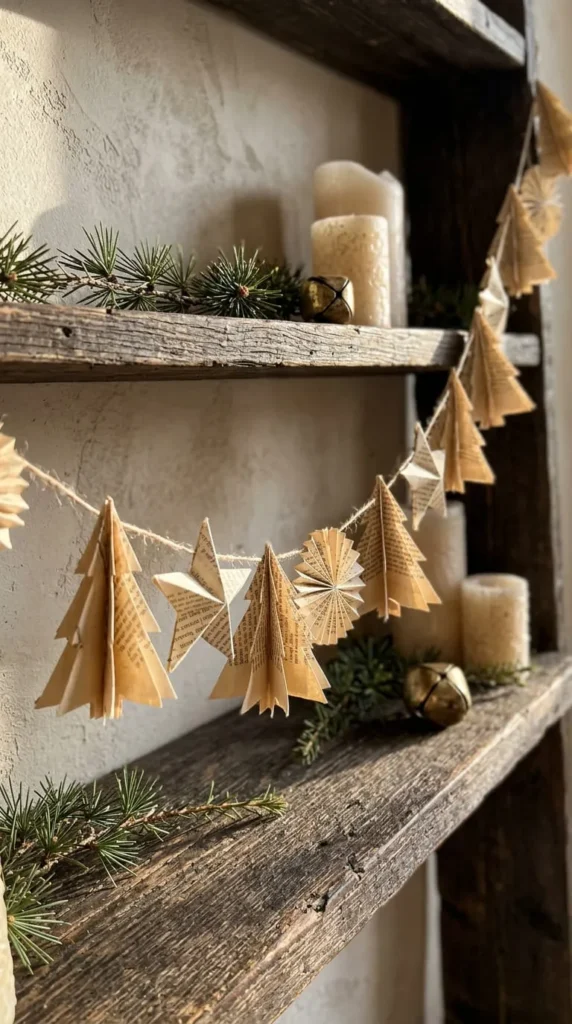
Old books with damaged covers or pages you no longer plan to use can become a decorative paper garland. The neutral tones suit a rustic Christmas interior and pair well with greenery, wooden furniture, and simple white ornaments.
Materials:
- Discarded book pages or recycled paper
- Scissors
- Pencil
- String or cotton thread
- Paper glue
- Hole punch, if required
How to make it:
- Draw small tree, star, or circle shapes on the paper.
- Cut out matching pairs for each decoration.
- Fold selected shapes down the middle to create dimension.
- Glue the pairs together around a length of thread, or punch holes and string them individually.
- Space the shapes evenly along the garland.
For a layered effect, alternate paper trees with small folded stars. Leave a little thread at each end so the garland can be attached to a shelf or mantel.
Styling tip: Combine the paper garland with a few evergreen sprigs, but keep the greenery separate if it may stain the paper. Avoid placing paper close to candles, fireplaces, or other heat sources.
Use pages from damaged books that are yours to repurpose rather than cutting up a book you value. After the holiday season, store the garland flat in a dry folder to help prevent creases.
18. A Rustic Christmas Candle Tray
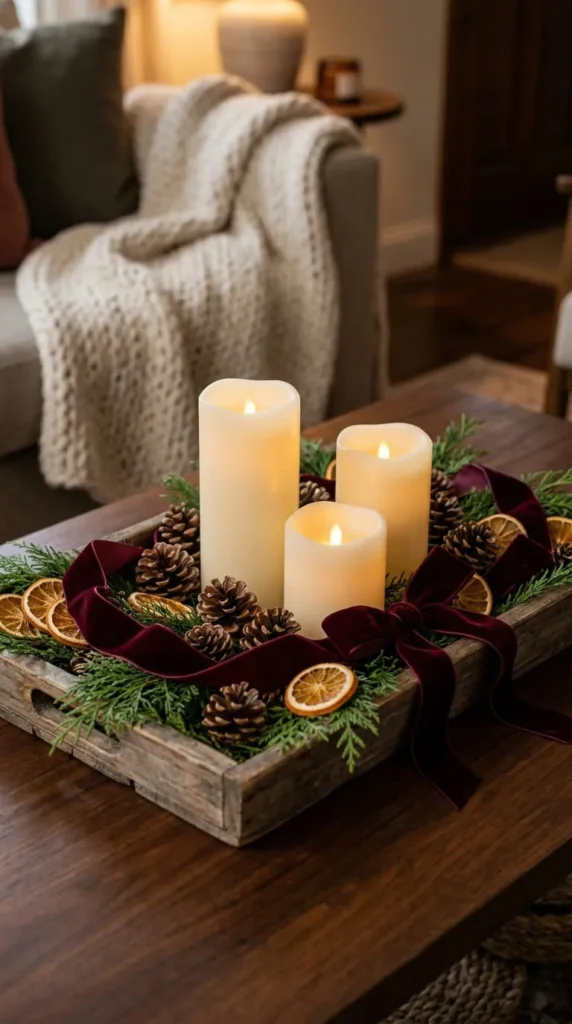
A candle tray creates a small, defined Christmas display that can sit on a coffee table, dining sideboard, or bedroom dresser. It is a useful choice when you want a festive focal point without decorating the entire room.
Materials:
- A shallow tray
- Three LED candles in different heights
- Pinecones
- Dried orange slices
- Evergreen clippings
- Optional ribbon or wooden beads
How to arrange it:
- Place the tallest candle toward the back of the tray.
- Arrange the smaller candles around it, leaving space between each one.
- Fill open areas with pinecones and dried citrus.
- Add a small ribbon bow to one corner.
- Check the arrangement from several angles and remove anything that looks crowded.
Choose candles in cream or warm ivory for a classic appearance. A dark wooden tray gives the arrangement contrast, while a white tray creates a softer look.
Safety tip: Battery-operated candles are a practical choice around dried materials and ribbon. If you use real candles, place them in stable holders and keep every flammable decoration well away from the flame. Never leave a burning candle unattended.
Keep the tray portable so you can move it when serving food or using the coffee table. Store the reusable pieces together for easy decorating next year.
19. A Nutcracker-Inspired Christmas Mantel
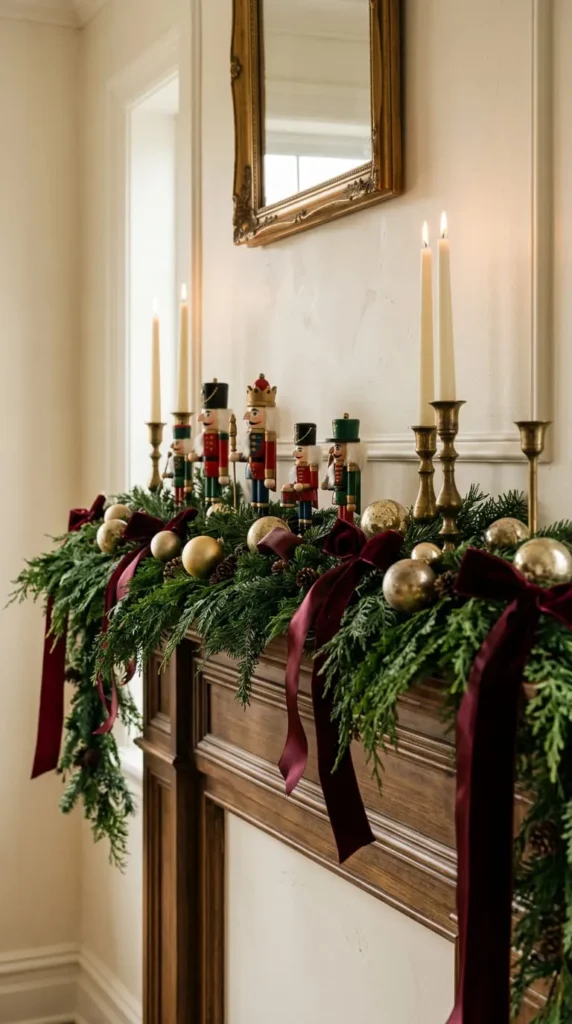
Nutcracker-inspired decorations bring a nostalgic, storybook feeling to Christmas interiors. You can create this look with small wooden figures, simple painted ornaments, and a coordinated arrangement of greenery.
Materials:
- Small wooden craft figures or plain wooden ornaments
- Acrylic craft paint
- Fine paintbrushes
- Evergreen garland
- Burgundy ribbon
- Decorative candle holders
How to make it:
- Choose plain wooden figures or ornaments with simple shapes.
- Paint them in traditional colors such as red, green, cream, and gold.
- Allow the paint to dry completely before handling the figures.
- Arrange evergreen branches across the mantel.
- Position the nutcracker figures at different points along the display.
- Add ribbon and a few gold accents to connect the colors.
If you do not have a fireplace, recreate the arrangement on a bookshelf, console table, or wide windowsill.
For a balanced display, place a taller figure toward one end and smaller ornaments around it. Leave some open space so the figures remain visible.
Budget tip: Repaint wooden decorations from previous Christmas seasons instead of buying an entirely new set. Use a limited palette to make different pieces look coordinated.
Keep the display stable and away from open flames. Store the painted figures in individual compartments or wrap them in soft paper after the holidays.
20. A Hanging Ornament Garland for a Colorful Christmas

An ornament garland is a useful way to decorate a staircase railing, mantel, doorway, or large shelf. It also offers a way to reuse baubles that no longer fit your main Christmas tree.
Materials:
- A sturdy garland base or strong decorative cord
- Lightweight Christmas ornaments
- Ribbon
- Ornament hooks or suitable ties
- Optional evergreen branches and LED lights
How to make it:
- Lay out your ornaments before attaching them.
- Select two or three main colors, then add a few contrasting pieces.
- Secure the ornaments to the garland using suitable hooks or ties.
- Space the decorations at different intervals rather than arranging them in a rigid pattern.
- Add small ribbon bows between selected ornaments.
- Hang the completed garland from a secure support.
For a traditional style, combine burgundy, dark green, and gold. If you enjoy retro Christmas décor, mix colorful baubles with tinsel and a few reflective ornaments.
Practical tip: Lightweight plastic ornaments are a safer choice for high-traffic areas where the garland may be bumped. Keep glass baubles away from children’s play areas and pets.
Do not overload the garland or its hanging points. Test the support before decorating, and keep lights away from materials that could become hot.
Conclusion
Creating a cozy holiday home can be as simple as making a dried orange garland, repainting old baubles, arranging fairy lights in glass jars, or crafting a small Christmas tree for an empty corner. These DIY Christmas decorations offer ways to personalize your space without spending heavily on new accessories.
Start by checking the craft supplies and holiday decorations you already own. Choose a color palette that suits your home, then select two or three projects that fit your available time and space. Natural greenery, handmade ornaments, soft ribbon, and warm lighting can work together to create a welcoming Christmas atmosphere.
If you live in a small apartment, focus on windows, shelves, and wall displays. If you have more room, try a statement wreath, a dining-table centerpiece, or a decorated mantel.
Pick your favorite idea, gather your supplies, and make one handmade decoration today. Once you see how much character a small project can add, you may find yourself creating a new Christmas tradition to enjoy every year.