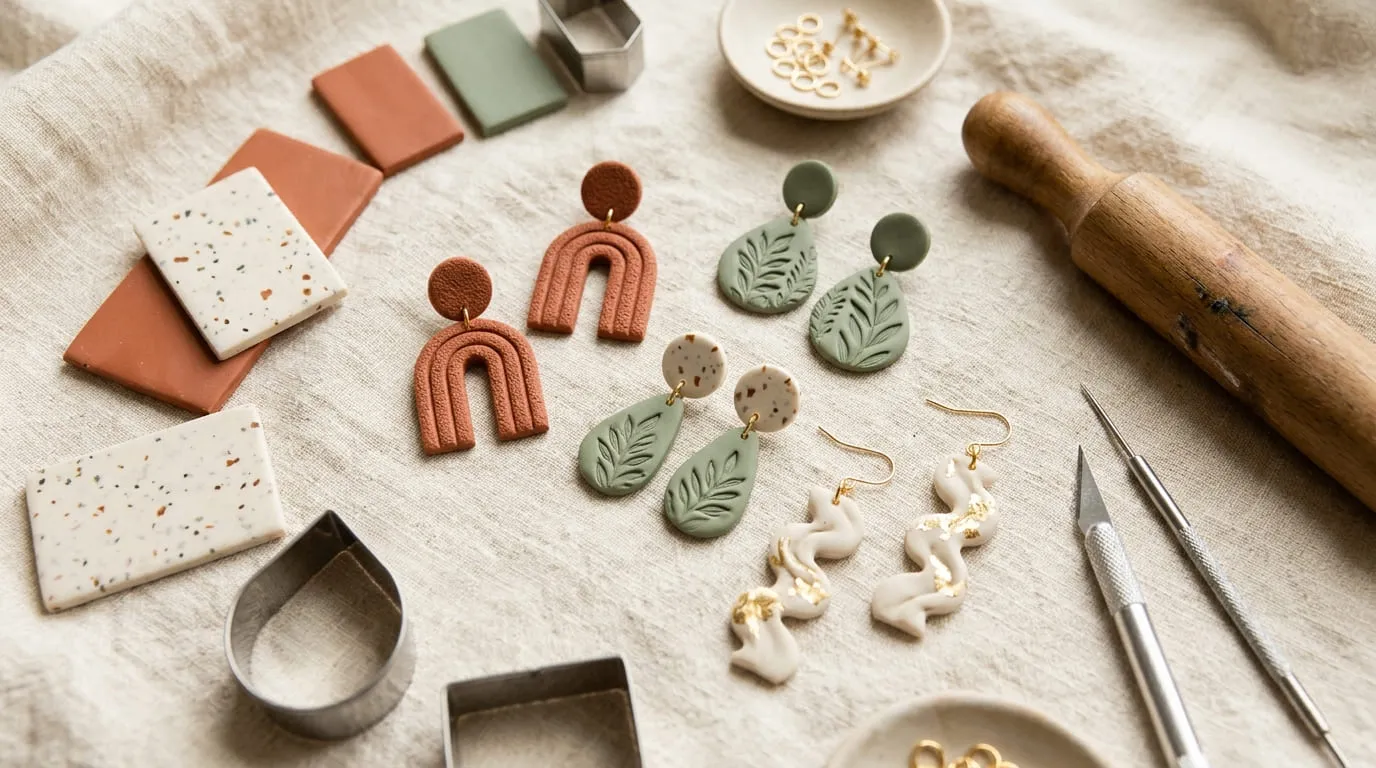
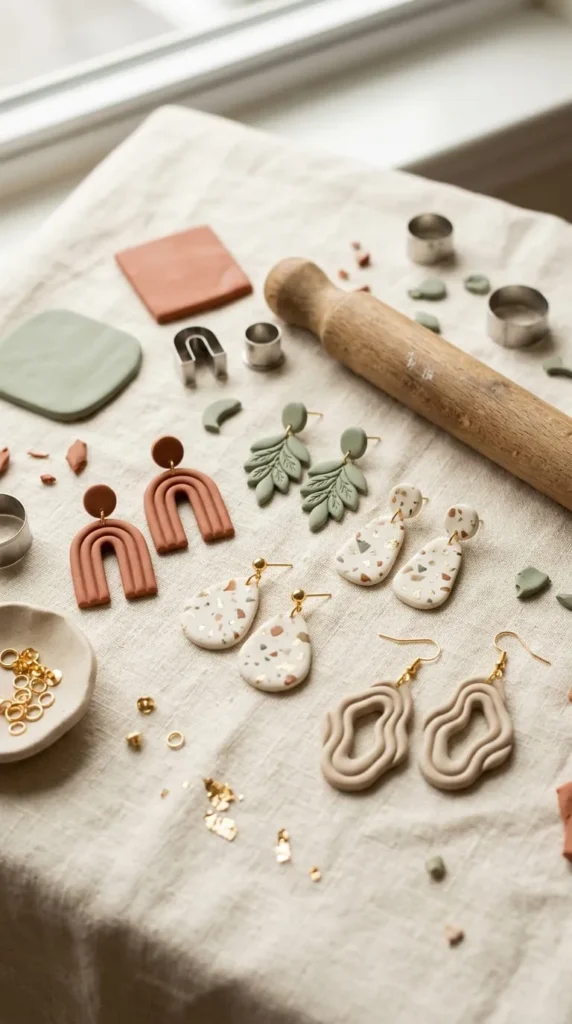
Polymer clay earrings are a fun way to turn simple craft supplies into beautiful handmade accessories. With a few basic tools, colorful clay, and some creative ideas, you can make earrings that suit different styles, from minimalist everyday pieces to bold statement designs.
These earrings are also a popular option for a small handmade business because you can experiment with shapes, colors, textures, and seasonal collections without buying a large amount of material for every design. The key is to focus on neat finishing, comfortable weight, secure findings, and a consistent style.
Before you begin, condition your clay until it feels smooth and pliable. Roll it evenly, remove visible air bubbles, and follow the manufacturer’s baking instructions. An oven thermometer can help you check the temperature. Once the clay has cooled completely, finish the edges and attach suitable earring findings.
1. Minimalist Terracotta Arch Earrings
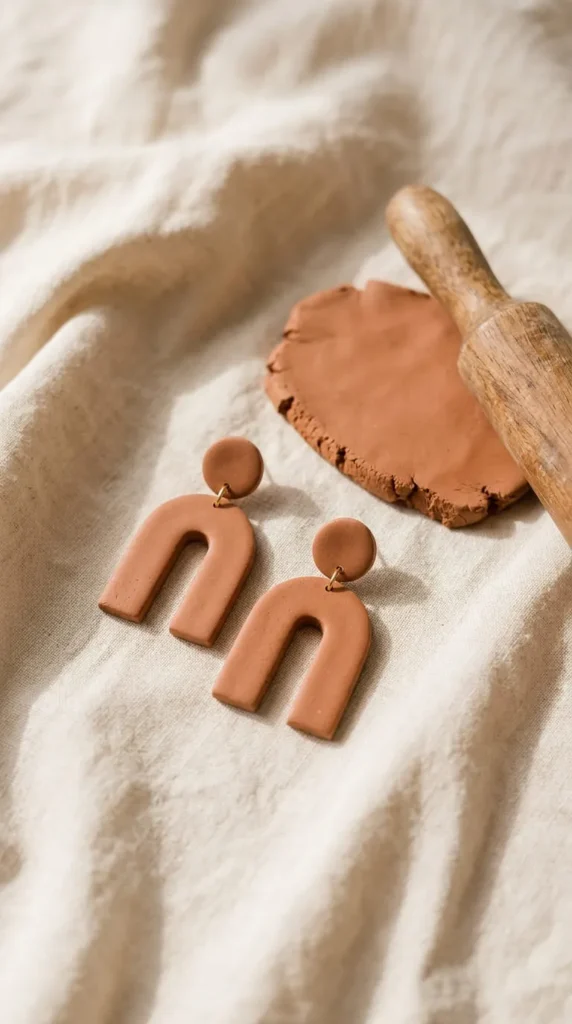
Terracotta arch earrings are a lovely starting point for beginners because their simple shape looks stylish without requiring complicated techniques. The warm reddish-brown color pairs well with cream, beige, olive green, denim, and other everyday clothing colors.
To make this design, roll your conditioned clay into an even sheet. Use an arch-shaped cutter to create matching pieces, checking that both earrings have similar thickness and proportions. Smooth rough edges gently before baking according to the clay manufacturer’s instructions.
You can keep the surface matte for a natural handmade look or add a small contrasting arch cutout to create a layered effect. Cream, dusty pink, and muted sage are attractive colors to combine with terracotta.
For selling, consider offering two sizes: a smaller pair for everyday wear and a larger pair for customers who prefer statement accessories. Photograph the earrings against a neutral background so their shape and color remain the main focus.
Make sure the finished pieces feel comfortable on the ear and that the holes or attachment points are placed consistently. Simple designs can look especially professional when the edges are clean and both earrings match closely.
2. Speckled Terrazzo Statement Earrings
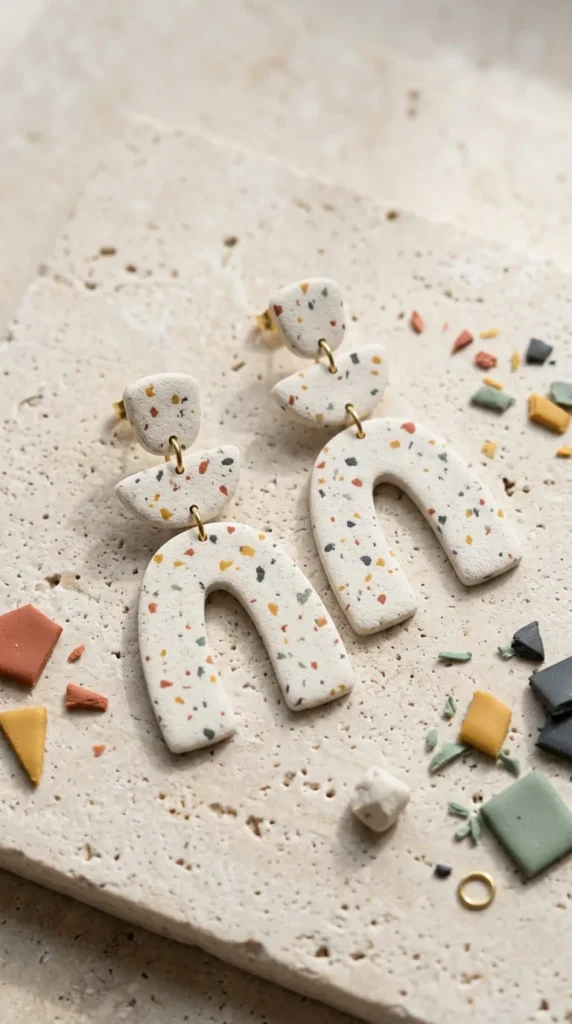
Terrazzo earrings recreate the scattered pattern found in terrazzo stone. They are a practical project for using leftover clay, making them useful when you have small pieces remaining from other designs.
Start with a base color such as ivory, pale beige, or soft pink. Chop contrasting clay into tiny, irregular pieces, then press them gently into the surface of the base sheet. Roll lightly to help the flecks sit securely without flattening the pattern too much.
Cut the clay into circles, arches, rectangles, or rounded geometric shapes. Try to distribute the flecks across the surface so each earring has a balanced pattern. The two earrings do not need to be identical, but they should look like a coordinated pair.
For a collection, experiment with different color combinations. Black and cream create a bold modern look, while terracotta and mustard feel warm and earthy. Pastel flecks on a white base can suit spring and summer collections.
After baking and cooling, inspect the surface and edges carefully. Terrazzo designs photograph well against plain backgrounds because the small colorful details stand out. You can also group several color combinations together for a product listing that shows buyers the available options.
3. Soft Marbled Clay Drop Earrings
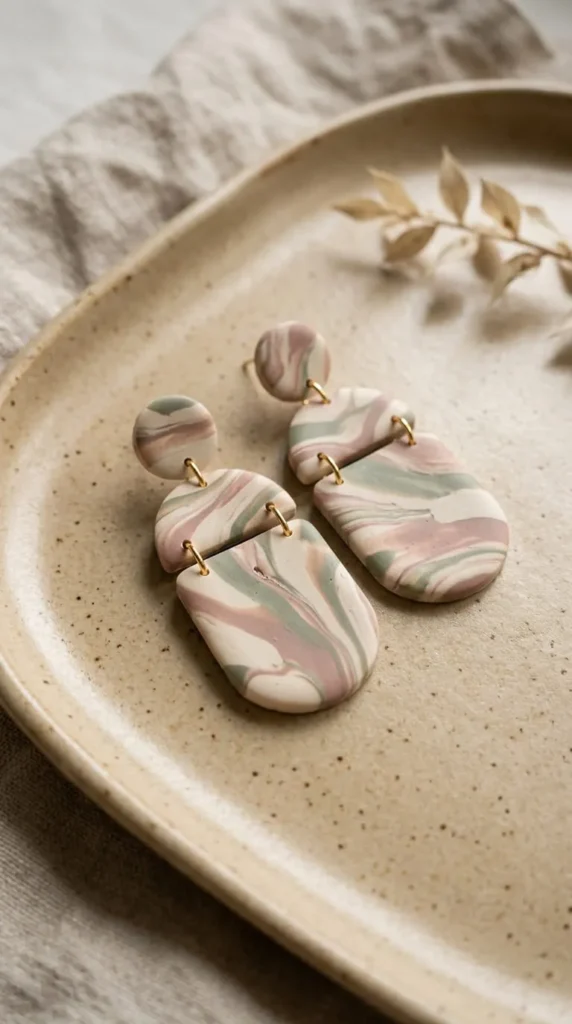
Marbled earrings have a one-of-a-kind appearance because the colors blend into flowing patterns. Even when you use the same colors, each pair can look slightly different, which gives handmade jewelry its character.
Choose two or three coordinating clay colors. Roll each color into a small log, twist the logs together, and fold the mixture gently. Repeat only a few times until the colors form attractive veins. Too much mixing can turn the design into a single muddy shade.
Flatten the clay with an acrylic roller, keeping the thickness even. Cut out matching drop shapes, circles, or organic forms. Look at the pattern before cutting so the most interesting sections appear on the front of each earring.
Cream and dusty rose create a soft romantic effect, while black and white offer a sharper contrast. Blue and ivory can suit coastal-inspired accessories.
Once baked and cooled, check the edges and attach the findings securely. Because marbling is the main feature, avoid adding too many extra decorations. A simple gold-tone connector or plain stud can complement the design without distracting from the pattern.
For a small business, make a few pairs from one marbled sheet and photograph each pair individually. Customers can then see the natural variation rather than expecting every piece to have exactly the same swirls.
4. Delicate Daisy and Botanical Earrings
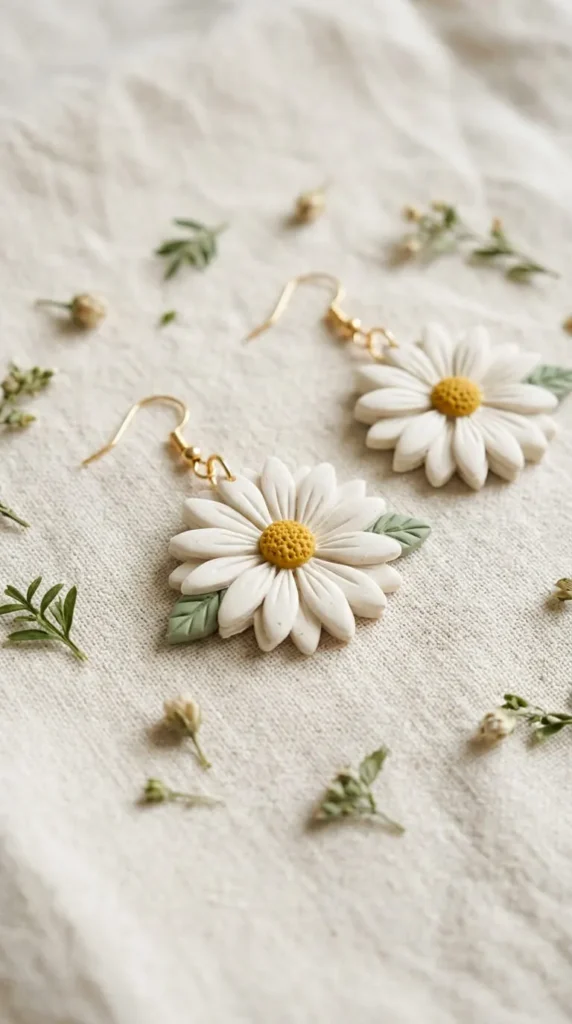
Daisy earrings are cheerful accessories for spring, summer, garden parties, and everyday outfits. Their recognizable flower shape also makes them a good choice for a themed handmade collection.
For a simple version, cut two small flower shapes from ivory clay and place a tiny circle of mustard clay in the center of each flower. Press the center gently so it stays in place. You can use a flower cutter for consistent petals or shape the petals by hand for a more organic finish.
For extra detail, add small sage green leaves beneath the flowers. Keep the leaves thin enough to remain visually delicate but not so thin that they become fragile. Avoid creating tiny projecting pieces that could break during handling.
A daisy can be made into a stud earring or attached to a small clay drop. Larger flowers create a playful statement, while smaller versions work well for customers who prefer subtle accessories.
When selling floral earrings, consider creating coordinated colorways such as ivory and yellow, blush and cream, or lilac and white. Photograph the earrings with soft natural props, but keep the background uncluttered so the flower details remain easy to see.
After baking, allow the pieces to cool before attaching posts or connectors. Check each petal for rough edges and make sure both earrings have similar dimensions and comfortable weight.
5. Refined Celestial Moon and Star Earrings
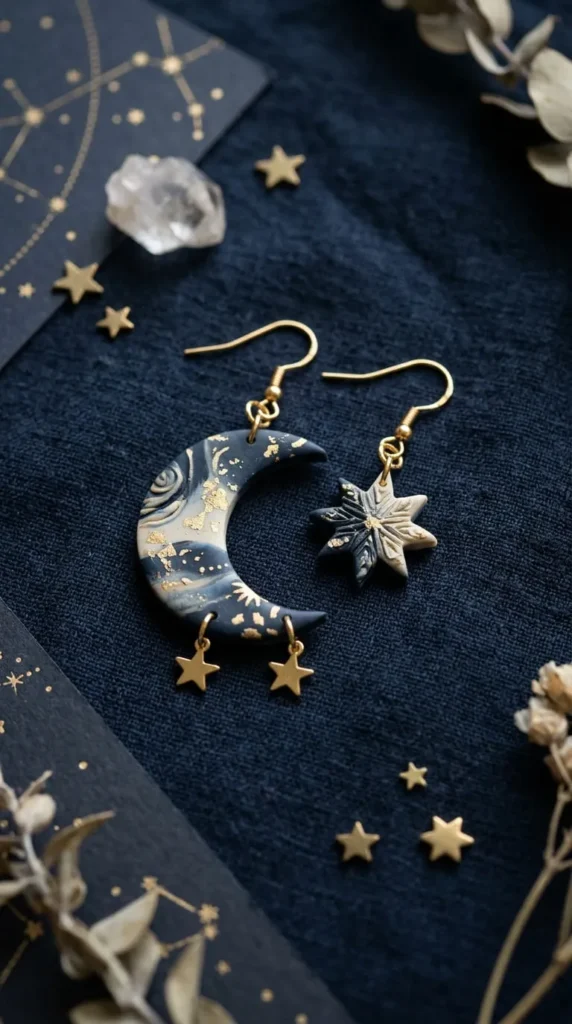
Moon and star earrings offer a celestial theme that can work throughout the year. Their simple shapes are easy to recognize, and the design can range from understated everyday jewelry to more dramatic evening accessories.
Choose a base color such as midnight blue, charcoal, ivory, or dusty lavender. Use small cutters to create crescent moons and stars, checking that the narrow points are not excessively thin. Very delicate tips can be more vulnerable to breakage, so slightly rounded shapes are often more practical.
You can create matching pairs with two moons or combine a moon with a star for a coordinated mismatched set. A tiny contrasting clay detail can add interest without making the earrings too busy.
For a premium appearance, keep the color palette limited. Deep blue with ivory looks classic, while lavender and cream feel softer. Small gold-tone findings can complement the celestial theme.
If you plan to sell these earrings, consider including them in a night-sky or astrology-inspired collection. Use clear product photographs that show the full outline of each moon and star. A close-up can help customers assess the finish, while a lifestyle photograph shows the earrings at their actual scale.
After baking and cooling, inspect the narrow points and attachment areas carefully. Smooth the edges and make sure the findings are securely connected before wearing or packaging the finished pair.
6. Playful Y2K Squiggle Earrings
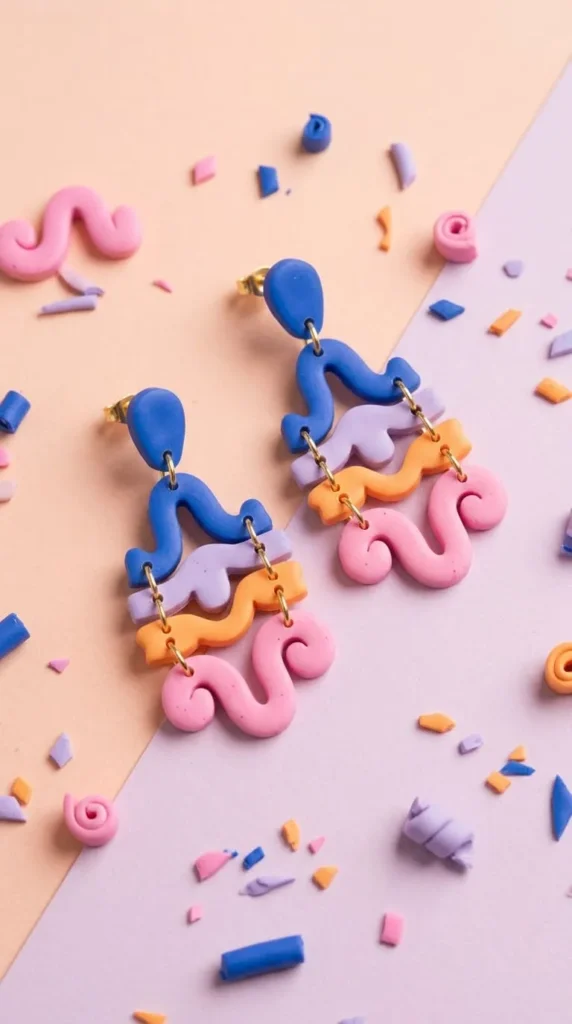
Squiggle earrings are a fun way to experiment with irregular lines and bold colors. Inspired by playful retro fashion, these designs can be eye-catching without requiring detailed painting or complicated components.
Begin by rolling conditioned clay into an even sheet. Cut freeform wavy shapes using a small knife or a suitable cutter. If you prefer a raised effect, create a base shape and add a thin contrasting clay line on top. Press the layers gently together to help them bond.
Try to make the curves smooth rather than sharp. Extremely narrow sections can be fragile, so keep the width reasonably consistent. You can create two matching squiggles or use different shapes in the same color family.
Color choices make a big difference. Pink and orange create a lively summer look, while cobalt blue and lavender feel playful but more restrained. Black and cream can suit customers who prefer bold shapes in neutral colors.
These earrings can be part of a trend-inspired collection, especially when photographed with colorful backgrounds and modern styling. However, prioritize clear product photos over excessive props. Buyers should be able to see the outline, size, and surface finish.
Once the pieces have been baked and cooled, attach the findings and check that the earrings hang comfortably. Keep the finished designs lightweight, since large, solid clay pieces may feel uncomfortable during extended wear.
7. Layered Eucalyptus Leaf Earrings
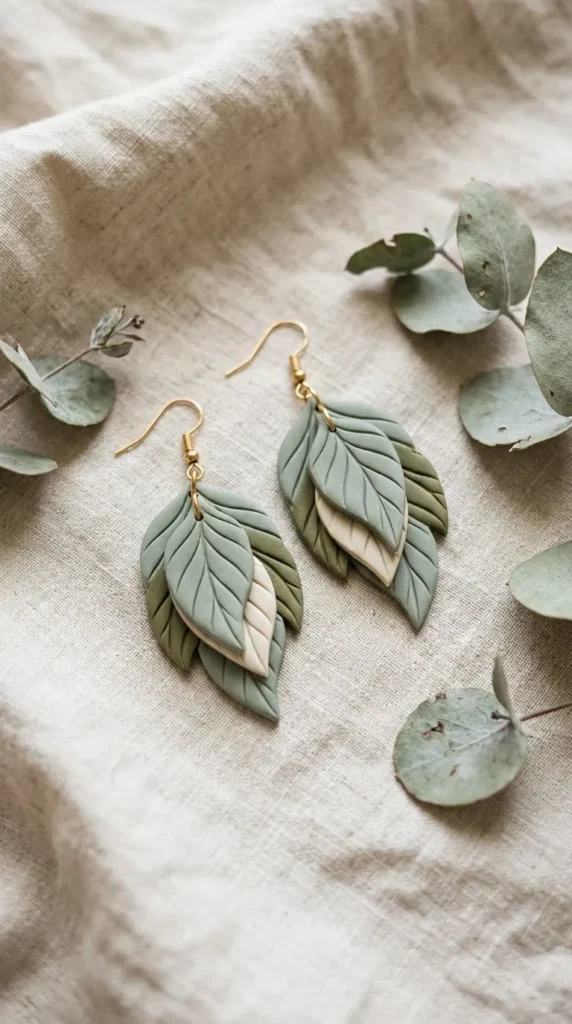
Eucalyptus-inspired earrings bring a natural, understated look to a handmade jewelry collection. Their muted green shades coordinate well with neutral clothing, floral prints, and other earthy accessories.
Choose two or three shades of green, perhaps combining sage with olive and a little cream. Cut leaf shapes from conditioned clay using a cutter or a small craft blade. If you want a layered appearance, place a smaller leaf over a larger base shape and press the pieces together gently.
Use a needle tool to add shallow vein lines. Avoid cutting too deeply, as deep grooves may weaken narrow areas. You can also create a pair of simple leaf drops without layering for a cleaner style.
The design works well in a vertical shape because it follows the natural form of a leaf. Keep both pieces similar in size and weight so they hang evenly. A small metal connector can provide movement between a stud and the leaf drop.
For product photography, use a neutral surface with one or two botanical elements. Real leaves can support the theme, but they should not cover the clay details. Show a close-up of the vein texture so buyers can appreciate the handmade finish.
After baking and cooling, check the pointed ends for rough edges. Secure the findings properly and test the earrings gently before packaging them. A consistent green palette can also help you build matching necklaces, pins, or other accessories.
8. Cottagecore Mushroom Earrings
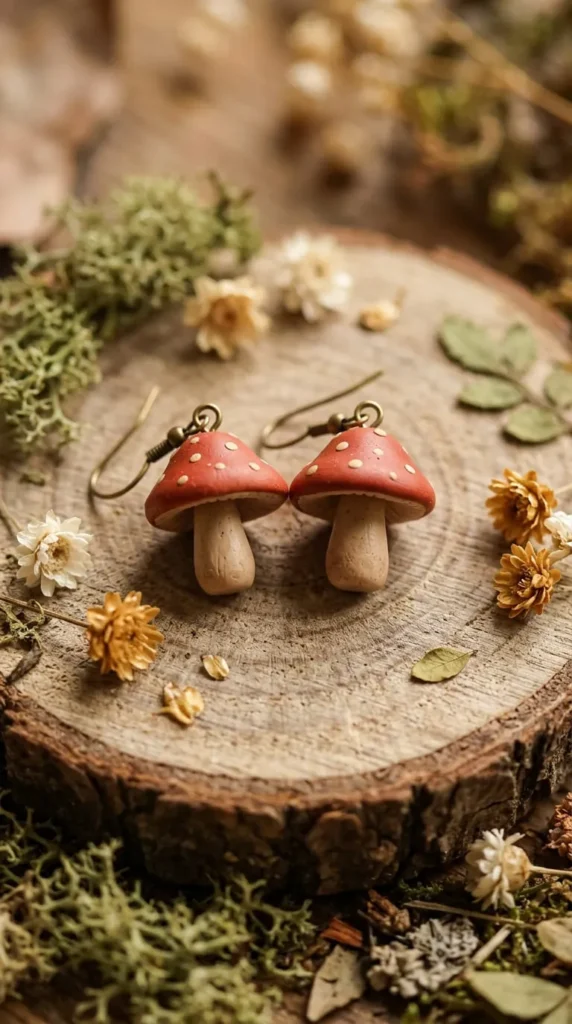
Mushroom earrings suit woodland, cottagecore, and nature-inspired styles. Their recognizable caps and stems provide plenty of room to play with color while keeping the design approachable for beginners.
Start with a small amount of red, rust, or muted brown clay for the cap and cream or beige clay for the stem. Shape the two sections separately, then join them carefully. Add small cream dots to the cap by pressing tiny clay circles into the surface.
For a softer cottagecore look, try dusty pink caps with cream spots or earthy brown caps with pale beige stems. You can also make tiny mushroom studs or larger hanging pairs with a leaf or flower detail.
Keep the cap and stem proportions consistent across the pair. Make sure the connection between the shapes is secure and avoid making the stem too narrow. If the design includes very small details, press them firmly enough to stay in place during handling.
Mushroom earrings can work as part of a woodland-themed collection alongside leaf, flower, and celestial designs. Photograph them with subtle natural props, but keep the earrings in sharp focus.
After baking, allow the pieces to cool completely before attaching the findings. Inspect the spots and cap edges for loose details, and check that the earrings feel balanced. A few different color options can help you offer customers variety without changing the basic design.
9. Floral Medallion Earrings
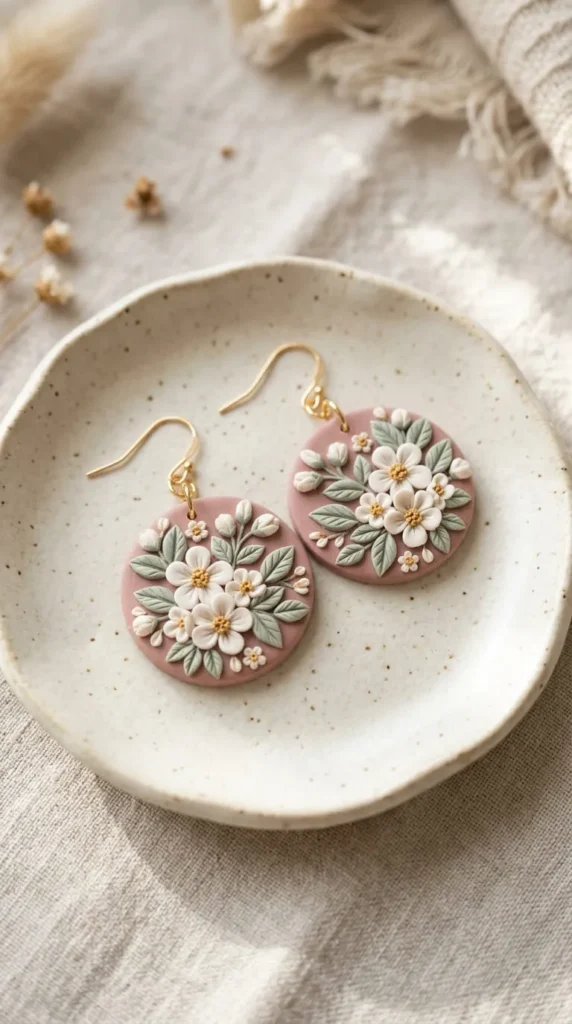
Floral medallion earrings combine a larger rounded shape with a decorative flower motif. They have a vintage-inspired appearance and provide more space for pattern and color than tiny floral studs.
Begin with a circular or oval base in a soft shade such as blush, cream, terracotta, or sage. Add small flower shapes, dots, or short leaf forms to create a balanced design. You can arrange one flower in the center or scatter several tiny motifs across the surface.
Keep the decorative elements relatively flat so they do not catch easily on clothing. Press the pieces together gently and make sure the design is secure before baking. If you want a more subtle look, use similar colors for the base and flowers. Contrasting colors create a bolder statement.
A medallion can be worn as a simple stud or attached to a small connector for a drop style. Choose the size carefully: a large, thick medallion may be heavier than expected, so use a thin, even sheet of clay.
For a handmade shop, consider releasing floral medallions in coordinated color sets. Photograph each pair from the front and at a slight angle to show the surface details and thickness.
Once the clay has cooled, finish the edges and attach the findings securely. A neat outline and carefully arranged flower details can make this design look polished without expensive materials.
10. Lightweight Open-Frame Hoop Earrings
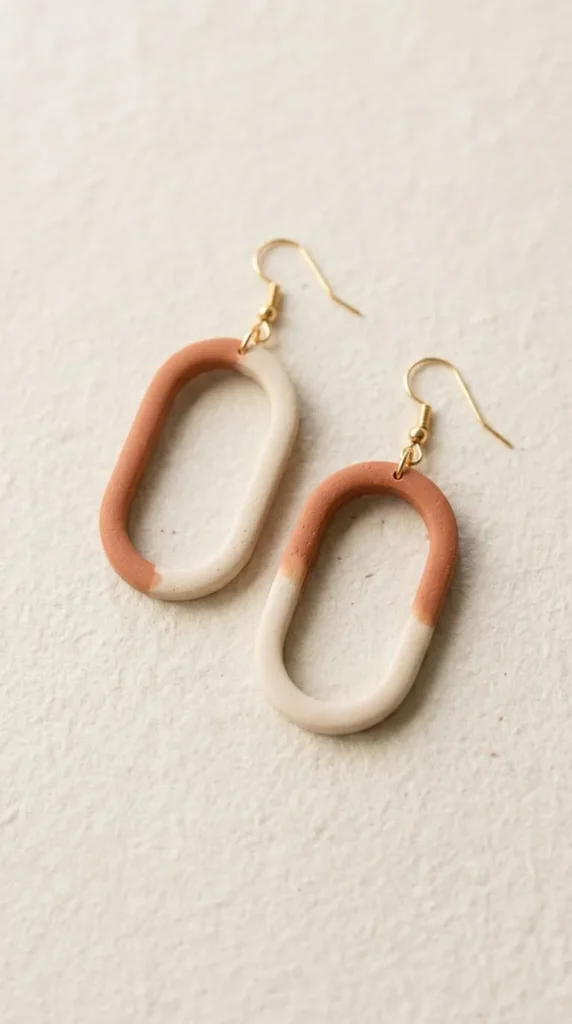
Open-frame hoop earrings create a bold outline without filling the entire shape with clay. This can help reduce material use and produce a visually light design when the clay is rolled evenly.
To make them, cut a large circle, oval, or arch from a sheet of clay. Use a smaller cutter to remove the center, leaving a consistent frame around the outside. Make sure the narrowest section is not too thin, since this area may be more likely to crack or break.
Rounded geometric shapes are easier to finish than extremely intricate outlines. You can keep the design plain or add a small contrasting detail near the bottom. Neutral shades look classic, while terracotta, mustard, and muted green create a more colorful collection.
Because the center is open, these earrings can look substantial without using as much clay as a solid shape of similar size. However, the actual weight depends on the clay thickness, dimensions, and findings, so test a sample before making a full batch.
For selling, show the open center clearly in the product photos. A side-angle image can help buyers understand the construction, while a lifestyle photo gives a sense of scale.
Bake according to the clay brand’s instructions, cool fully, and inspect the frame for weak spots. Smooth the edges and attach suitable findings. Matching frame sizes help the pair hang evenly and look professionally finished.
11. Black-and-Cream Geometric Earrings
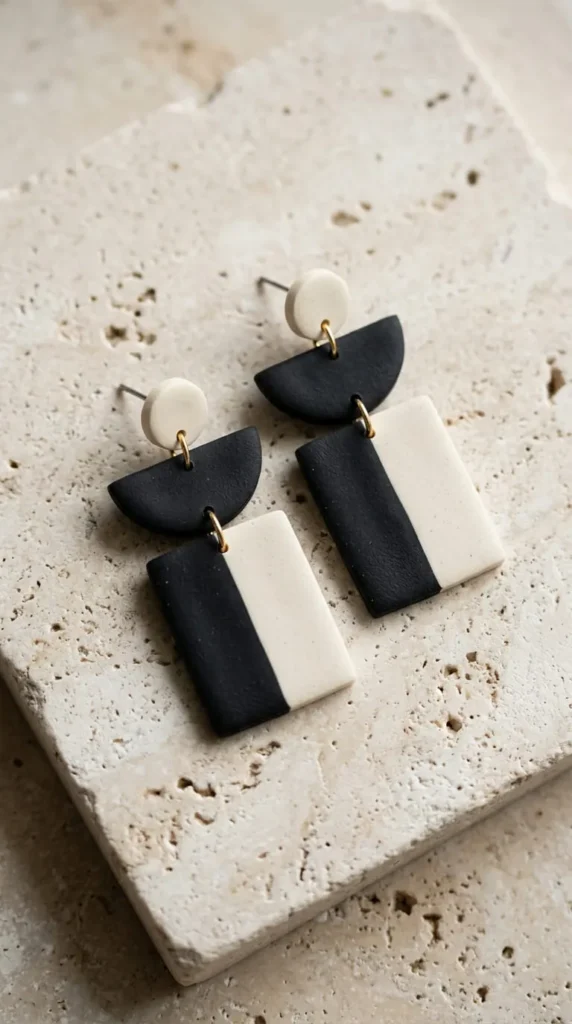
Black-and-cream earrings are a versatile option for people who like clean shapes and neutral accessories. The limited palette allows the design to stand out through proportion, pattern, and contrast rather than many colors.
Choose a few geometric forms, such as circles, semicircles, arches, or small rectangles. Cut the shapes from black and cream clay, then layer them to create a two-tone design. You can also create a checkerboard effect using small squares, provided the pieces are pressed together carefully.
Before baking, check the alignment of the layers. Small differences can make a handmade piece charming, but uneven edges may look accidental if the pattern is intended to be precise. A simple design with two well-finished layers can look more polished than one with too many details.
Try creating several coordinated styles: cream circles with black half moons, black arches with cream dots, or alternating geometric drops. These designs can appeal to customers who want accessories that work with many outfits.
Photograph the earrings against a light background so the black outlines remain clear. Include a close-up that shows the surface texture and a scale reference that helps customers understand the dimensions.
Once baked and cooled, check the edges and layer joins. Attach the findings securely and compare the pair side by side. Consistent proportions are especially important when the design depends on symmetry and clean geometric lines.
12. Ombre Gradient Clay Earrings
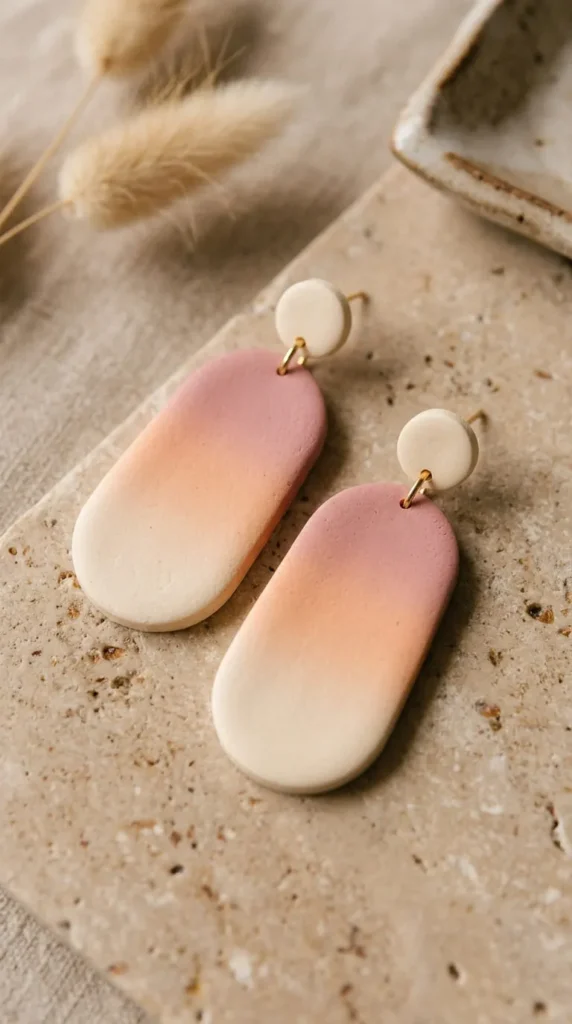
Ombre earrings feature a gradual transition between colors, creating a soft effect that looks beautiful on simple shapes. The gradient itself becomes the main decoration, so you do not need extra patterns or embellishments.
Choose two colors that blend well, such as pink and peach, blue and ivory, or sage and cream. Prepare small pieces of each color and blend them gradually, folding and rolling the clay until the transition looks smooth. Work slowly so the colors merge without becoming a single uniform shade.
Flatten the blended clay evenly, then cut your chosen shapes. Long drops and rounded arches can display the gradient clearly. Try to position the cutter so the color transition crosses the design in an attractive direction.
Making a gradient sheet large enough for both earrings helps the pair look coordinated. Even so, slight differences in the color pattern can give handmade pieces their individual character.
For a shop collection, consider using the same gradient in different shapes. This creates a recognizable visual theme while giving buyers several style choices. Use natural lighting when photographing the pieces, since harsh light may make subtle color transitions harder to see.
After baking and cooling, inspect the surface and edges. Keep the finish simple so the gradient remains visible. A small, clean metal finding can complement the soft colors without competing with the main design.
13. Gold-Foil Accent Earrings
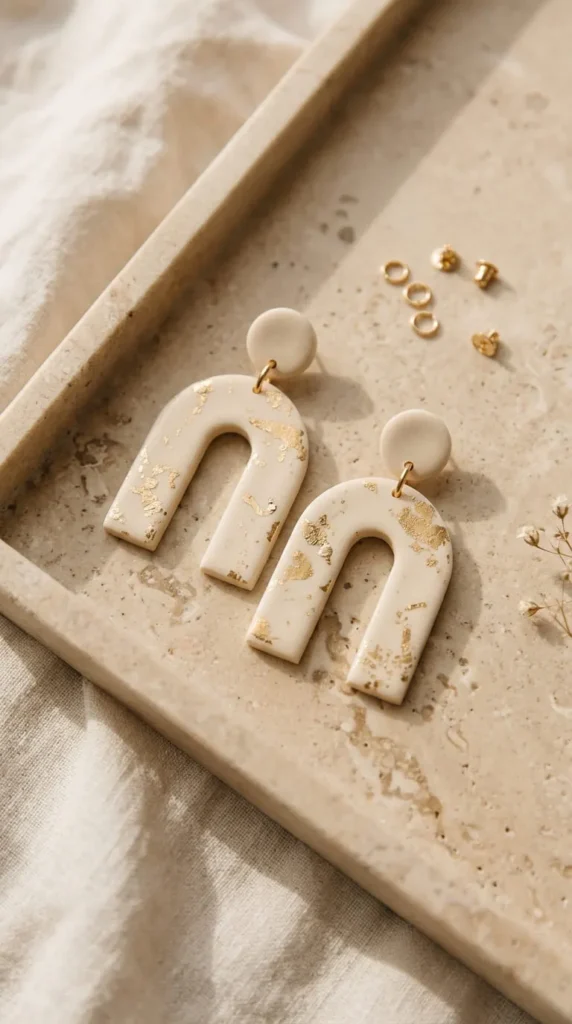
Gold-foil earrings can create a refined appearance with only a small amount of decorative material. The metallic accents catch the light, while a neutral clay base keeps the design wearable for everyday outfits and special occasions.
Choose a base color such as ivory, blush, charcoal, or terracotta. Flatten the conditioned clay evenly, then apply small pieces of suitable craft foil according to the product’s directions. Press gently so the foil adheres without creating large wrinkles or covering the entire surface.
Cut out circles, arches, or organic drop shapes. A scattered foil pattern can look more natural than placing identical pieces in exactly the same positions. If you prefer a more structured design, place a small accent near one edge of each earring.
Keep the foil decoration balanced across the pair. Too much metallic detail may distract from the clay shape, while a few carefully placed accents can give the design a polished finish.
For selling, photograph these earrings in soft natural light to show the contrast between the matte clay and metallic surface. Avoid strong glare that hides the texture. A close-up is useful because customers may want to see how the foil is distributed.
Follow the clay and foil manufacturer’s instructions for baking and finishing. Some decorative materials may react differently to heat, so test a sample before making several pairs. After cooling, check that the edges are smooth and the findings are secure.
14. Muted Rainbow Layered Arches
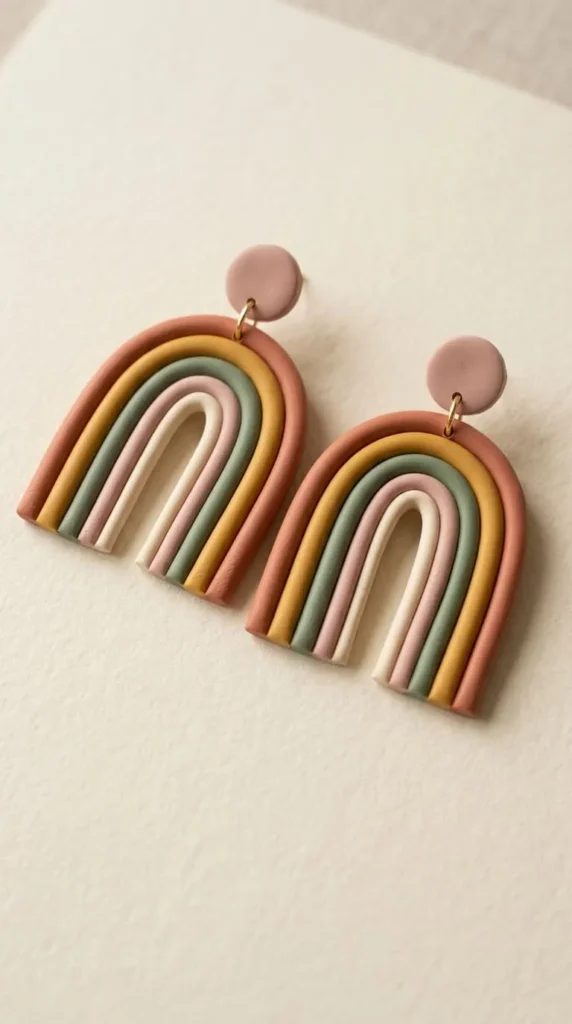
Layered rainbow arches are a colorful design that can be adapted to different seasons and personal styles. Muted shades create a calm, earthy appearance, while brighter colors make the earrings feel more playful.
Start by rolling several clay colors into thin, even sheets. Cut arches in different sizes and layer them from largest to smallest. Keep the curved edges aligned so the rainbow looks intentional. Press the layers gently together and check the sides for uneven sections.
You can use three colors for a simple design or five for a fuller rainbow. Terracotta, mustard, sage, dusty pink, and cream work well together because the shades share a warm, natural feel. If you prefer a cooler palette, try blue, lavender, pale gray, and white.
Because several layers add thickness, keep the overall design compact enough to remain comfortable. Test a sample pair before producing larger quantities, especially if you plan to sell them.
Rainbow earrings photograph well in small collections. Arrange several color combinations together, but also show each pair individually so customers can see the details. A plain background helps the curved layers stand out.
After baking and cooling, smooth the edges and inspect the layers for weak joins. Attach the findings securely and make sure both earrings have similar dimensions. Consistent layer spacing can make a simple rainbow design look carefully crafted.
15. Checkerboard Pattern Earrings
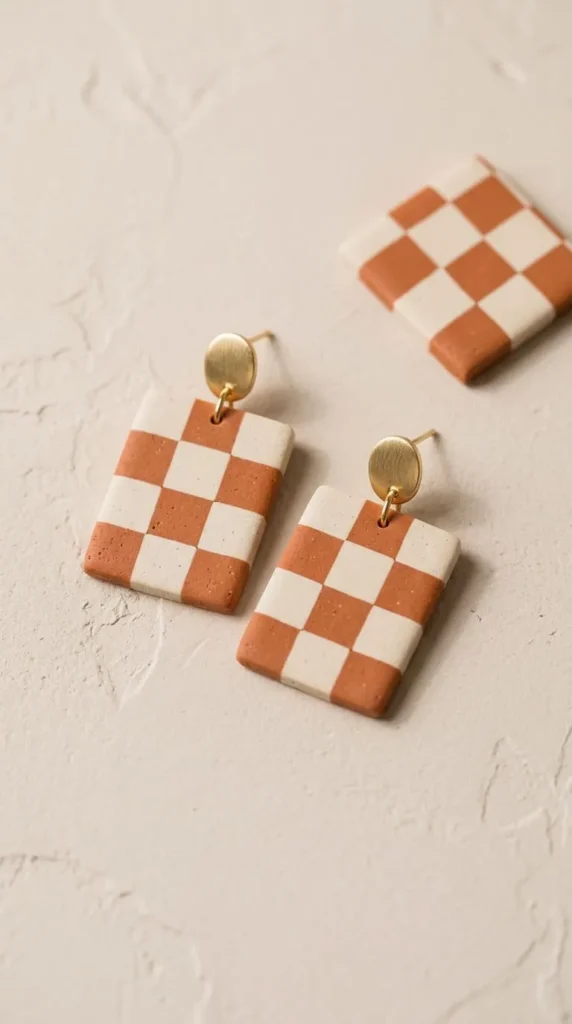
Checkerboard earrings bring a graphic pattern to a simple clay shape. The design can feel retro, playful, or modern depending on the colors and the size of the squares.
Choose two contrasting clay colors, such as black and cream, terracotta and ivory, or pink and white. Roll both colors to a similar thickness. Cut small squares and arrange them in alternating rows, pressing the edges together carefully to create a flat sheet.
Roll gently over the assembled pattern to help the pieces join. Avoid excessive pressure, which can distort the squares. Once the pattern is stable, use a cutter to create circles, arches, or rounded rectangles.
For a softer style, use muted colors and smaller checks. Larger squares create a bolder visual effect. You can also make a mismatched pair with the same colors but different shapes, keeping the overall pattern coordinated.
Checkerboard designs reward careful preparation. Check the pattern before cutting so each earring has a balanced arrangement. Small variations are natural in handmade work, but consistent thickness and clean edges help the final result look polished.
Photograph the earrings straight on to show the grid clearly. A close-up can highlight the pattern, while a separate lifestyle photo gives a sense of scale.
After baking and cooling, inspect the joins between squares and smooth the edges. Attach the findings and check that the earrings hang evenly. Offering two or three color options can make this design a useful part of a coordinated collection.
16. Scalloped Vintage-Inspired Earrings
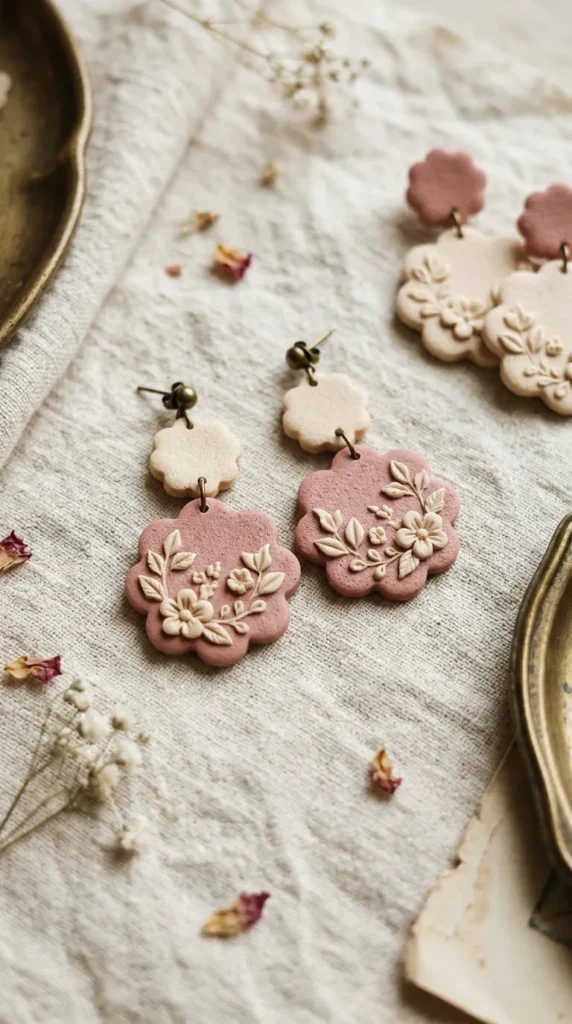
Scalloped earrings feature a rounded, repeating edge that gives a design a soft vintage character. The shape works well with muted colors, small floral details, and classic outfits.
Use a scalloped cutter if you have one, or create the shape with a series of small rounded curves. Keep the edge pattern consistent so the outline looks deliberate. A circular or oval base can help you plan the scallops before cutting the final piece.
Dusty rose, cream, pale blue, and sage are good choices for a gentle vintage palette. For a bolder version, try terracotta or deep plum. You can leave the surface plain or add a small central flower or contrasting dot.
Avoid making the scalloped edges too thin. The rounded sections should be strong enough to withstand normal handling. After cutting, smooth the perimeter carefully and check that both earrings have a similar number and size of curves.
These earrings can suit a romantic or cottage-inspired collection. Photograph them with soft fabric, simple ceramic props, or dried flowers, making sure the props do not overwhelm the shape.
Once baked and cooled, inspect each scallop for rough spots and finish the edges as needed. Attach the findings securely and compare the pieces side by side. A well-shaped outline is the main feature, so careful finishing makes a noticeable difference.
17. Abstract Wave and Fluid-Shape Earrings
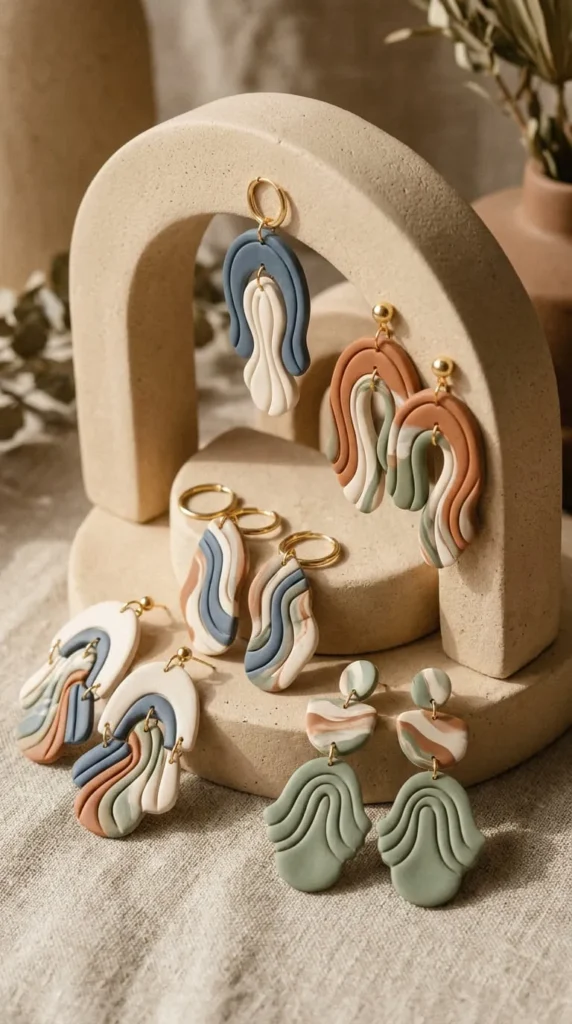
Abstract wave earrings are ideal for experimenting with freeform shapes. Their flowing curves look artistic without requiring detailed patterns, and small variations can make each pair feel individual.
Begin by sketching a simple wave or fluid outline on paper. Use it as a guide while cutting the clay, or shape the design by hand with a small craft blade. Smooth the curves with your fingertips or a suitable tool before baking.
You can create solid wave shapes or layer two colors for extra depth. Cream and sage look calm and natural, while terracotta and blue create a stronger contrast. Try to keep the design balanced so one side is not much heavier than the other.
Organic shapes can be forgiving for beginners because they do not depend on perfect symmetry. However, the edges should still be smooth, and the overall thickness should remain even. Very narrow curves may be fragile, so avoid creating delicate projections that can snap.
For product photos, use a simple background and angle the earrings slightly to reveal their sculptural outline. A close-up can show the handmade surface, while a model or display stand can demonstrate their scale.
After baking and cooling, inspect the curves and attachment points. Add findings that allow the earrings to hang naturally. If you are selling them, create a few related shapes in the same palette to form a collection without making every pair identical.
18. Monstera and Tropical Leaf Earrings
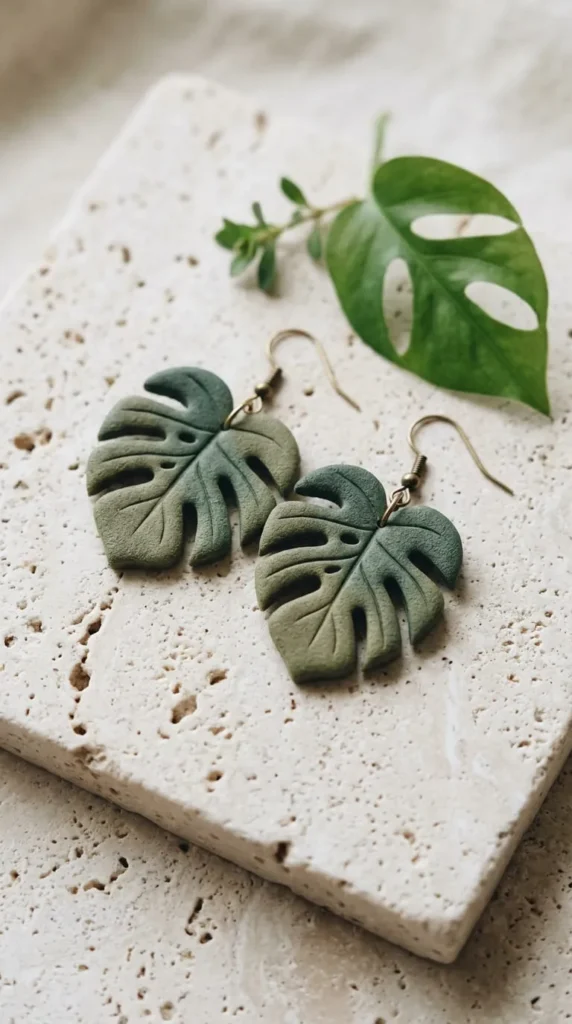
Monstera-inspired earrings are a good choice for a tropical or plant-themed collection. Their distinctive leaf shape is recognizable, while shades of green can give the design a natural appearance.
Start with a leaf outline cut from conditioned clay. Use a small blade or suitable tool to create the characteristic openings, making sure the remaining sections are wide enough to stay strong. Extremely thin bridges of clay can break, so keep the cutouts simple and balanced.
You can make small leaf studs or larger hanging earrings. Sage and olive green offer a softer look, while deep green creates stronger contrast. A subtle cream accent can add variation without taking attention away from the leaf.
Because the openings are an important part of the design, check that the clay sheet is even and the edges are smooth. Work carefully around each cutout to avoid stretching or distorting the leaf. If you are a beginner, practice on a small sample before making a larger pair.
For a handmade shop, tropical leaf earrings can sit alongside eucalyptus, daisy, and mushroom designs in a nature-inspired range. Photograph them against a neutral background, adding one real leaf as a supporting prop if desired.
Bake according to the clay manufacturer’s directions, then allow the pieces to cool completely. Inspect the narrow sections for cracks and attach the findings securely. A well-finished leaf shape can look distinctive even without additional decoration.
19. Chocolate and Caramel Marble Drops
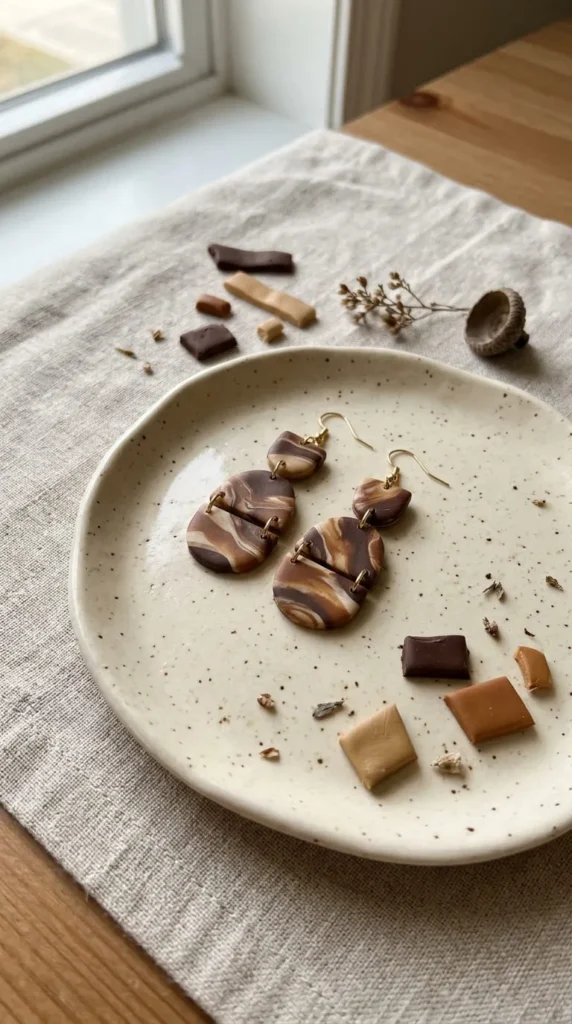
Chocolate and caramel marble earrings use warm brown shades to create a rich, understated appearance. They can suit autumn outfits, neutral wardrobes, and customers who prefer earthy colors over bright accessories.
Choose a dark chocolate brown and a lighter caramel or cream shade. Roll the colors into small logs, twist them together, and fold gently until you see a flowing pattern. Stop before the colors blend completely so the marble effect remains visible.
Flatten the clay to an even thickness and cut out rounded drops, arches, or oval shapes. Position the cutter to show the most attractive parts of the pattern. You can use the same marbled sheet for both earrings while choosing slightly different sections for a coordinated, not identical, pair.
For a deeper palette, add a small amount of rust or black. Keep the colors limited so the pattern remains clear. A glossy finish may suit some designs, but a matte surface can emphasize the handmade, natural look.
These earrings work well in seasonal product photography. Use warm neutral props and soft light to complement the brown tones without making the pieces disappear into the background.
After baking and cooling, inspect the surface and edges. Attach findings that complement the warm palette, and check that both earrings have similar weight. A few different brown combinations can form a small collection with a consistent visual theme.
20. Textured Clay Earrings Inspired by Fabric
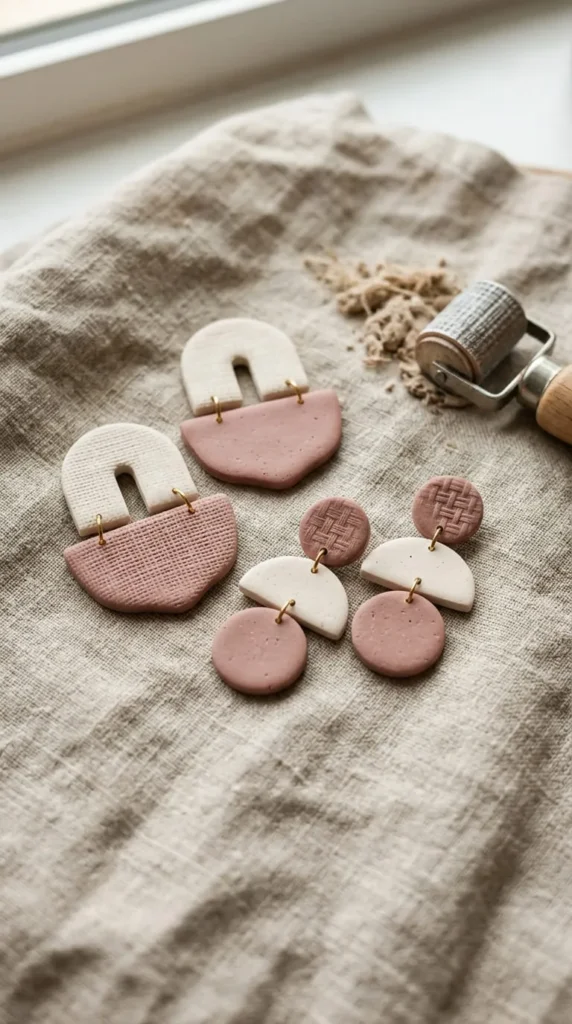
Textured earrings add interest through surface detail rather than complicated shapes. Fabric-inspired patterns can resemble linen, woven cloth, or soft embossed designs while retaining the structure of polymer clay.
Roll your conditioned clay into an even sheet. Press a clean texture mat, textured roller, or suitable fabric-like material gently onto the surface. Test the pressure on a scrap piece first, since some materials leave marks that are too deep or uneven.
Cut the textured sheet into simple shapes such as circles, arches, and rounded rectangles. Keeping the outline simple allows the texture to remain the main feature. Cream, blush, sage, and beige are useful choices because their surfaces show shadows and shallow grooves clearly.
Check the texture before baking. If the pattern is too faint, you may be able to press it again gently. If the clay becomes distorted, smooth the sheet and start over rather than trying to hide major flaws.
Textured earrings can appeal to people who enjoy natural materials and understated accessories. Photograph them with side lighting, which helps the raised and recessed areas become visible. Include a close-up so customers can see the surface detail.
Follow the clay manufacturer’s baking directions, then let the pieces cool fully. Inspect the edges and remove any rough areas. Keep the findings simple so the texture remains the main attraction, and compare the pair to make sure both have a similar finish.
21. Sunburst and Radiating-Line Earrings
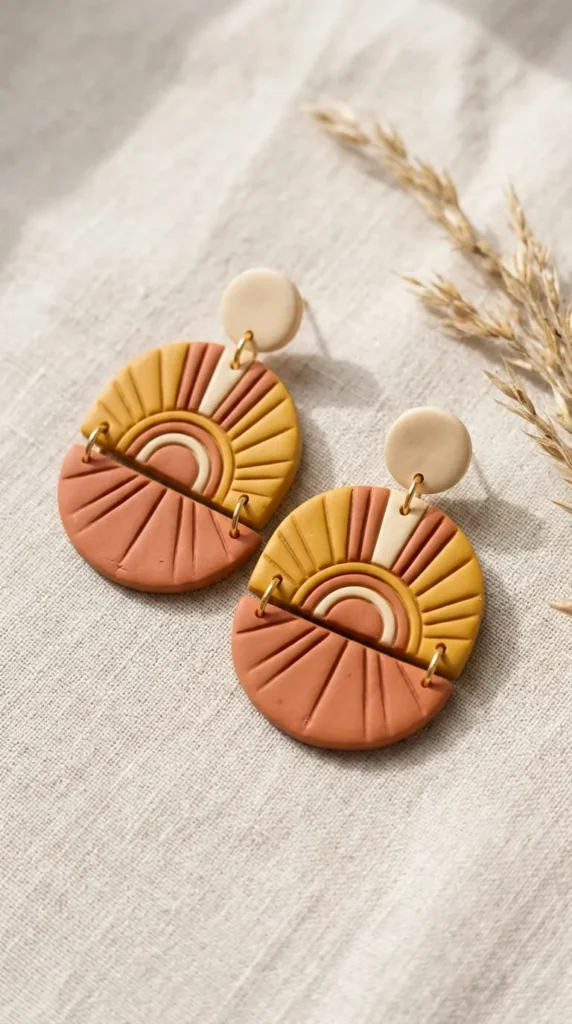
Sunburst earrings have a cheerful, retro-inspired appearance. Their radiating lines create movement, making them a good choice for colorful collections and statement accessories.
Start with a circular or semicircular base in mustard, cream, or terracotta. Use a needle tool or another suitable clay tool to press shallow lines outward from the center. Keep the grooves evenly spaced, but avoid cutting too deeply into the clay.
You can add a small contrasting circle at the center or keep the design plain. Another option is to cut short rays around the outer edge, though the projections should be broad enough to remain durable. For a beginner-friendly version, use a simple circle with pressed lines rather than many separate pieces.
Warm colors complement the sun motif, but a monochrome version in cream and brown can feel more subtle. Try making a small pair of studs and a larger drop style using the same pattern.
When photographing sunburst earrings, use light that reveals the grooves without creating harsh shadows. Show the front of the earrings clearly, since the radiating pattern is the main feature.
After baking and cooling, inspect the lines and outer edge for rough spots. Smooth the perimeter and attach the findings securely. If you are selling these earrings, make sure the pattern and size are accurately represented in the product photos so customers know what to expect.
22. Intentional Mismatched Earrings
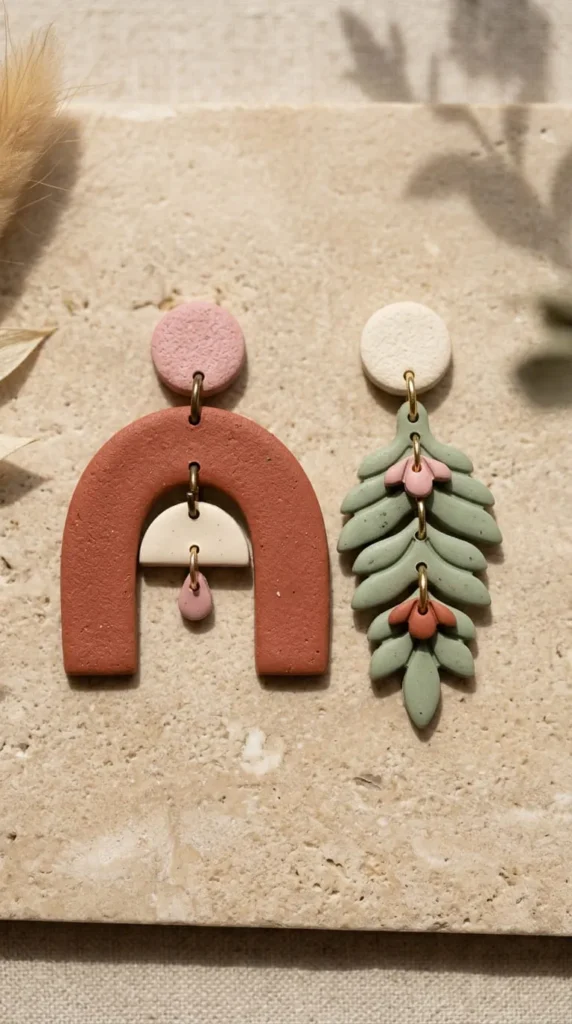
Mismatched earrings let you combine two different shapes while keeping a shared color palette or theme. The result feels playful and personal, and it gives you a chance to use designs that do not fit a traditional matching pair.
Choose a connecting idea before you begin. For example, pair a terracotta arch with a sage leaf, a moon with a star, or a flower with a simple geometric drop. Repeat one color or shape detail so the earrings look coordinated rather than unrelated.
Make each piece individually, paying attention to its weight and length. Even when the shapes differ, the pair should hang comfortably and look balanced when worn. Avoid combining a very heavy earring with a tiny, lightweight one unless the difference is part of a deliberate design and remains comfortable.
Mismatched earrings can be a creative way to build a small collection from existing designs. A floral earring could be paired with a leaf, while two geometric shapes could share the same color scheme.
For product photography, show both earrings together and make their differences clear. Include a straight-on image so buyers can understand the design before ordering. If you sell them online, describe the shapes and dimensions accurately.
After baking and cooling, check both pieces carefully and attach the findings securely. The aim is to create an intentional pair with a shared visual theme, not simply two unrelated earrings.
How to Make Your Polymer Clay Earrings Ready to Sell
Creating an attractive design is only one part of making earrings for a small business. Consistent quality, clear photographs, and realistic pricing all help customers understand the value of your work.
- Use reliable materials: Choose polymer clay and findings suitable for jewelry making. Nickel-free findings may be helpful for customers who prefer them, but avoid making medical or allergy-safety promises you cannot verify.
- Follow baking instructions: Different clay brands and products can have different temperature and timing directions. Follow the package instructions and use an oven thermometer to check the temperature.
- Finish each pair carefully: Let the clay cool completely, smooth rough edges, and check for cracks or loose details. Avoid breathing sanding dust; use appropriate dust-control methods and clean up carefully.
- Calculate your price: Include clay, findings, packaging, your working time, selling fees, and other business expenses. Compare similar products to understand your market, but do not copy another seller’s price without calculating your own costs.
- Take clear product photos: Use natural light, a simple background, and several angles. Show the full pair, close-up details, and a scale reference so customers can judge the size.
- Write accurate listings: Describe the shape, colors, dimensions, materials, and care instructions. Use the phrase “polymer clay earrings” naturally in your product title and description, alongside specific design terms that match the item.
Start with a small batch of designs and test how they look, feel, and wear before producing larger quantities. This gives you time to improve your technique and identify the styles that customers respond to most.
Conclusion
Polymer clay earrings offer plenty of room for creativity, whether you prefer earthy arches, delicate flowers, colorful checkerboards, or unusual mismatched shapes. You can begin with a few basic tools and gradually explore new patterns, textures, and color combinations as your skills improve.
For the best results, focus on even thickness, careful conditioning, correct baking, smooth edges, and secure findings. If you plan to sell your earrings, keep your product photos clear, calculate your costs thoughtfully, and describe each design honestly.
Choose two or three ideas from this list, make a small test batch, and experiment with your own colors. With practice and attention to detail, you can develop a collection of handmade polymer clay earrings that reflects your style and gives customers something special to wear.