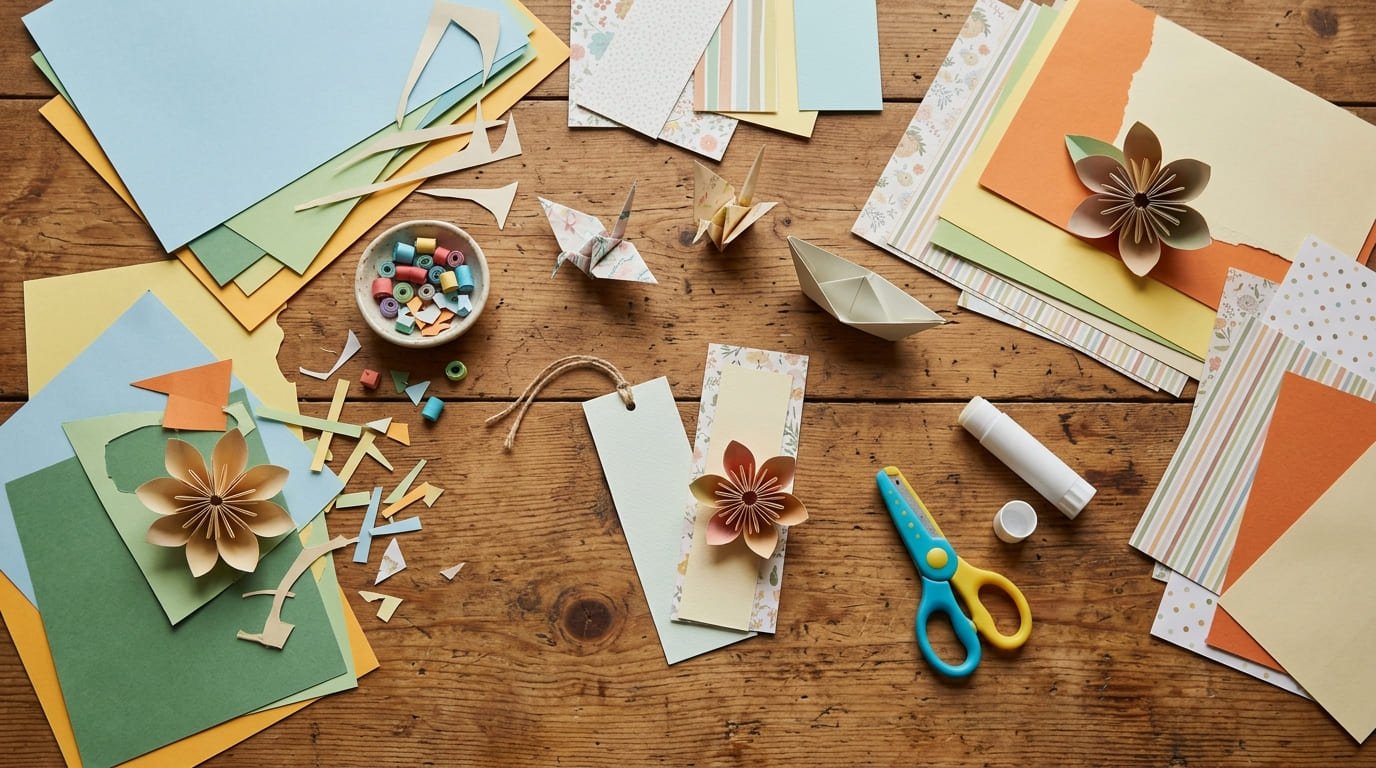
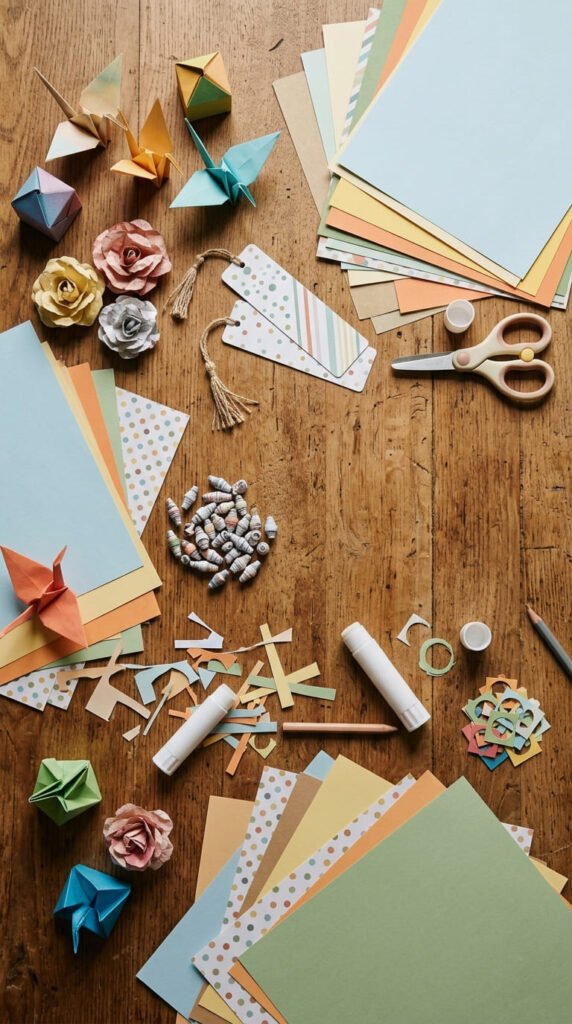
Paper crafting is an enjoyable way to turn ordinary sheets of paper into useful decorations, thoughtful gifts, and playful creations without spending much money. If you are new to DIY projects, easy paper crafts for beginners offer a simple starting point because most ideas use supplies you may already have at home. A few sheets of printer paper, colored cardstock, scissors, a ruler, and a glue stick can open the door to dozens of creative possibilities. You can try simple origami, make handmade greeting cards, decorate your room with paper garlands, or reuse old magazines for colorful collages. The best part is that you do not have to draw perfectly or master complicated techniques to get a pleasing result. This collection includes 24 beginner-friendly paper craft ideas, from quick five-minute activities to more detailed projects you can enjoy at your own pace. Each idea includes practical instructions, helpful material choices, and ways to make the finished piece your own.
1. Make a Simple Origami Heart
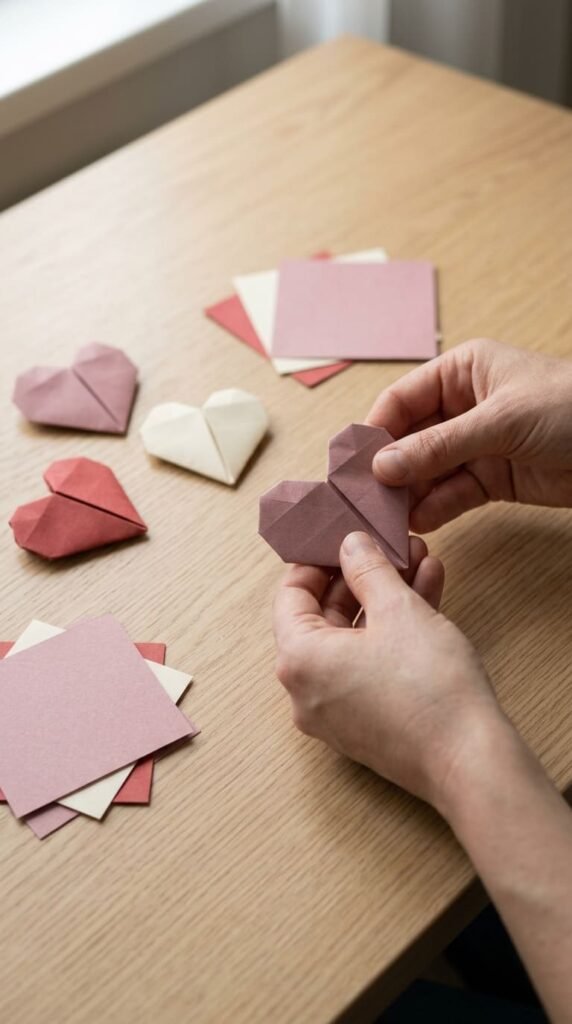
An origami heart is a lovely first project because it teaches you how to fold paper into a recognizable shape without glue or complicated equipment. Use it as a bookmark decoration, a small gift insert, or a handmade Valentine’s Day surprise.
Materials: One square sheet of thin paper, a ruler for measuring, and scissors to trim a rectangular sheet into a square.
How to make it:
- Place the paper with its colored side facing down.
- Fold it in half horizontally, open it, and repeat vertically to create guide creases.
- Fold the top corners toward the center line.
- Turn the paper over and fold the pointed lower section upward.
- Fold the remaining corners inward to soften the heart’s shape.
- Adjust the edges until both sides look balanced.
Thin origami paper is easier to manipulate than heavy cardstock. If you only have printer paper, cut a square measuring about 6 inches on each side.
Beginner tip: Press each crease with your fingertip or the edge of a ruler. Uneven folds can make the heart look lopsided, so line up the edges before pressing firmly.
Make several hearts in different sizes for a handmade card or a decorative paper garland. This project is also suitable for a supervised family craft session.
2. Create a Fox Corner Bookmark
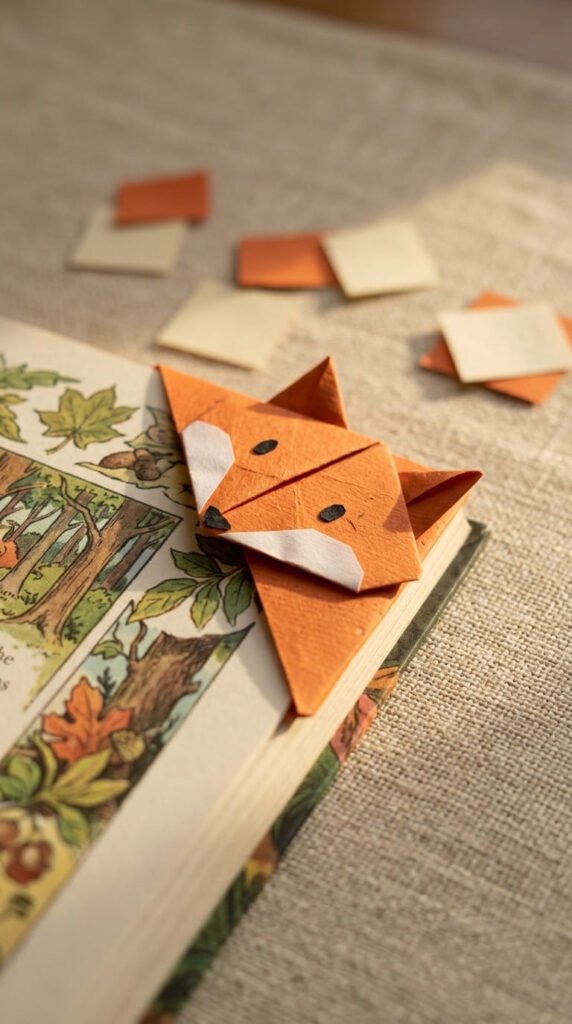
A corner bookmark slips over a page instead of hanging out of the book. This makes it useful for novels, school notebooks, journals, and reading logs. The fox design adds personality without requiring advanced drawing skills.
Materials: Orange construction paper, a small piece of white paper, scissors, glue stick, and a black marker.
How to make it:
- Cut a square of orange paper about 6 inches wide.
- Fold it diagonally into a triangle.
- Fold the two outer corners upward to meet the top point.
- Open the last two folds and bring one top layer down to form a pocket.
- Tuck the outer corners into the pocket.
- Cut two small orange ears and white cheek shapes.
- Glue the details in place and draw the eyes and nose.
The folded pocket should fit comfortably over a page corner. If it feels too tight, start again with a larger square or loosen the creases slightly.
Personalization idea: Use brown paper for a woodland fox, gray for a wolf, or yellow for a cat-inspired character. You can also make a plain geometric version using patterned scrapbook paper.
This craft works well for classroom reading activities and inexpensive party favors. For younger children, prepare the square pieces ahead of time and let them decorate the finished bookmarks.
3. Fold a Paper Boat That Floats
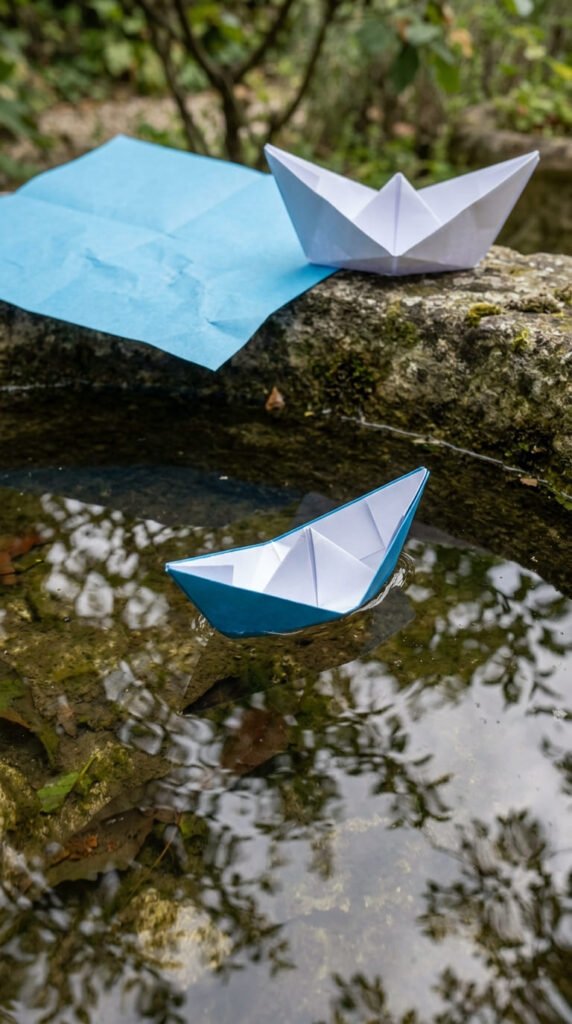
A traditional paper boat is a satisfying introduction to folding because a flat sheet becomes a three-dimensional object. It is ideal for rainy-day activities, simple science play, or a short craft session with children.
Materials: One rectangular sheet of lightweight paper. Printer paper works well for folding practice.
How to make it:
- Place the sheet vertically and fold it in half from top to bottom.
- Fold the upper corners toward the center to form a triangle.
- Fold the bottom strips upward on both sides.
- Open the triangle from underneath and press it into a square.
- Fold the lower point upward on both sides.
- Open the new triangle into another square.
- Pull the upper corners apart gently to reveal the boat.
Run a finger along each fold before moving to the next step. If the two sides are uneven, reopen the previous fold and align the corners.
Make it more playful: Draw waves, add a paper flag, or create a small fleet using different colors. Avoid attaching heavy decorations because they can affect balance.
You can test the boats in a shallow basin or sink under adult supervision. Ordinary paper softens when wet, so these boats are best treated as short-lived play objects rather than waterproof toys.
4. Design a Colorful Paper Butterfly
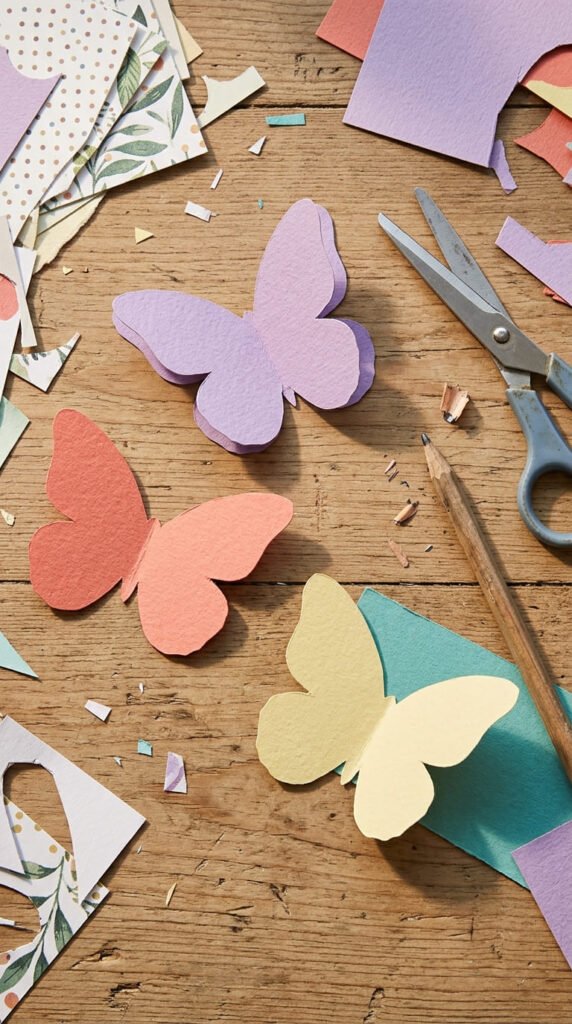
Paper butterflies are an easy way to practice symmetrical cutting while creating decorations for bedrooms, greeting cards, classroom displays, and spring-themed crafts. The basic shape can be simple, so there is no need for perfect drawing.
Materials: Colored paper, pencil, scissors, and glue or removable tape.
How to make it:
- Fold a rectangular sheet in half.
- Draw half a butterfly along the folded edge.
- Cut around the outline while keeping the fold connected.
- Open the paper to reveal matching wings.
- Fold a narrow strip of contrasting paper around the center to create a body.
- Curl the ends of two thin paper strips for antennae.
- Attach the body and antennae with a small amount of glue.
For a layered effect, make a second butterfly slightly smaller and glue it onto the first one. Choose contrasting colors so the wing shapes remain visible.
Decoration tip: Add tiny paper circles, strips, or simple geometric shapes instead of drawing every detail. This creates a patterned design while using leftover scraps.
To attach butterflies to a wall, use removable adhesive suitable for the surface. For a card, glue only the center body so the wings can lift slightly. Children can take part in choosing colors and arranging patterns, with an adult helping younger crafters use scissors safely.
5. Make a Folded Paper Fan
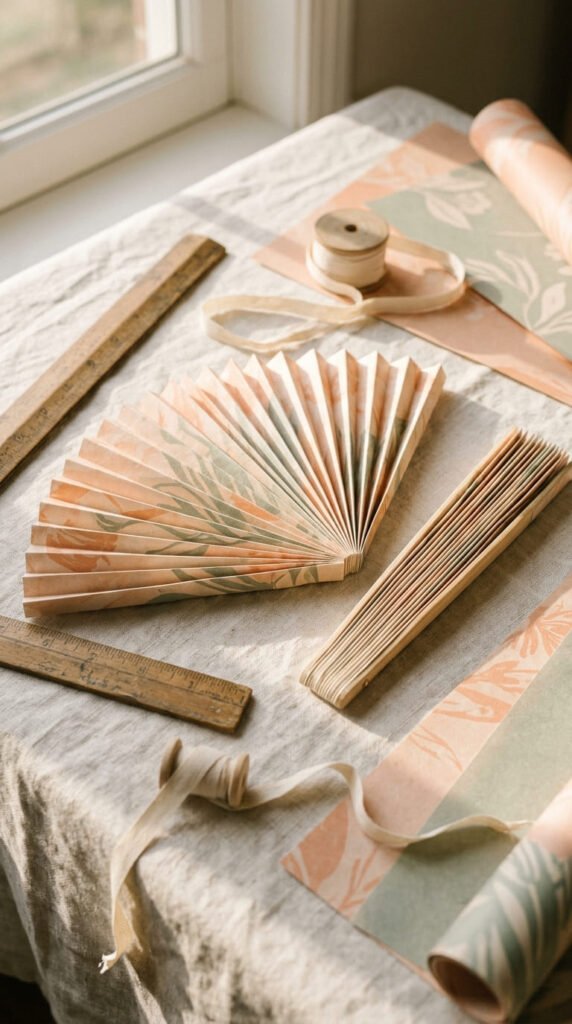
A folded paper fan turns a simple rectangle into a decorative accessory for a desk, party table, or bedroom wall. It is a good project for learning the accordion fold, a technique also used for rosettes and paper lanterns.
Materials: One rectangular sheet of lightweight cardstock or sturdy colored paper, a ruler, pencil, glue, and optional craft sticks.
How to make it:
- Place the paper horizontally.
- Mark equal intervals of about half an inch along the top and bottom edges.
- Fold the paper forward at the first mark.
- Turn it over and fold backward at the next mark.
- Repeat until the entire sheet forms narrow pleats.
- Pinch one end together and secure it with glue.
- Fan out the opposite end to create the curved shape.
For a handheld version, attach a craft stick to each side of the gathered end. Let the glue dry before opening the fan.
Design idea: Use floral paper for a garden party, metallic cardstock for a celebration, or plain cream paper with painted edges for understated room décor.
If the pleats become uneven, unfold only the affected section and realign the marks. A ruler helps keep the folds consistent. Avoid paper that is too thick, since heavy cardstock can resist repeated bending and make the fan difficult to open.
6. Cut a Daisy From Layered Paper
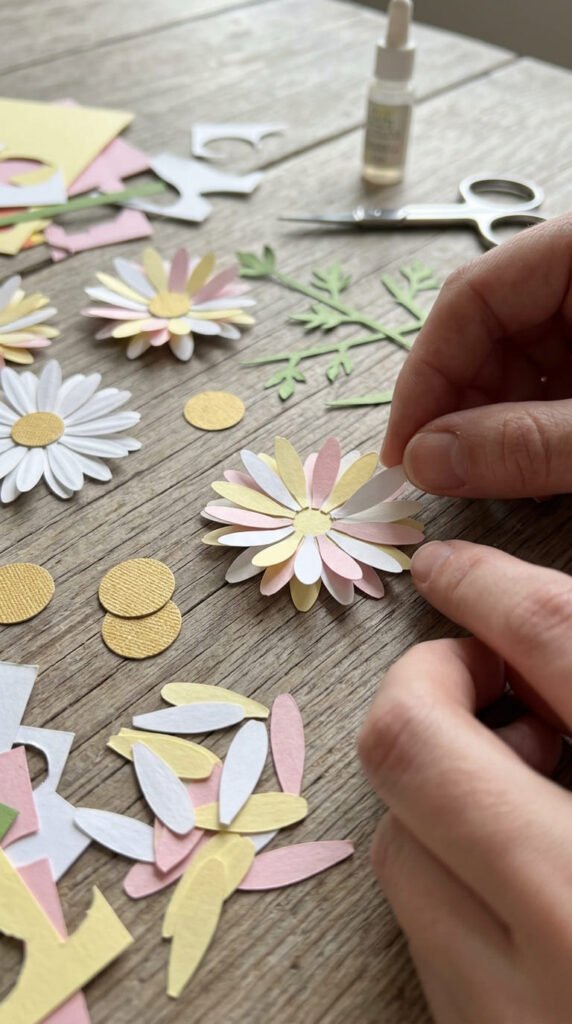
Paper daisies are cheerful decorations for handmade cards, gift wrapping, scrapbooks, and small bouquets. Unlike folded origami, this project focuses on cutting and layering shapes, making it suitable for people who prefer a visual craft.
Materials: Two or three colors of paper, pencil, scissors, glue stick, and optional green paper for stems.
How to make it:
- Draw a small circle on yellow paper for the flower center.
- Fold white paper in half and draw a long rounded petal along the fold.
- Cut out the shape and unfold it to form a pair of petals.
- Repeat until you have eight to twelve petals.
- Arrange the petals in a circle, overlapping their inner ends slightly.
- Glue the yellow center over the joins.
- Add a second layer of smaller petals if you want more depth.
You can make a single flower in around 15–20 minutes once you are comfortable cutting the petals.
Useful variation: Make the petals different lengths for a more relaxed, handmade appearance. Perfect symmetry is not required for the flower to look attractive.
For a greeting card, use a small flower and press it flat under a book while the glue dries. For a paper bouquet, attach the finished flower to a rolled green paper stem. Keep the stem lightweight so the petals do not bend out of shape.
7. Craft a Paper Chain Garland
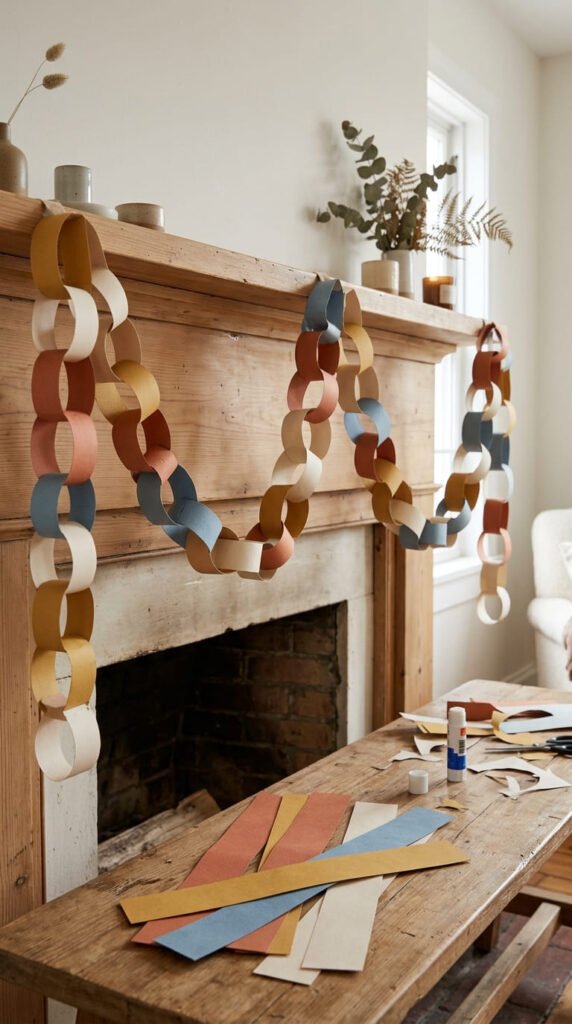
A paper chain garland is one of the easiest DIY paper crafts for birthdays, classroom celebrations, seasonal decorations, or a child’s bedroom. Repeating the same simple action creates a long decoration without complicated cutting patterns.
Materials: Colored construction paper, ruler, pencil, scissors, and glue stick or double-sided tape.
How to make it:
- Cut paper into strips roughly 1 inch wide and 6 inches long.
- Curve one strip into a loop.
- Secure its ends with glue or tape.
- Pass a second strip through the first loop.
- Close the second strip into another loop.
- Continue linking strips until the garland reaches your preferred length.
Alternate colors in a repeating pattern or mix them randomly for a playful look.
Save-time tip: Cut a stack of strips before assembling the chain. This is particularly useful for group activities, birthday parties, and classroom craft stations.
For a seasonal decoration, choose orange and black for Halloween, green and red for Christmas, or pastel shades for spring. Reuse clean scraps from other paper projects to reduce waste.
Hang the finished garland with removable hooks or low-tack tape. Keep it away from open flames, hot bulbs, and other heat sources. For toddlers, an adult should handle scissors and supervise the finished decoration.
8. Build a Paper Pinwheel
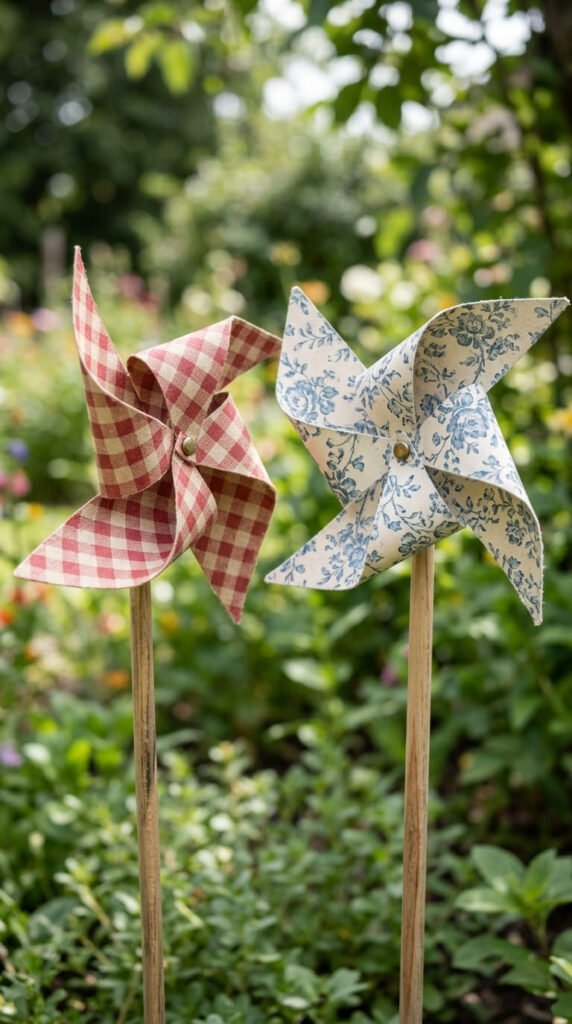
A paper pinwheel adds movement to a plant pot, picnic table, party centerpiece, or garden decoration. The folds are simple, but the finished shape looks more complex than the materials suggest.
Materials: A square of medium-weight paper, pencil, ruler, scissors, a paper fastener, a straw or wooden stick, and an adult’s help with any sharp fastening parts.
How to make it:
- Draw diagonal lines between opposite corners of the square.
- Cut along each line, stopping about an inch before the center.
- Bring every other corner toward the middle.
- Hold the gathered corners together.
- Secure them with a suitable paper fastener.
- Attach the fastener to the stick without crushing the paper.
Use paper that is firm enough to hold its shape but flexible enough to fold. Very thick cardstock can make the blades stiff, while tissue paper may tear.
Creative variation: Cut two squares in different colors and place them back to back before folding. This creates a pinwheel with contrasting sides.
A paper pinwheel may spin when air moves across its blades, but the fastening must remain loose enough for movement. Test it gently before taking it outdoors. For young children, have an adult assemble the fastener and stick, then let them decorate the paper and choose the colors.
9. Turn Magazine Pages Into Paper Beads
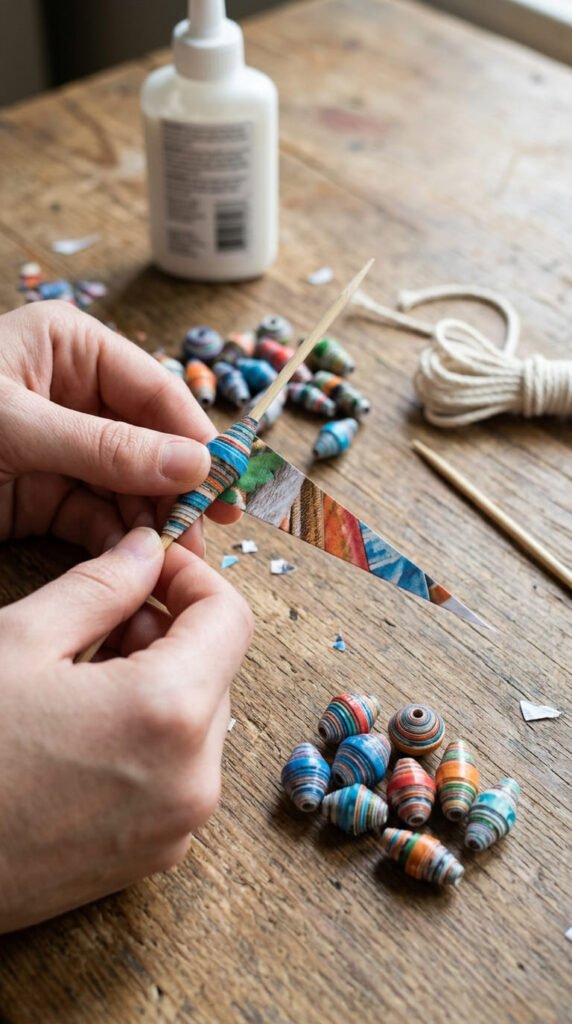
Paper beads are a clever way to reuse old magazines, catalogs, or colorful wrapping paper. Once rolled and dried, they can be used in lightweight necklaces, bracelets, keychains, or decorative garlands.
Materials: Magazine pages, ruler, pencil, scissors, wooden skewer, craft glue, and string.
How to make them:
- Cut long triangles from a magazine page, keeping the base wide and the tip narrow.
- Place the wide end around a skewer.
- Roll the paper tightly toward the narrow tip.
- Add a small amount of glue near the end.
- Press the tip down and slide the bead off the skewer.
- Allow it to dry completely before threading.
The shape of the triangle determines the bead’s appearance. Long, narrow triangles create elongated beads, while shorter triangles produce rounder shapes.
Make a coordinated set: Select pages with similar colors, such as blues and greens, or combine neutral paper with a few bright accents. You can also alternate paper beads with wooden beads on a string.
Keep glue away from the inside hole so the skewer can be removed easily. For longer-lasting beads, apply a suitable clear craft sealer after the glue dries, following its label instructions. These beads are decorative rather than waterproof, so keep them away from rain and water.
10. Create a Torn-Paper Landscape Collage
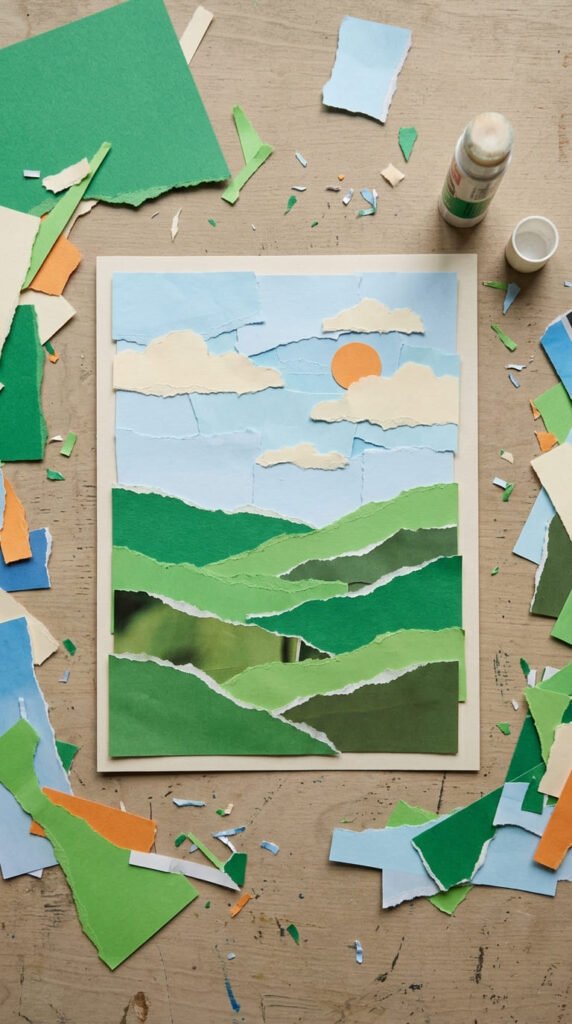
A torn-paper collage is ideal for anyone who finds precise cutting difficult. Instead of drawing detailed outlines, you build a scene by arranging colored paper pieces and letting their edges create the shapes.
Materials: Old magazines or colored paper, a backing sheet, glue stick, and pencil.
How to make it:
- Choose a simple subject, such as a sunset, garden, mountain scene, or seaside view.
- Tear a large blue piece for the sky.
- Add overlapping strips of green or brown paper for the ground.
- Tear smaller pieces for trees, flowers, clouds, or buildings.
- Arrange the pieces before applying glue.
- Glue the largest shapes first, then add the smaller details.
Work from the background toward the foreground. This makes the layers easier to organize and gives the picture a sense of depth.
Beginner tip: Keep a small gap between some shapes if you want the backing paper to act as a natural outline. Alternatively, overlap the edges for a continuous scene.
This craft suits adults, children, and mixed-age groups because everyone can choose a different subject and color palette. Use a cardboard backing for a firmer finished piece.
Save the unused scraps in separate color piles. They can become flowers, mosaic pieces, or decorative accents in later projects instead of going straight into the bin.
11. Make a Geometric Paper Mosaic
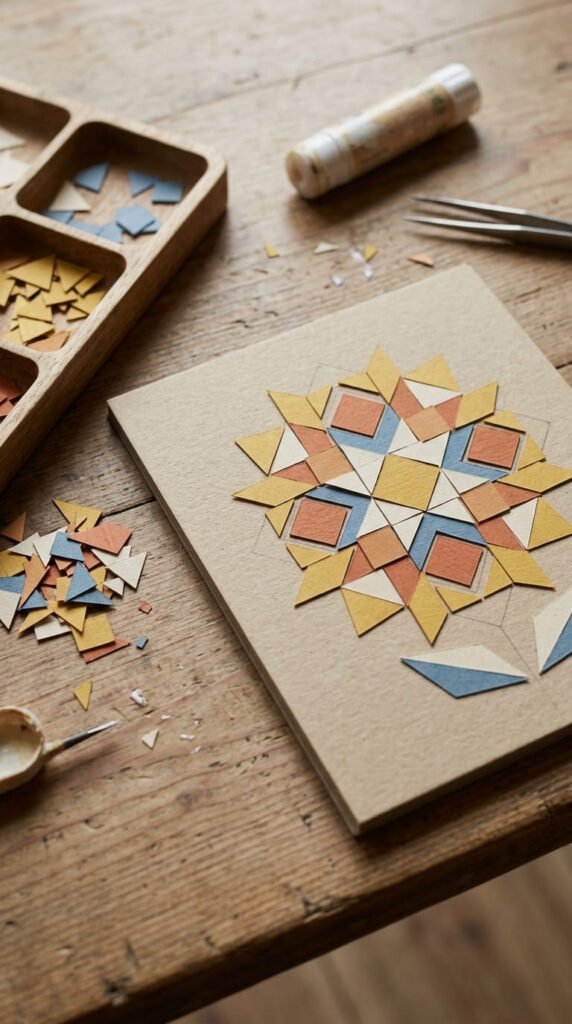
A paper mosaic turns small leftover pieces into a larger pattern. It is a practical craft for using scraps that are too small for other projects, and it can be adapted to greeting cards, wall art, or notebook covers.
Materials: Paper scraps, cardstock backing, pencil, ruler, scissors, and glue stick.
How to make it:
- Draw a simple outline, such as a leaf, sun, fish, or house.
- Cut scraps into small squares, triangles, or irregular pieces.
- Arrange the pieces inside the outline without gluing them.
- Start filling the outer edges to establish the shape.
- Place the remaining pieces toward the center.
- Glue each piece down, leaving narrow gaps if you prefer a tiled appearance.
Choose a limited palette of three or four colors. Too many competing shades can make a small design harder to read.
Easy first project: Fill a paper circle with triangles to create a sunburst. For children, prepare a simple outline and pre-cut larger pieces so they can focus on arranging colors.
If a piece does not fit, trim it slightly or replace it rather than forcing it into place. Small gaps are part of the mosaic style and do not have to be hidden.
Mount the completed design on a firm card base. It can become a handmade birthday card, a framed mini artwork, or a decorative label for a craft storage box.
12. Design a Handmade Greeting Card
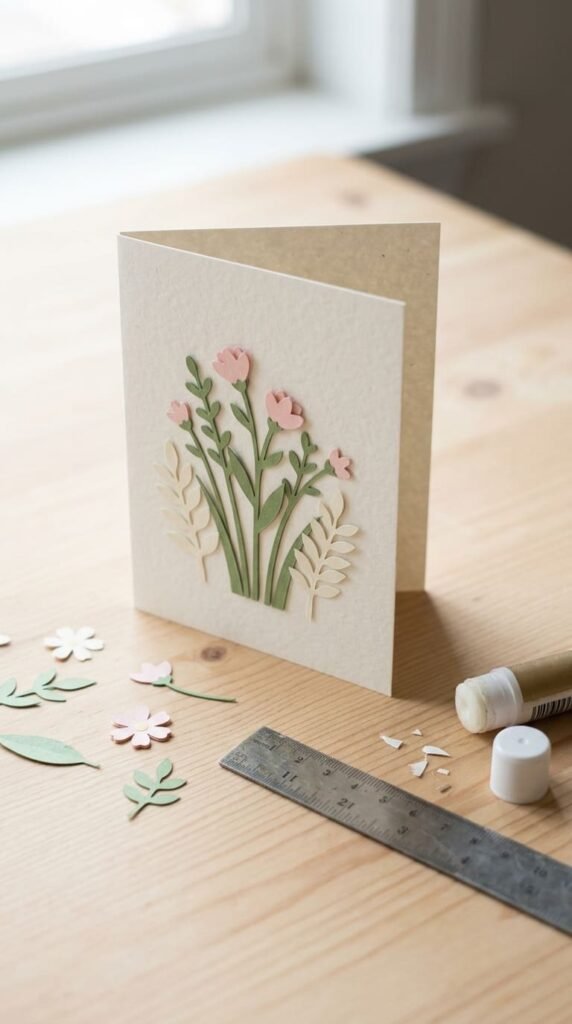
A handmade greeting card gives you a practical reason to experiment with paper layering, color combinations, and simple shapes. You can adapt the design for birthdays, thank-you notes, celebrations, or a message to a friend.
Materials: Blank cardstock, colored paper, ruler, scissors, pencil, and glue stick.
How to make it:
- Fold a sheet of cardstock in half to create the card base.
- Cut a rectangle of colored paper slightly smaller than the front.
- Attach it to the center, leaving a narrow border.
- Cut small shapes such as flowers, circles, stars, or leaves.
- Arrange the shapes on the front before gluing.
- Press each piece flat and let the adhesive dry.
- Write your personal message inside after the design is complete.
For a clean appearance, use one main motif and two supporting colors. A simple arrangement often looks more balanced than filling every empty space.
Practical tip: If the card will be mailed, avoid large raised decorations that can catch on envelopes or increase postage. Flat paper shapes are easier to package and protect.
You can make a matching envelope from lightweight paper using a template, or reuse a suitable plain envelope and decorate it with a small paper flower. Store finished cards between sheets of clean paper so their corners stay neat until you are ready to give them away.
13. Make a Beginner Pop-Up Card
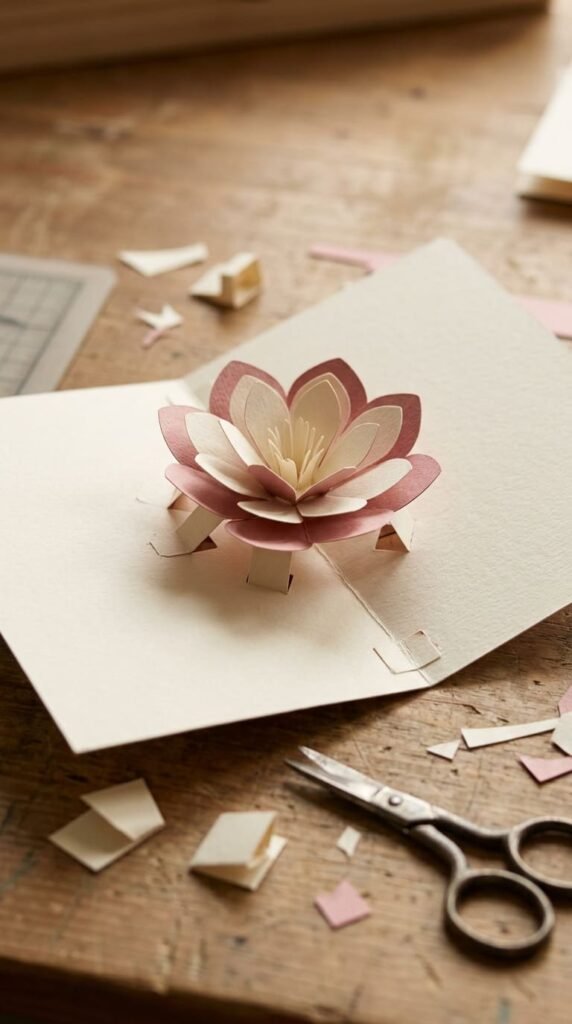
A pop-up card adds a small surprise when the recipient opens it. Although the result looks intricate, a basic version can be made using a single folded tab rather than a complicated paper mechanism.
Materials: Two sheets of cardstock, pencil, ruler, scissors, and glue stick.
How to make it:
- Fold one sheet of cardstock in half.
- Along the folded edge, mark two short parallel lines about an inch apart.
- Cut along both lines, stopping at the marked ends.
- Open the card slightly and push the cut strip inward to form a tab.
- Fold the tab firmly so it moves inside the card.
- Cut a simple flower, heart, or star from a second sheet.
- Attach the shape to the front of the tab.
- Glue the folded card onto a second cardstock sheet, keeping glue off the moving tab.
Open and close the card slowly to check that the decoration folds inward without catching.
Design tip: Keep the pop-up shape light and relatively small. Heavy decorations can pull the tab out of position.
For a first attempt, practice with scrap paper before using your final cardstock. If the tab looks uneven, trim the cut lines or refold the crease carefully. This project is ideal for birthdays, anniversaries, and handmade keepsakes when you want something more interactive than a flat greeting card.
14. Roll a Paper Rosette for Party Décor
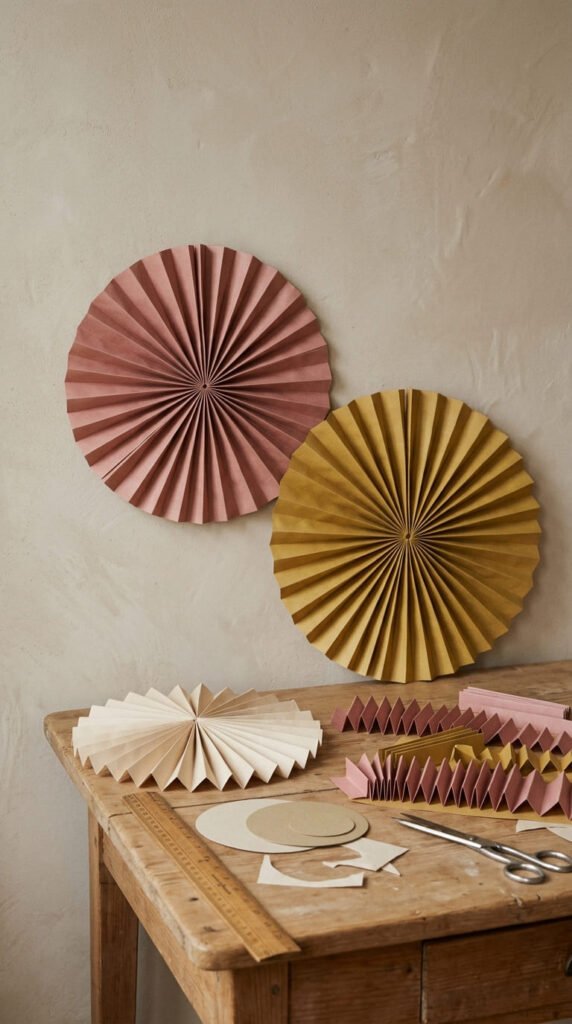
Paper rosettes are circular decorations made from pleated strips. They can be used for birthday backdrops, gift toppers, classroom displays, or seasonal wall arrangements. The repeated folds create texture without requiring drawing skills.
Materials: Two or three long strips of lightweight cardstock, ruler, scissors, glue, and small cardstock circles.
How to make it:
- Cut two matching paper strips, each about 2 inches wide.
- Score or mark equal intervals along each strip.
- Fold the strips back and forth in an accordion pattern.
- Join the short ends to form one long ring.
- Gently press the ring inward until the pleats form a circle.
- Glue a cardstock circle to the center on each side to hold the shape.
Use a firm backing circle and allow the glue to dry before hanging the decoration. If the rosette springs open, add a larger backing circle or use a stronger paper adhesive suitable for cardstock.
Try a layered design: Place a small rosette over a larger one, or add a contrasting circle at the center. Metallic paper can work well for celebrations, while kraft paper creates a more rustic look.
These decorations are easiest to make on a flat surface. Keep your fingers close to the center as you press the pleats together, and ask another person to help hold the shape if it keeps opening.
15. Try Paper Quilling With a Simple Flower
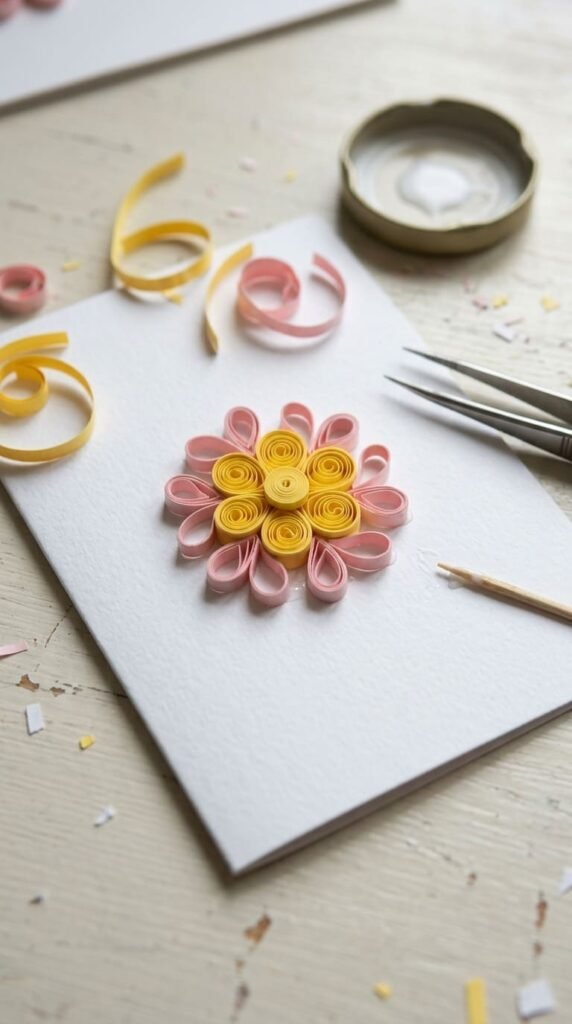
Paper quilling uses narrow strips rolled into coils and shaped into decorative forms. The technique can appear complicated, but a small flower made from basic coils is a manageable first project.
Materials: Narrow paper strips, toothpick or quilling tool, glue, tweezers, and a card base.
How to make it:
- Wrap one strip tightly around a toothpick.
- Release it slightly to create a loose coil.
- Glue the loose end in place.
- Pinch one side of the coil to make a teardrop.
- Repeat until you have five or six petals.
- Arrange the petals around a small center coil.
- Glue the flower onto a card or firm backing sheet.
Choose strips of similar width so the petals look consistent. If the paper keeps unrolling, use a small amount of glue at the end rather than coating the whole strip.
Beginner tip: Start with one flower instead of a large arrangement. The small scale makes it easier to learn how tightly to roll the paper and how much pressure to use when shaping each petal.
A quilled flower can decorate a gift tag, notebook cover, or handmade greeting card. Keep the finished piece away from moisture and store it flat to protect the raised coils. Children can help arrange the petals, while an adult assists with small pieces and glue.
16. Fold an Accordion Paper Lantern
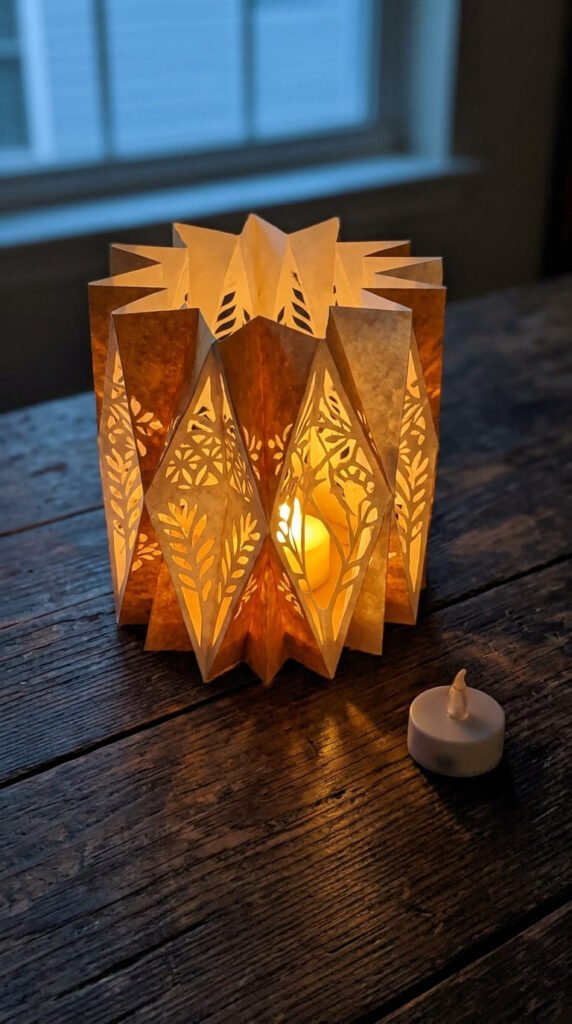
A paper lantern creates a cozy decorative effect for a shelf, table centerpiece, or seasonal display. This beginner version uses folded cardstock and an LED light rather than a real candle.
Materials: Cardstock, ruler, pencil, scissors, glue or double-sided tape, and a battery-powered LED tea light.
How to make it:
- Cut a rectangle of cardstock to your preferred lantern height.
- Fold the sheet into an accordion pattern.
- Draw simple shapes between the folds if you want decorative openings.
- Cut out the shapes carefully, leaving enough paper to hold the structure together.
- Join the short ends to form a cylinder.
- Add a flat cardstock base if the lantern will stand on a table.
- Place an LED tea light nearby or inside only if the construction leaves adequate space and does not obstruct the light.
Use medium-weight cardstock for a structure that stands upright. Very thin paper can collapse, while thick board may be difficult to fold evenly.
Decoration idea: Add a contrasting inner layer to create colorful openings. You can also use a simple silhouette pattern for a winter or autumn display.
Never use an open flame with a paper lantern. Keep battery lights dry and follow the product’s instructions. If your lantern leans, check that the base is level and that the top and bottom edges align before the glue sets.
17. Create a Mini Paper Gift Bag
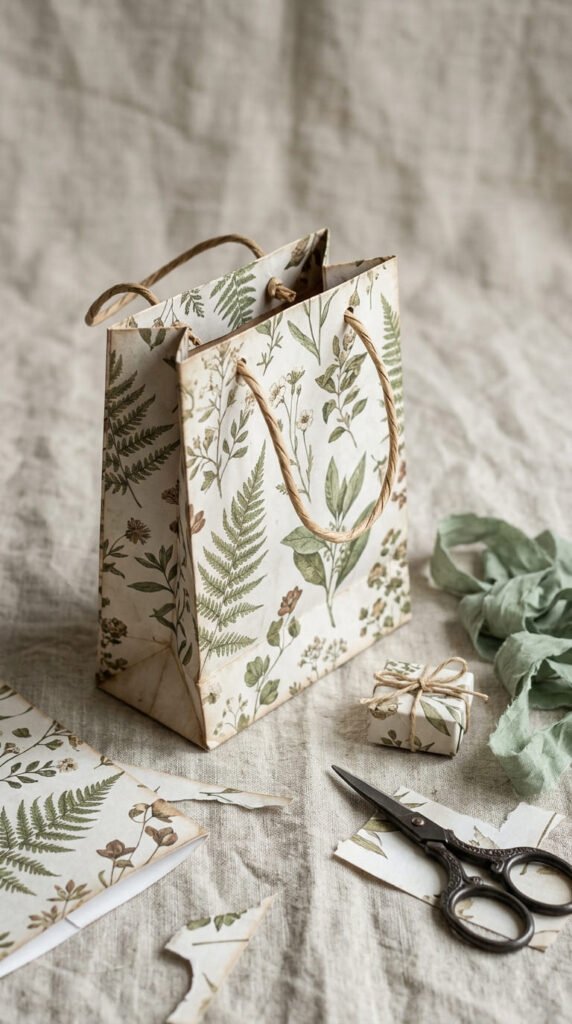
A mini paper gift bag is useful for small presents, handmade jewelry, party favors, and gift cards. Making one from patterned paper lets you coordinate the packaging with the occasion.
Materials: A rectangular sheet of sturdy decorative paper, ruler, pencil, double-sided tape or craft glue, scissors, and optional paper for handles.
How to make it:
- Place the patterned side down.
- Fold the left and right edges toward the center, overlapping them slightly.
- Secure the overlap with tape or glue.
- Fold the bottom edge upward to create a base.
- Open the bottom fold and flatten the corners into triangles.
- Fold the upper and lower flaps inward and secure them to form a flat base.
- Fold the side edges inward slightly to create gussets.
- Add paper-strip handles if you want a handled bag.
Press each fold with a ruler edge to create a crisp finish. If the bottom feels weak, glue an extra rectangle of cardstock inside.
Size tip: Make a small test bag with scrap paper before cutting decorative cardstock. This helps you check the proportions and avoid wasting your favorite pattern.
The bag is best for lightweight items. Do not use it for heavy objects, sharp items, or anything that could tear the base. For a polished finish, add a matching paper tag or a small folded flower to the front.
18. Weave a Paper Placemat
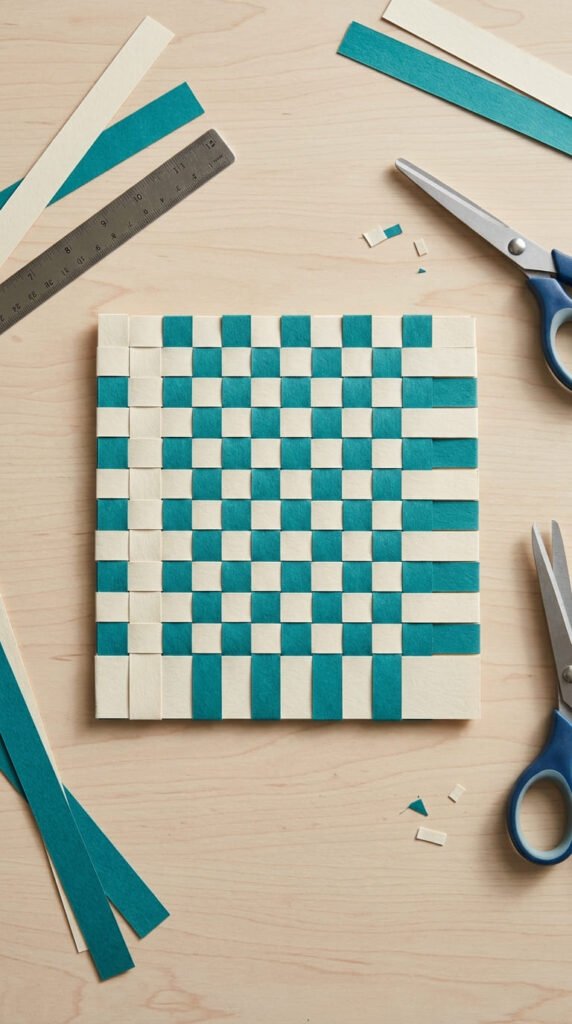
Paper weaving introduces an easy over-and-under pattern that can become a placemat, greeting-card panel, or decorative panel for a scrapbook. It is especially useful for practicing hand coordination and recognizing repeating patterns.
Materials: Two colors of construction paper, ruler, pencil, scissors, and optional glue.
How to make it:
- Cut one sheet into a rectangle to serve as the base.
- Fold the base in half.
- Cut evenly spaced slits from the folded edge, stopping before the opposite edge.
- Unfold the base.
- Cut the second color into strips of equal width.
- Weave the first strip over one section and under the next.
- Reverse the pattern on the next strip.
- Continue until the base is filled.
- Trim the strip ends and secure them on the back with glue if desired.
A simple two-color design makes it easier to follow the weaving pattern. If you lose track of the sequence, check the previous row and alternate the starting position.
Make it your own: Try wide strips for a bold checkerboard or narrow strips for a more detailed appearance. You can also weave recycled magazine paper for an interesting mix of colors.
Paper placemats are decorative rather than washable. Keep them dry and use a sturdier backing if they will be handled often. For a card, cut the finished woven panel smaller and mount it on cardstock.
19. Make a Paper Crown for a Celebration
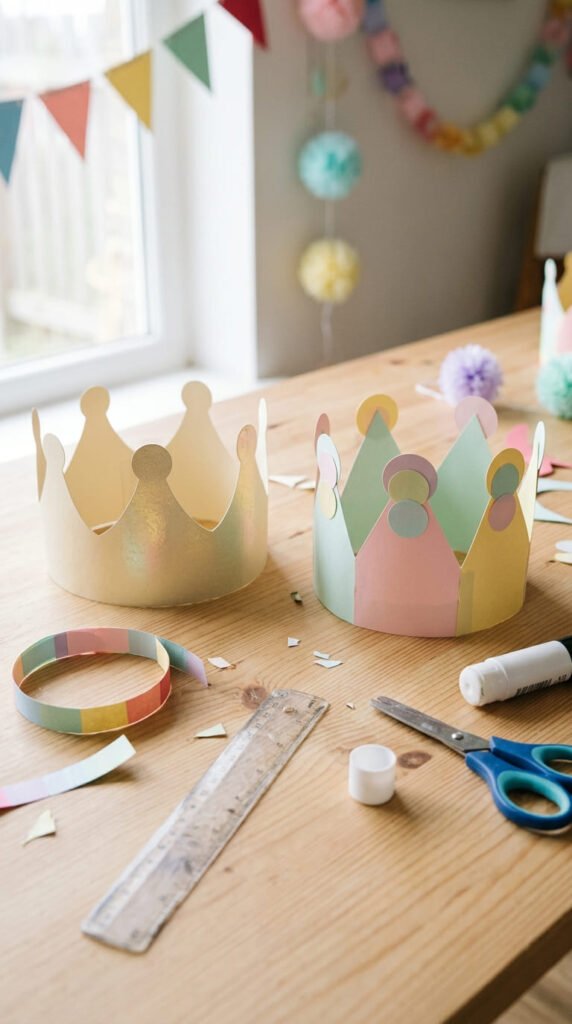
A paper crown is a playful project for birthdays, dress-up, school plays, or imaginative games at home. The design is easy to adjust for different head sizes and can be decorated with leftover paper shapes.
Materials: Construction paper or lightweight cardstock, pencil, ruler, scissors, glue or tape, and optional crayons or paper decorations.
How to make it:
- Cut a long strip of paper about 2–3 inches wide.
- Measure it loosely around the intended wearer’s head, leaving a little overlap.
- Mark a series of triangles or rounded points along one edge.
- Cut out the points.
- Decorate the strip with paper circles, stars, or simple patterns.
- Join the ends with tape or glue after checking the fit.
Avoid making the crown too tight. Leave enough room for comfortable movement, and use an extra strip of paper if the original piece is too short.
Decoration idea: Create a woodland crown with green leaves, a birthday crown with colorful circles, or a royal-style crown with gold paper shapes. Pre-cut decorations can help younger children focus on arranging and gluing.
Use ordinary scissors under suitable supervision, and avoid staples or sharp wire when the crown will be worn by a child. If the paper edge feels rough, fold a narrow strip over it to create a smoother band.
20. Create a Paper Tissue-Box Cover
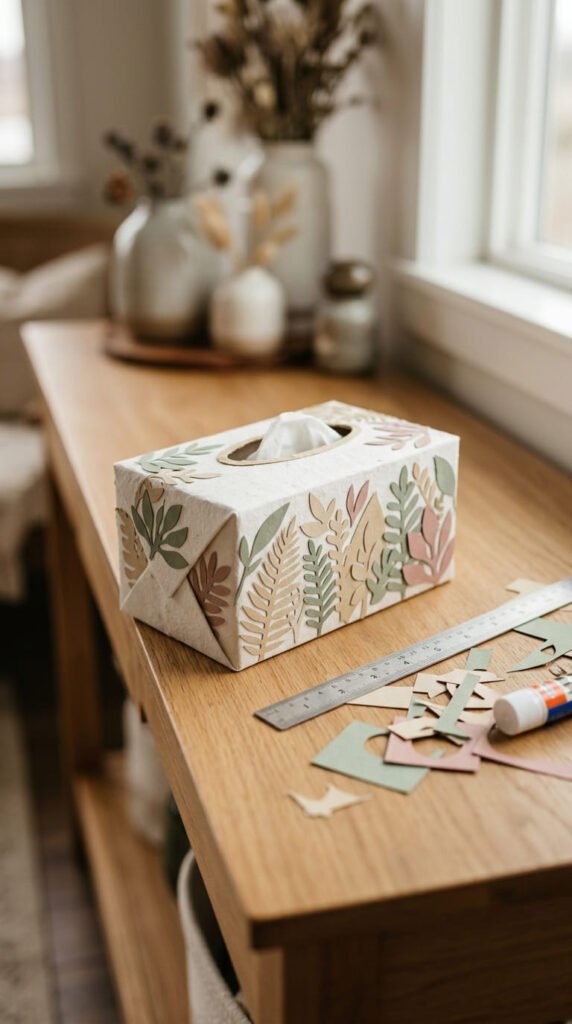
A paper tissue-box cover is a useful home craft that combines measuring, folding, and decorating. It is a good choice for adults who prefer functional paper crafts rather than small decorative objects.
Materials: Medium-weight cardstock, ruler, pencil, scissors, glue or double-sided tape, and a tissue box for measuring.
How to make it:
- Measure the length, width, and height of the tissue box.
- Draw a net on cardstock with a top panel and four side panels.
- Add small tabs along selected edges for joining.
- Cut out the net and mark the fold lines lightly.
- Cut an oval or rectangular opening in the top panel.
- Fold the sides upward and attach the tabs with tape or glue.
- Decorate the outside with paper shapes or a second layer of patterned paper.
Leave enough room around the tissue opening so tissues can be pulled out without catching. Test the fit over the empty box before adding decorations.
Design tip: Use a neutral base with one repeated pattern, such as leaves or geometric shapes. This creates a coordinated look for a bedroom, office, or living room.
Paper covers are not water-resistant, so keep them away from spills and damp surfaces. If the cover will be changed often, use removable tabs or double-sided tape rather than permanently gluing every edge.
21. Fold a Paper Jumping Frog
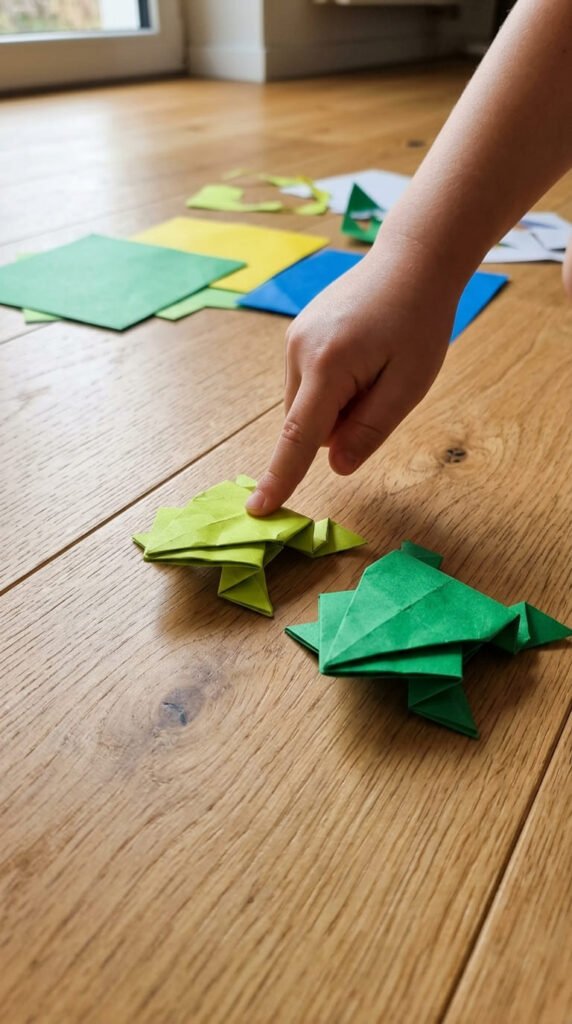
A jumping frog turns origami into a small interactive toy. The spring-like folded back allows the frog to hop when pressed, making it an enjoyable paper activity for children and adults learning more detailed folds.
Materials: One rectangular sheet of lightweight paper, a flat table, and optional markers for the eyes.
How to make it:
- Fold the top section diagonally in both directions to create guide creases.
- Fold the upper portion into a triangle by bringing the sides inward.
- Fold the lower edges toward the center to shape the body.
- Fold the bottom section upward and back to create a spring-like layer.
- Fold the lower corners to form the frog’s feet.
- Press the folds flat and test the spring action gently.
Origami paper is helpful because it is thin and easy to crease. A small rectangular sheet of printer paper also works if the folds are sharp.
Troubleshooting tip: If the frog does not hop, check the spring fold at the back. It should bend and release rather than remain completely flat. Rework that crease gently instead of pressing the entire model too tightly.
Add eyes with a marker or tiny paper circles. Keep decorations light so they do not interfere with movement. Use the frog for a simple hopping contest on a clear table, making sure everyone has enough room to play without knocking other craft supplies over.
22. Build a Recycled Paper Bowl
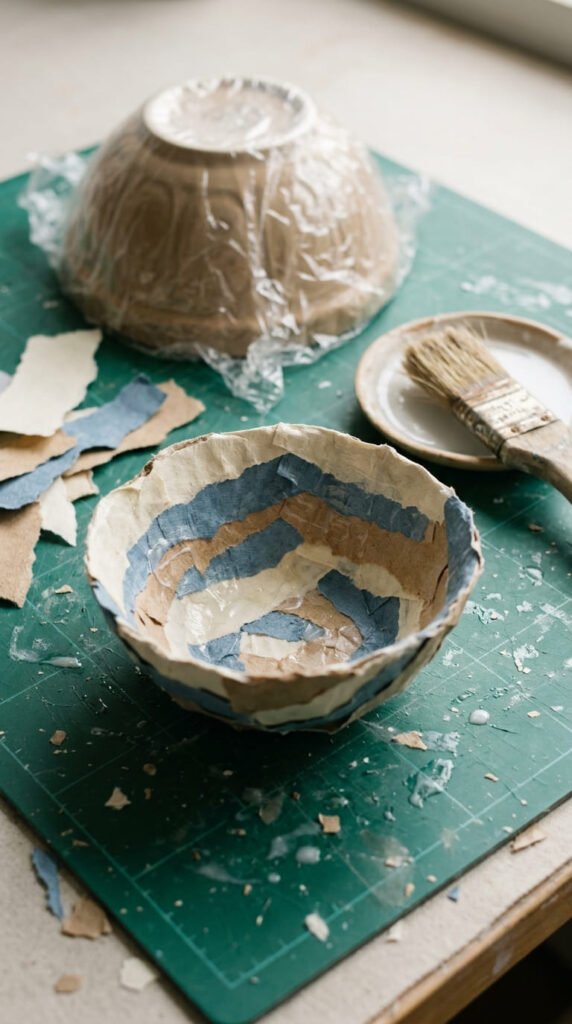
A recycled paper bowl is a slower project, but it makes useful decorative storage for wrapped sweets, paper clips, or lightweight craft items. It introduces layering and shaping rather than folding or precise cutting.
Materials: Scrap paper, a small bowl for a mold, plastic wrap, a brush, suitable craft adhesive, and a protected work surface.
How to make it:
- Cover the outside of the mold with plastic wrap.
- Tear paper into small strips.
- Apply a thin layer of adhesive suitable for paper crafts.
- Place strips over the mold, overlapping the edges.
- Brush another light layer over each section.
- Add several layers, spreading them evenly across the surface.
- Leave the form to dry completely.
- Remove the paper shell carefully and trim any rough edges.
Avoid soaking the paper with adhesive, which can make the layers slow to dry and cause the bowl to warp. Smaller strips also conform to curves more easily than large sheets.
Decorating idea: Use newspaper for a neutral base and add colored paper around the rim. Alternatively, layer magazine pieces for a multicolored surface.
This bowl is for decoration, not food storage or liquids. Do not use it in a microwave or dishwasher. Allow it to dry thoroughly before removing the mold, as damp layers can collapse or tear.
23. Make a Mini Paper Photo Frame
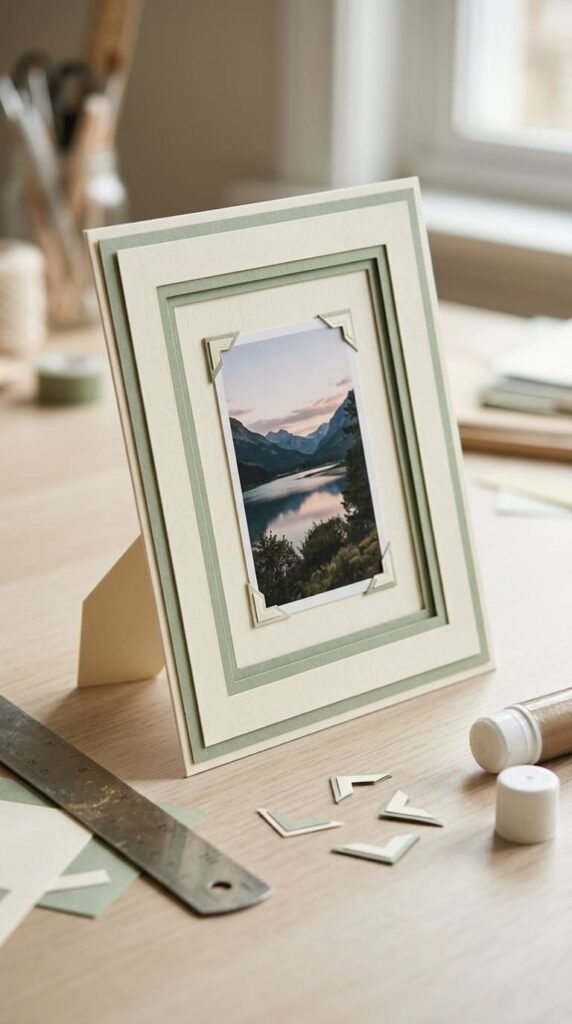
A mini paper photo frame is a thoughtful handmade gift and an easy way to display a favorite memory on a desk or shelf. The design can be kept simple, allowing the photograph to remain the main focus.
Materials: Cardstock, ruler, pencil, scissors, glue or double-sided tape, and a photograph.
How to make it:
- Cut a cardstock rectangle slightly larger than the photograph.
- Draw a centered opening on the front panel, leaving a border around all sides.
- Cut out the opening carefully.
- Cut a second rectangle to form the backing.
- Attach the backing along three edges, leaving one side open for inserting the photograph.
- Fold a separate strip into a triangular support stand.
- Glue the stand to the back and let it dry.
Check that the opening is smaller than the photograph so the picture’s edges remain hidden behind the frame. If the frame feels flimsy, attach a second cardstock layer to the front.
Personalization idea: Decorate the border with tiny paper flowers, geometric shapes, or a color palette that matches the room. Keep decorations flat if the frame will sit close to other objects.
Use a lightweight photograph or printed image. This frame is best displayed indoors, away from moisture and direct heat. It also works as a handmade place card when the photo is replaced with a small drawing.
24. Create a Paper Star Garland
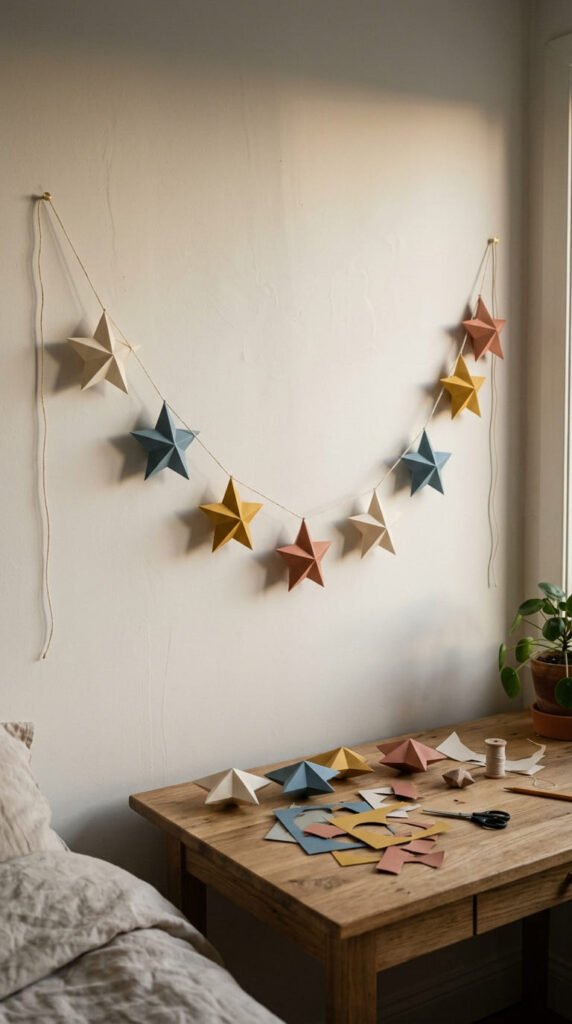
A paper star garland is a lovely finishing project because it uses basic folding and creates a decoration that can stay up throughout the year. Choose neutral colors for a calm room display or bright shades for birthdays and seasonal celebrations.
Materials: Lightweight colored paper, ruler, pencil, scissors, cotton thread, and a glue stick if you are making layered stars.
How to make it:
- Cut paper into matching squares.
- Fold each square diagonally in both directions to establish guide creases.
- Fold the paper into a smaller shape using the creases as guides.
- Bring the outer points inward to form a star-like structure.
- Press each crease carefully and adjust the points.
- Repeat with different colors and sizes.
- Attach the finished stars to a thread using small paper tabs or a suitable adhesive.
For the first attempt, make one star before cutting a whole batch. This helps you check the fold sequence and paper size.
Decoration tip: Space the stars evenly and alternate large and small shapes to create a balanced garland. You can also combine stars with paper circles or tiny folded hearts.
Use lightweight thread and removable wall hooks to hang the finished decoration. Keep it away from heat sources and avoid placing it where someone could become tangled in the string. Store the garland flat or wrap it loosely around a piece of cardboard when not in use.
Conclusion
Paper crafting is a simple way to create something useful or beautiful with affordable supplies and a little imagination. From origami hearts and fox bookmarks to handmade gift bags, paper mosaics, and decorative garlands, these projects offer plenty of ways to practice new techniques without buying expensive equipment.
Start with one idea that matches your available time and materials. Printer paper is suitable for learning folds, construction paper works well for colorful shapes, and cardstock gives greeting cards and small structures extra support. Keep your paper scraps for future collages, beads, and decorations.
If a fold looks uneven or a shape does not turn out as expected, try again with a spare sheet. Each small project gives you another chance to learn a useful skill.
Ready to make something? Choose your favorite project, gather your paper and scissors, and create your first handmade decoration today. Save this collection from Yarnlivo so you can return whenever you want another simple DIY paper craft to try.