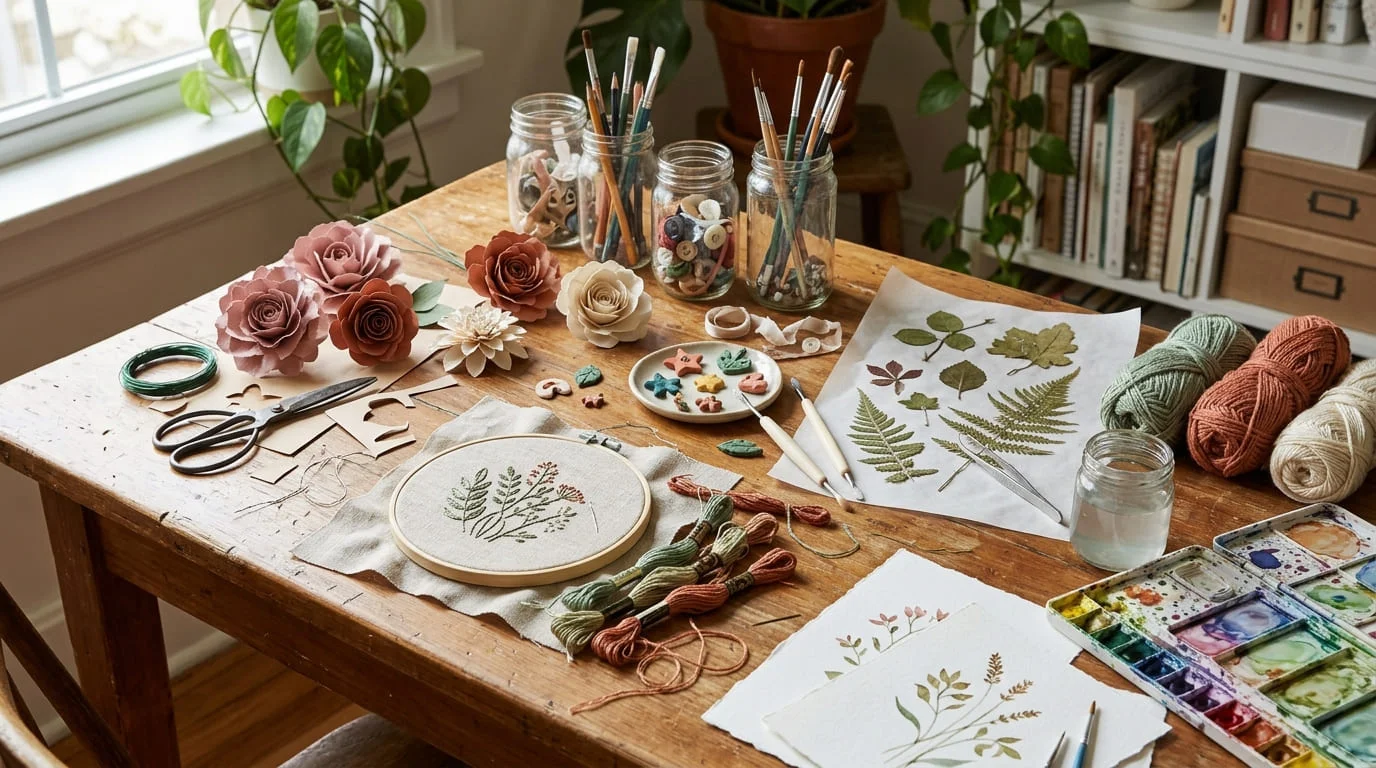
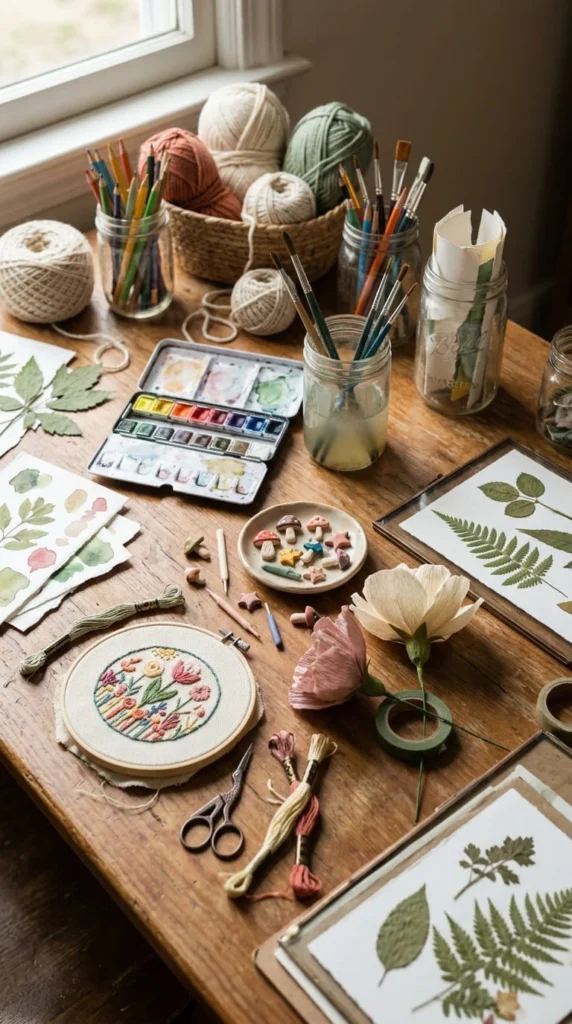
Crafting is a fun way to turn simple materials into beautiful decorations, personalized gifts, and useful items for everyday life. Whether you enjoy paper crafts, handmade jewelry, home décor, sewing, or recycled DIY projects, there are plenty of crafting ideas to explore without spending a fortune on supplies. You can start with materials you already have, such as cardboard boxes, glass jars, leftover fabric, yarn, and colored paper. Some projects take just 15 minutes, while others offer a relaxing afternoon of creative work. These 25 creative DIY projects include beginner-friendly crafts, nature-inspired decorations, handmade accessories, memory-keeping activities, and practical ways to reuse household items. Each idea gives you a clear starting point, useful material suggestions, and ways to personalize the finished piece. You can make them for your home, give them to friends, or adapt selected designs for a small handmade craft business. Pick a project that matches your available time and skill level, gather your supplies, and enjoy creating something that feels uniquely yours.
1. Create a Junk Journal Filled With Everyday Memories
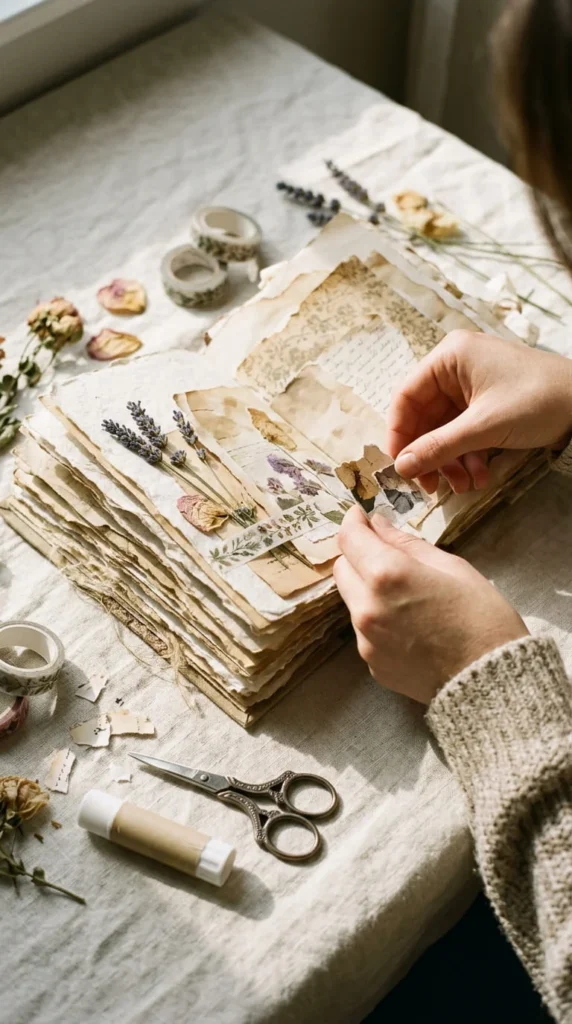
A junk journal is a handmade book for collecting memories, creative experiments, and little pieces of everyday life. Unlike a traditional scrapbook, it does not require matching pages or perfectly arranged photographs. Its charm comes from combining different textures, colors, and found materials.
Start with an old notebook, a simple sketchbook, or folded sheets of paper tied together with string. Gather ticket stubs, fabric scraps, dried flowers, old greeting cards, and interesting packaging. Arrange your pieces before gluing them down so you can experiment with different layouts.
Give each page a theme. One might hold memories from a family outing, while another collects favorite color combinations, garden observations, or ideas for future DIY projects.
Helpful tip: Keep heavier decorations near the spine to help the journal close properly. Use a glue stick for lightweight paper and suitable adhesive for thicker materials.
You can also add pockets made from folded paper to store small keepsakes. Leave a few blank spaces for notes or sketches.
This craft is ideal for a quiet evening at home. The finished journal becomes a personal collection of memories rather than another decorative object that sits unused on a shelf.
2. Make Paper Flowers for Lasting Home Décor
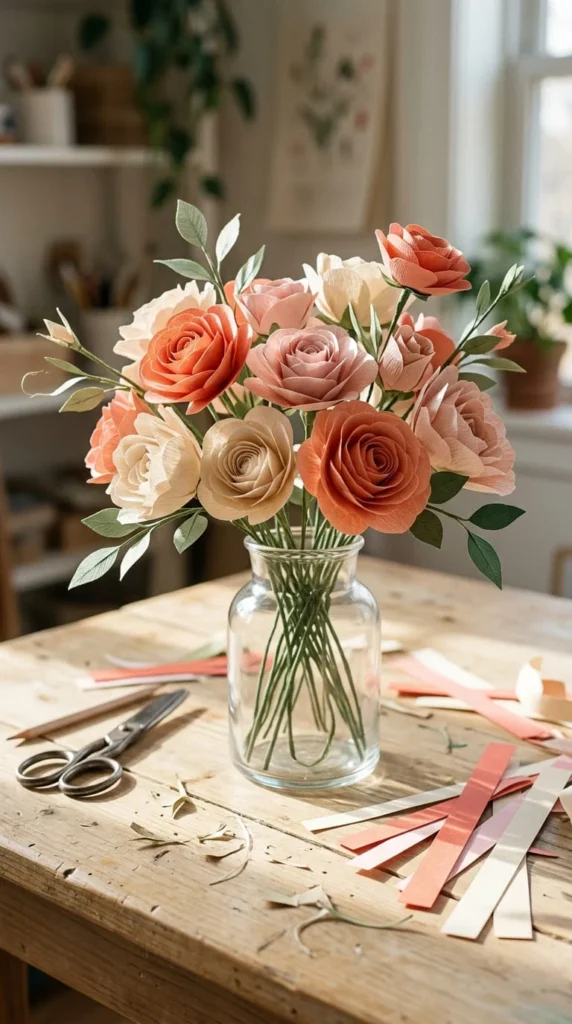
Paper flowers offer an affordable way to decorate a bedroom, shelf, party table, or handmade gift basket. You can create a colorful bouquet using cardstock, construction paper, or pages from old magazines.
Choose a simple flower shape for your first attempt. Cut five or six petals, then gently curl their edges around a pencil. Arrange the petals in a circle and secure them with craft glue. Add a small paper circle in the center and attach a stem made from wrapped floral wire or rolled paper.
For a natural appearance, vary the flower sizes instead of making every bloom identical. Combine two or three complementary colors, such as terracotta, cream, and dusty pink, for a coordinated arrangement.
Smaller paper flowers work well on greeting cards, gift wrapping, and scrapbook pages. Larger versions can decorate a party backdrop or an empty wall.
Budget-friendly tip: Use leftover wrapping paper for patterned petals and green paper from old craft supplies for the stems.
If children are joining the activity, an adult can prepare the more detailed cuts. Store finished flowers away from moisture and strong sunlight to help prevent fading.
These handmade blooms can be reused for birthdays, celebrations, and seasonal home decorations.
3. Shape Polymer Clay Into Trinket Dishes
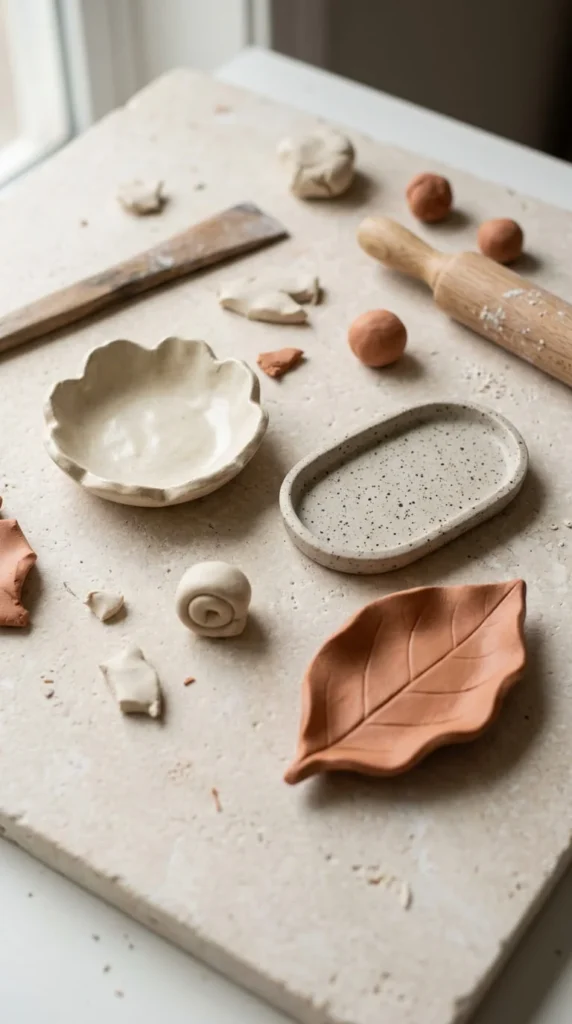
Small clay dishes are useful for keeping rings, earrings, hair clips, and other lightweight accessories in one place. Their handmade shapes also make them attractive decorations for a bedside table or dressing area.
Choose polymer clay in two or three colors. Soften it according to the package instructions, then roll it into an even sheet. Cut an oval, circle, or leaf shape and gently lift the edges to form a shallow dish.
You can add tiny dots, wavy edges, or contrasting clay speckles. For a coordinated set, make one large dish and two smaller ones in related colors.
Before baking, check the manufacturer’s temperature and timing instructions. Use dedicated craft tools and an appropriate baking setup. Keep polymer clay away from food preparation surfaces, and do not use the finished dish for food unless the manufacturer explicitly approves that use.
Design tip: Simple shapes often work best for small decorative objects. A single curved edge or subtle color contrast can make the dish look polished without requiring advanced sculpting skills.
Allow the piece to cool completely before handling it. Follow the clay manufacturer’s recommendations for any optional surface finish.
These small creations are suitable for handmade gift boxes, craft fairs, or inexpensive personalized presents.
4. Turn Empty Glass Jars Into Desk Organizers
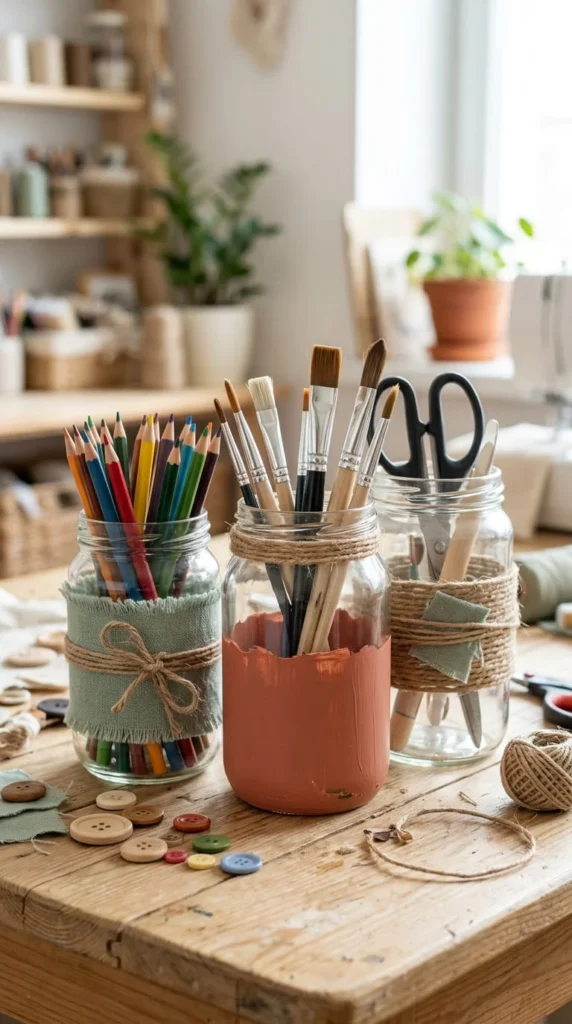
Empty glass jars can become practical organizers for pens, paintbrushes, scissors, buttons, and other small supplies. This upcycling project gives useful household containers a second purpose while reducing clutter on your desk.
Remove the labels by soaking the jars in warm, soapy water. Dry them thoroughly before decorating. If sticky residue remains, use a suitable adhesive remover and wash the surface again.
Wrap a section of each jar with jute cord, fabric ribbon, or decorative paper. Use an adhesive designed for the chosen surface. You can also paint the outside with glass-compatible paint, following its preparation and curing directions.
Choose jars of different heights to separate supplies by size. A tall jar can hold paintbrushes, while shorter containers work well for paper clips, beads, and buttons.
Keep the design practical. Leave the rims clear and avoid adding decorations that make the jars difficult to clean or handle. Check for cracks or chipped edges before using them.
For a coordinated desk setup, place the finished jars on a small wooden tray. This keeps the containers together and makes it easier to move your supplies when the table is needed for another activity.
The result is a useful organizer made from items you might otherwise recycle.
5. Design Pressed-Flower Bookmarks
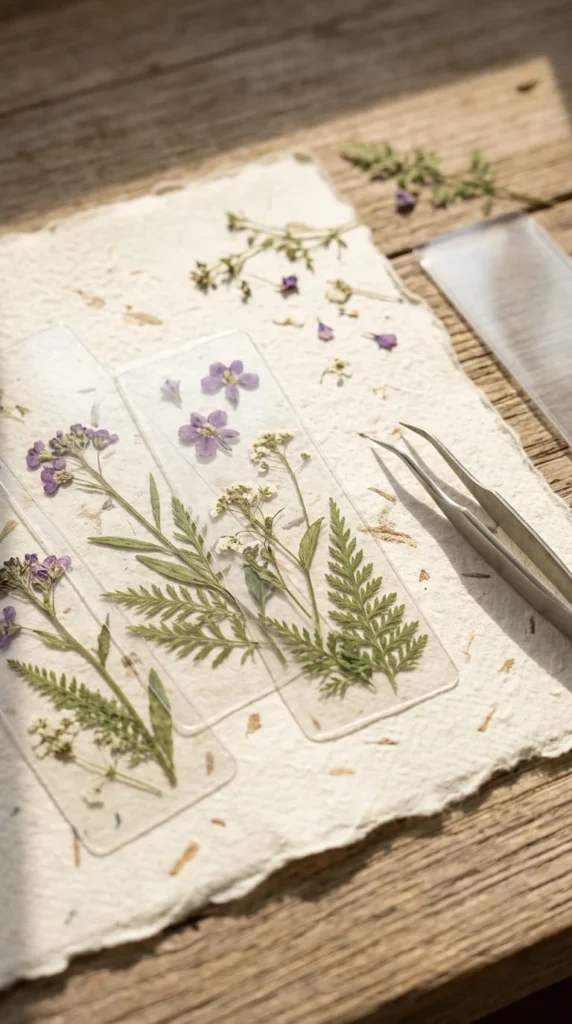
Pressed-flower bookmarks are lovely gifts for readers, teachers, students, and anyone who enjoys botanical details. They are lightweight, inexpensive, and easy to customize with flowers collected from your own garden.
Begin with small, flat flowers and leaves. Press them between sheets of absorbent paper inside a heavy book, making sure the plant material is spread out rather than folded. Check the flowers after several days and allow additional time if they still feel damp.
Arrange the dried pieces on a strip of cardstock. Place them inside a clear bookmark sleeve or laminate them using a suitable laminating method. Keep the flowers flat and leave enough space around the edges for trimming.
For a softer appearance, use tiny white blossoms with pale green leaves. Purple flowers create a more colorful design, while pressed ferns offer an elegant, understated look.
Practical tip: Never seal fresh or damp flowers inside a bookmark. Trapped moisture can discolor the petals or cause mold.
You can finish the bookmark with a narrow ribbon attached through a reinforced hole, provided the material is sturdy enough to support it.
Make several designs at once and package them with a notebook for a thoughtful handmade gift.
6. Customize a Plain Canvas Tote Bag
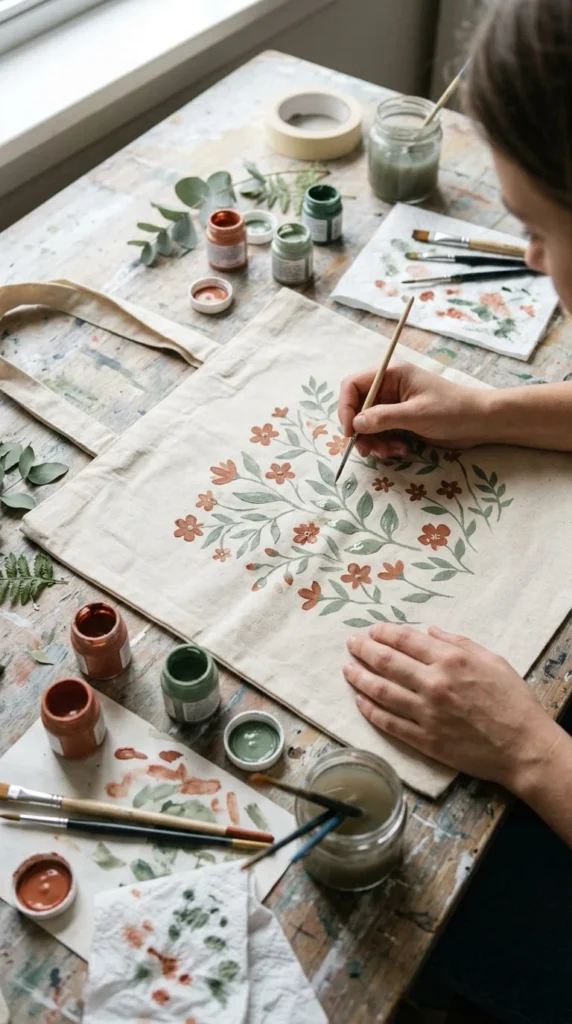
A plain canvas tote can become a personalized shopping bag, library bag, or everyday accessory with a little fabric paint and imagination. It is a useful craft because the finished item can be carried rather than stored away.
Wash and dry the bag according to its care label before decorating. Place a piece of cardboard inside to prevent paint from bleeding through to the opposite side.
Sketch your design lightly with a pencil. Beginners can start with leaves, daisies, abstract dots, or simple geometric shapes. Use fabric paint and brushes recommended for cotton, then follow the product instructions for drying and heat-setting.
If you prefer a neat pattern, place a stencil on the fabric and secure it with masking tape. Apply paint in light layers instead of loading the brush with too much color.
Personalization idea: Match the design to the bag’s intended use. Small botanical motifs suit a book bag, while bright shapes work well for a reusable market tote.
Test the paint on a hidden area first, especially if the bag contains synthetic fibers. Wait until the design is fully cured before using or washing the bag.
A customized tote also makes a useful birthday present when paired with a handmade bookmark or a small notebook.
7. Create a Recycled Cardboard Drawer Organizer
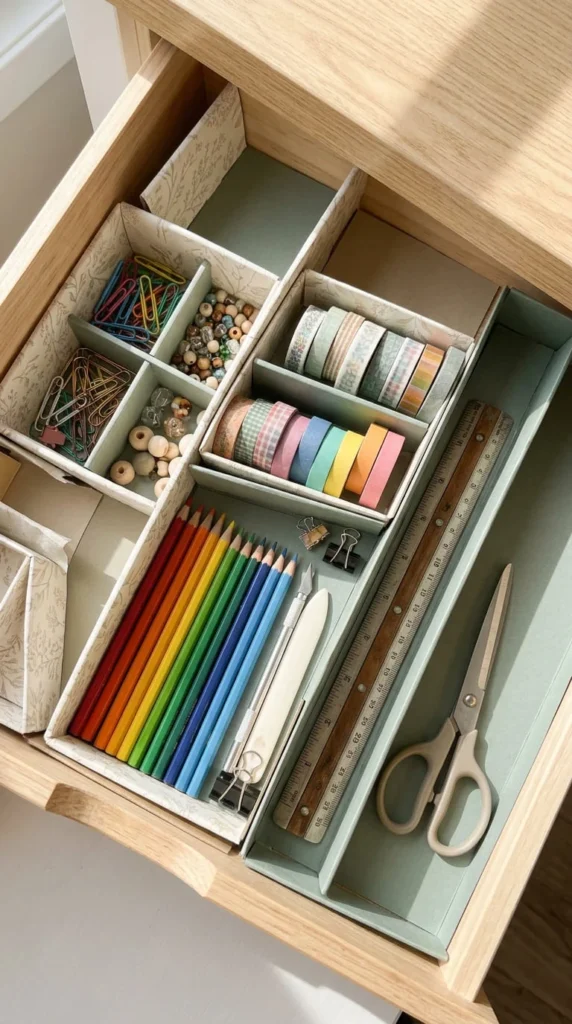
Cardboard drawer dividers help organize small items without buying plastic storage trays. They are especially useful for craft supplies, stationery, jewelry, and loose household accessories.
Measure the inside of your drawer before cutting anything. Use a sturdy cereal box or another clean cardboard package. Cut long strips for the main dividers and shorter strips for the smaller compartments.
Make small slits halfway through intersecting strips so they fit together like a grid. Test the structure inside the drawer before attaching the pieces. If the cardboard feels thin, double the layers or reinforce the corners with paper tape.
Cover the dividers with wrapping paper, leftover wallpaper, or colored cardstock. A consistent color scheme helps the organizer look tidy even when the compartments hold different objects.
The most useful layout depends on what you store. Keep frequently used items in larger compartments near the front. Reserve smaller sections for beads, pins, clips, and other tiny objects.
Avoid using cardboard where it may become wet. For kitchen or bathroom drawers, a washable organizer may be more suitable.
This project is easy to adapt as your collection changes. If you buy new supplies or rearrange your desk, simply cut new dividers rather than replacing an entire storage system.
8. Paint Decorative Rocks for Plants and Gardens
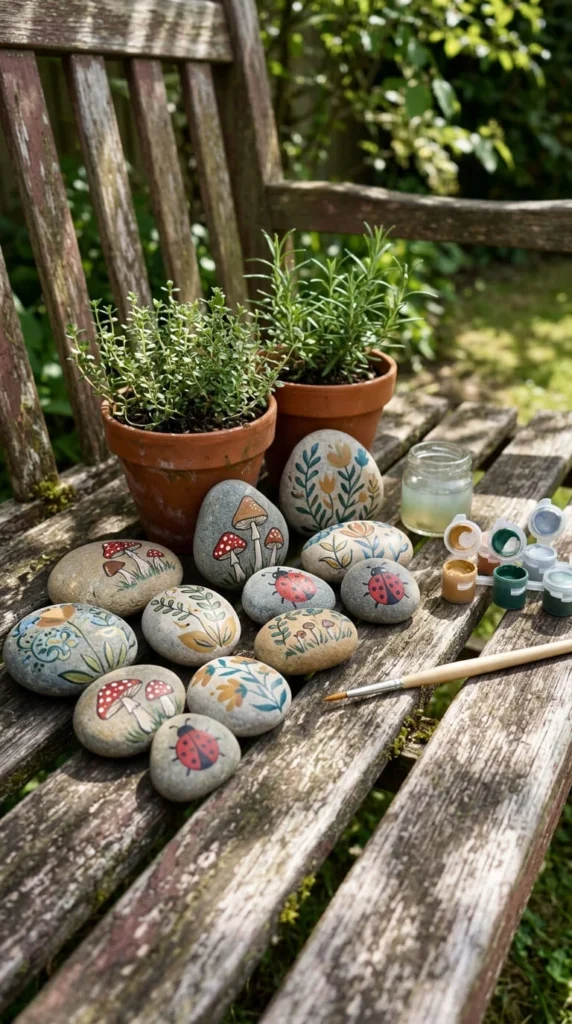
Rock painting turns smooth stones into small decorations for plant pots, garden paths, windowsills, or indoor displays. It is a simple activity for beginners because the designs can be as basic or detailed as you like.
Choose clean, dry stones with relatively smooth surfaces. Wash away dirt and allow the rocks to dry completely. Paint a base color using suitable acrylic paint, then add patterns such as leaves, dots, flowers, mushrooms, or simple animal faces.
Let each layer dry before adding another. A fine brush works well for small details, while a broader brush helps cover the base more evenly.
For indoor plant pots, choose colors that complement the leaves and container. Cream, green, and terracotta create a natural look, while bright colors give a playful finish.
Outdoor tip: Use a clear exterior sealer that is compatible with your paint if you want to display the stones outdoors. Follow the product directions, and keep painted stones away from areas where small children or pets might mistake them for toys or food.
You can also use painted rocks as paperweights or decorative accents on a desk.
This project works well with a group because everyone can paint a different design. Gather the finished stones together in a shallow bowl for a colorful handmade display.
9. Make a Fabric Scrap Patchwork Cushion Cover
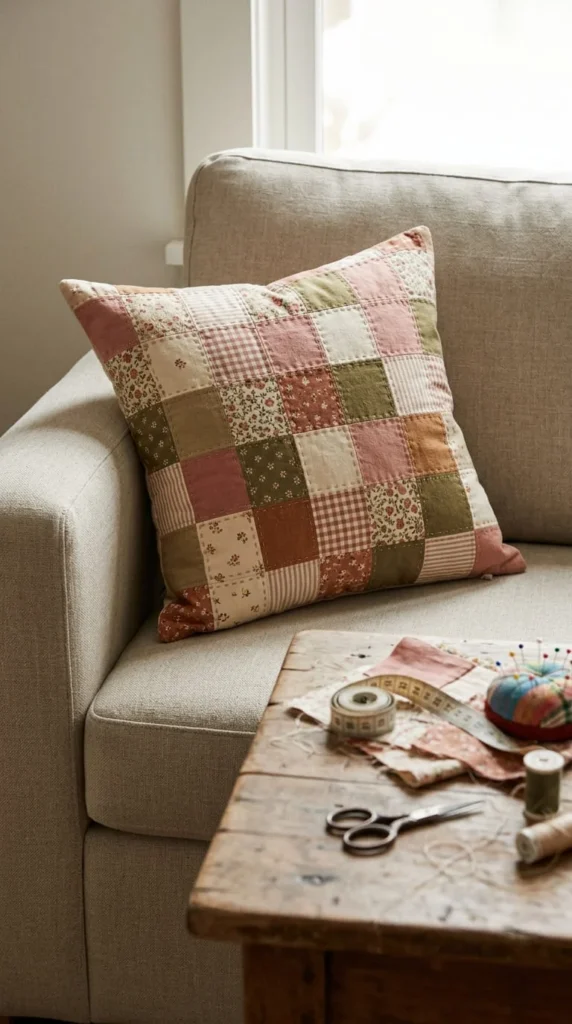
Small fabric scraps can become a colorful cushion cover instead of remaining unused in a sewing box. Patchwork also gives you a chance to experiment with color and pattern without buying a large amount of new fabric.
Start by choosing cotton pieces of similar thickness. Cut them into squares of equal size, using a ruler and fabric scissors for cleaner edges. Arrange the squares on a flat surface before sewing so you can adjust the pattern.
Join the squares into rows, keeping the seam allowances consistent. Sew the rows together to form the front panel. Add a plain fabric back with an envelope opening or a zipper, depending on your sewing skill.
If you are new to sewing, begin with a small cushion rather than a large one. Straight seams are easier to manage than complicated curved shapes.
Design tip: Repeat one color across the cushion to connect the different patterns. Even mismatched fabrics can look coordinated when they share a similar color family.
Wash suitable fabrics before sewing to reduce later shrinkage. Check that the finished cover fits your cushion insert without pulling at the seams.
This project is particularly useful for turning leftover fabric from old clothing, curtains, or previous sewing projects into something functional.
10. Make Personalized Friendship Bracelets
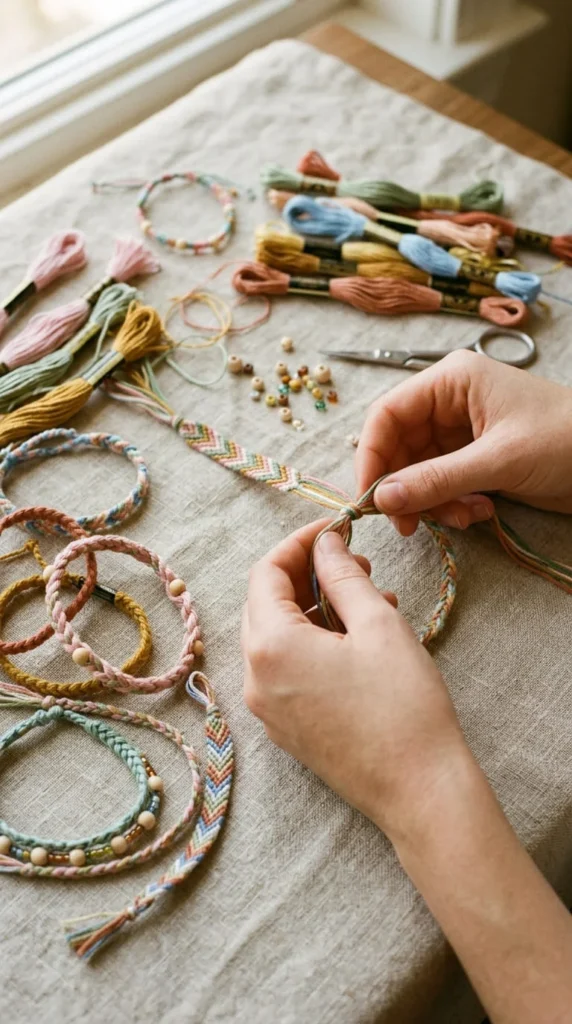
Friendship bracelets are small handmade gifts that can represent shared memories, favorite colors, or a special occasion. They are also portable crafts, making them suitable for travel, lunch breaks, or relaxing at home.
Choose three to five strands of embroidery floss and cut them to a comfortable working length, leaving extra thread for tying. Knot the strands together and secure the knot to a clipboard or another stable surface.
Beginners can start with a basic braid. Once comfortable, try diagonal stripes, chevrons, or simple woven patterns. Online diagrams and beginner tutorials can help you learn the direction of each knot.
Select colors with a personal connection. Two friends might choose their favorite colors, while a group could make matching bracelets in different combinations.
A neat finish matters more than a complicated pattern. Keep the thread tension consistent, check the bracelet’s length as you work, and tie secure knots at both ends.
You can add a few small beads if the thread can pass through them comfortably. Make sure all decorations are securely attached, especially if the bracelet is intended for a young child.
For a gift, roll the bracelet into a small paper envelope and include a handwritten note. This simple presentation adds a personal touch without requiring expensive packaging.
11. Build a Mini Indoor Herb Planter From a Tin Can
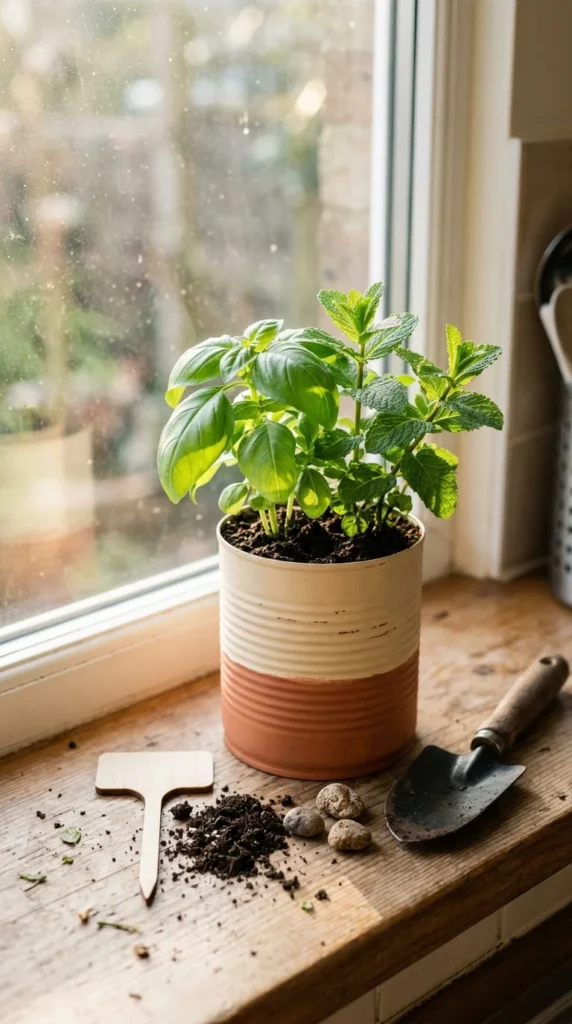
An empty tin can can become a compact planter for herbs or small decorative plants. It is a practical recycling project that adds greenery to a kitchen, balcony, or sunny windowsill.
Remove the label and wash the can thoroughly. Check for sharp edges and avoid using any container with a damaged rim. Drainage is important, so use a suitable planter with drainage holes, or place a nursery pot with holes inside the decorated can as a removable insert.
Paint the outside with a product suitable for metal. Allow it to dry according to the instructions before adding the plant.
Choose a herb that suits the light available in your home. Basil and mint generally grow well with good light, although their watering and growing conditions differ. Use potting mix suitable for the plant rather than ordinary garden soil.
Keep the roots healthy by avoiding standing water. If you use the can as a decorative outer container, remove the inner pot when watering and let excess water drain before returning it.
Decorate the planter with a simple painted border or a strip of fabric around the outside. Keep decorative materials away from the soil and drainage openings.
This craft combines upcycling with a useful result: fresh herbs for cooking or a small green accent for your living space.
12. Design Handmade Greeting Cards With Paper Collage
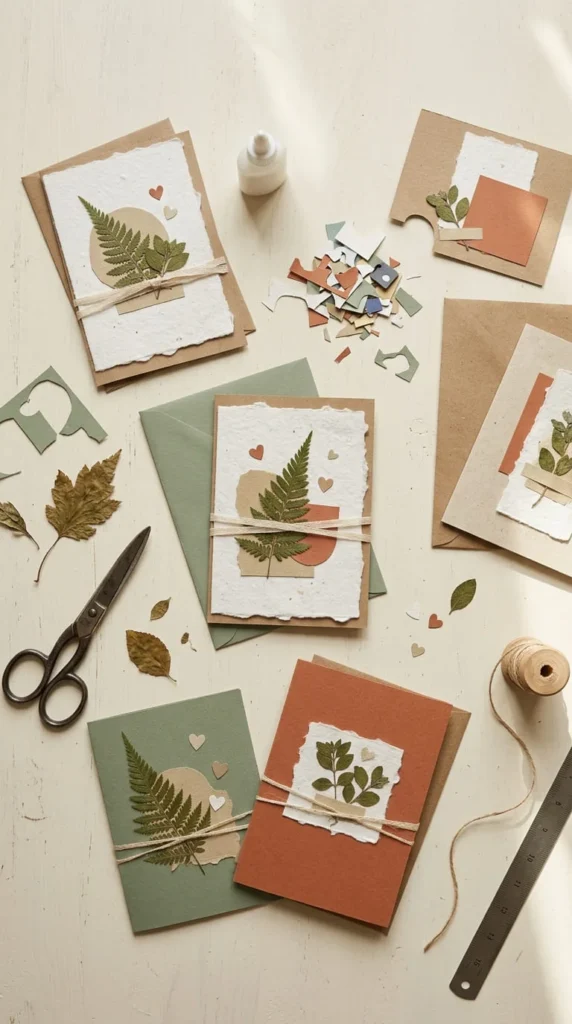
Handmade greeting cards are a thoughtful way to celebrate birthdays, thank someone, or send encouragement without purchasing a ready-made card. Paper collage allows you to create attractive designs with basic materials.
Fold a piece of cardstock in half to form the card base. Cut smaller shapes from colored paper, old greeting cards, or clean magazine pages. Arrange the shapes before gluing them down, leaving enough empty space for a handwritten message later.
Try making a simple flower from overlapping paper circles, a small landscape from torn paper, or an abstract pattern using triangles and curved shapes.
Use contrast to make the design easy to read. Light paper stands out against a darker base, while a few small decorative elements can make a simple layout feel finished.
You can also use textured paper, fabric scraps, or pressed leaves. Keep bulky decorations away from the fold so the card closes neatly.
For a coordinated gift, create a matching envelope from lightweight paper. Check that the finished card fits comfortably inside before sealing the envelope.
Store completed cards flat in a dry place until you need them. Making several designs in one session saves setup time and gives you a small collection ready for different occasions.
13. Embroider a Simple Botanical Hoop Art Piece
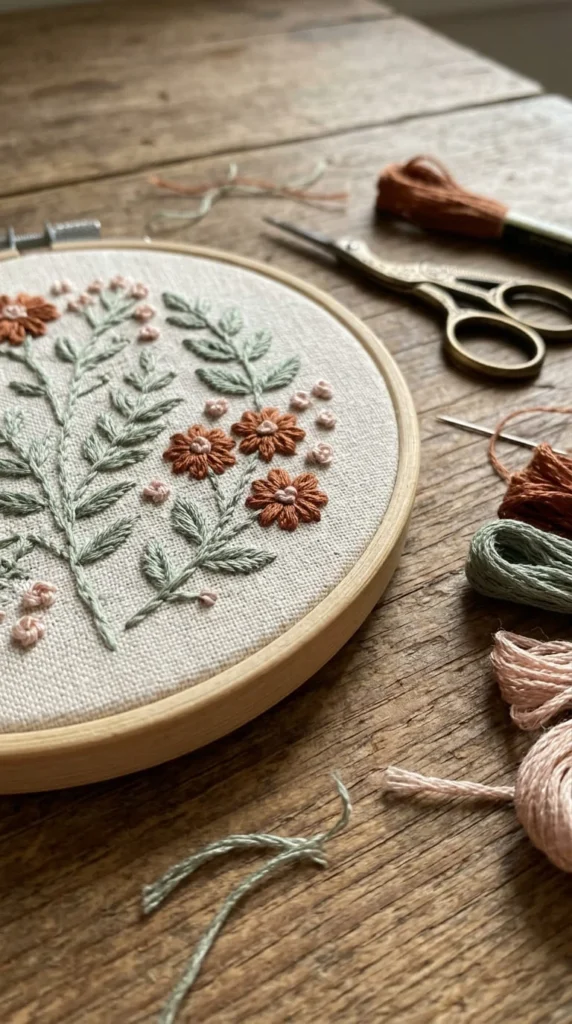
Embroidery hoop art is a lovely project for anyone who enjoys working with thread and fabric. A small botanical design can decorate a shelf, brighten a home office, or become a handmade present.
Stretch cotton fabric inside an embroidery hoop and tighten it until the material feels smooth. Draw a simple flower or leafy stem using a washable fabric marker. Begin with a backstitch for the stems and a basic straight stitch for small leaves or petals.
Choose only two or three thread colors for your first design. This keeps the project manageable and helps the finished piece look coordinated.
If you are new to embroidery, work slowly and avoid pulling the thread too tightly. Excessive tension can wrinkle the fabric or distort the design. Practice the stitches on a spare piece of cotton before starting the final artwork.
Start small rather than attempting a complicated pattern. A single leafy branch can look beautiful when the stitches are even and the fabric is properly stretched.
When the design is complete, secure the thread ends on the back. Trim excess fabric, leaving enough material to fold neatly behind the hoop. Add a backing if you want to hide the loose threads.
Display the finished piece on a wall or place it on a small stand. This slow craft rewards patience and creates a decoration with a handmade character.
14. Make a Decorative Candle Holder From Air-Dry Clay
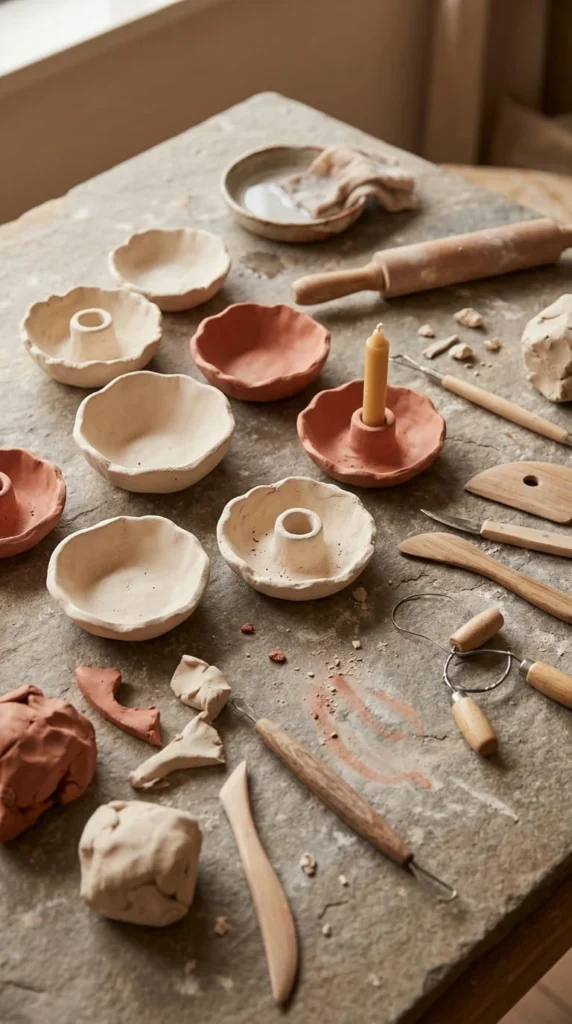
Air-dry clay is useful for creating small decorative objects without using an oven. A candle holder can be a satisfying project, but its design must account for heat and fire safety.
For a safer decorative alternative, make a holder for an LED tealight. Roll the clay into a thick slab and shape a shallow base with gently raised edges. Follow the clay manufacturer’s instructions for thickness, drying time, and surface finishing.
You can press simple patterns into the surface using a wooden tool or create a slightly uneven rim for a handmade appearance. Smooth any sharp edges before leaving the piece to dry.
Allow the clay to dry completely. Thick pieces may take longer than thin ones, and rushing the process can lead to cracks. Sand rough areas only when the material is fully dry and according to the manufacturer’s guidance.
Use battery-operated LED candles rather than real flames in air-dry clay holders. Air-dry clay is generally not designed to withstand direct flame or high heat.
Paint the finished piece with a compatible paint if desired. Cream, warm brown, and muted green work well for natural home décor.
A pair of small LED candle holders can decorate a shelf, bedside table, or dining centerpiece. Their soft shapes add handmade character without requiring advanced sculpting skills.
15. Create a Personalized Photo Memory Box
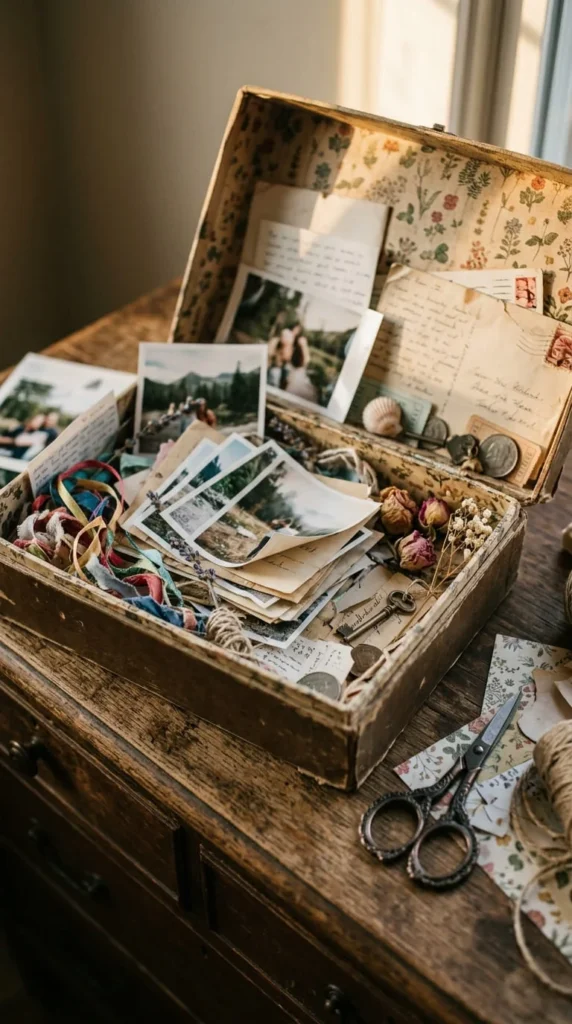
A memory box keeps photographs, letters, small souvenirs, and other meaningful items in one place. It is a useful craft for birthdays, anniversaries, graduations, or preserving family memories.
Start with a sturdy cardboard box that has a lid. Clean the outside and measure each side before cutting decorative paper to size. Attach the paper with an adhesive suitable for cardboard, smoothing it gently to reduce wrinkles.
Choose a theme for the contents. A travel box might hold postcards, photographs, maps, and small souvenirs. A friendship box could include printed pictures, ticket stubs, and handwritten notes.
Use smaller envelopes or paper dividers to separate items by date or occasion. This makes it easier to find specific memories later.
Avoid overcrowding the box. Heavy objects can damage delicate paper keepsakes, so place fragile photographs and letters in protective sleeves where appropriate.
You can decorate the lid with a simple paper collage or a fabric panel. Keep embellishments flat if the box will be stacked with other storage containers.
For a personal gift, fill the box with a few meaningful items before presenting it. The recipient can continue adding memories over time, making the project useful long after the initial celebration.
16. Turn Old T-Shirts Into a No-Sew Braided Basket
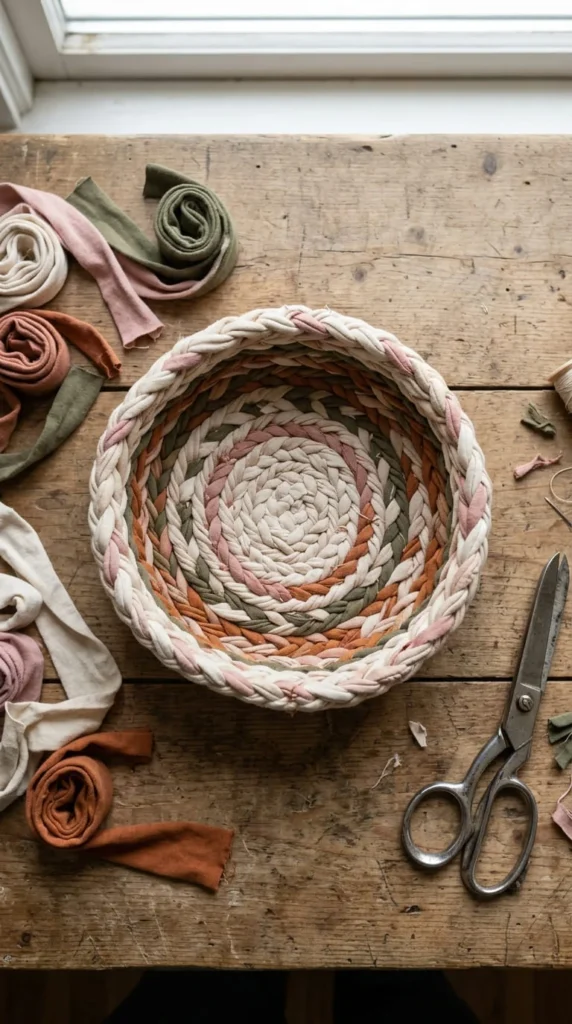
Old cotton T-shirts can be reused to make a soft basket for yarn, hair accessories, or other lightweight items. This project is ideal when you want to upcycle fabric without using a sewing machine.
Choose clean shirts that are no longer wearable. Cut them into long strips of similar width, avoiding seams and thick printed areas where possible. Stretch each strip gently so the edges curl inward and form a cord-like shape.
Braid three strips together, joining additional strips as necessary. Coil the braid into a flat circle for the base, then gradually build the sides by placing each new row against the previous one.
Use fabric glue or another suitable adhesive to secure the coils. Check the product instructions and allow the basket to dry fully before adding objects.
Keep the braid tight and even. Loose coils may separate when the basket is moved, while a consistent braid creates a more stable shape.
Choose a single fabric color for a simple appearance or alternate colors for stripes. Small baskets are easier to shape than large ones, so begin with a container that fits on a desk or shelf.
Because this is a soft fabric craft, use the finished basket for lightweight items rather than heavy tools or anything sharp.
17. Make a Miniature Paper Lantern Garland
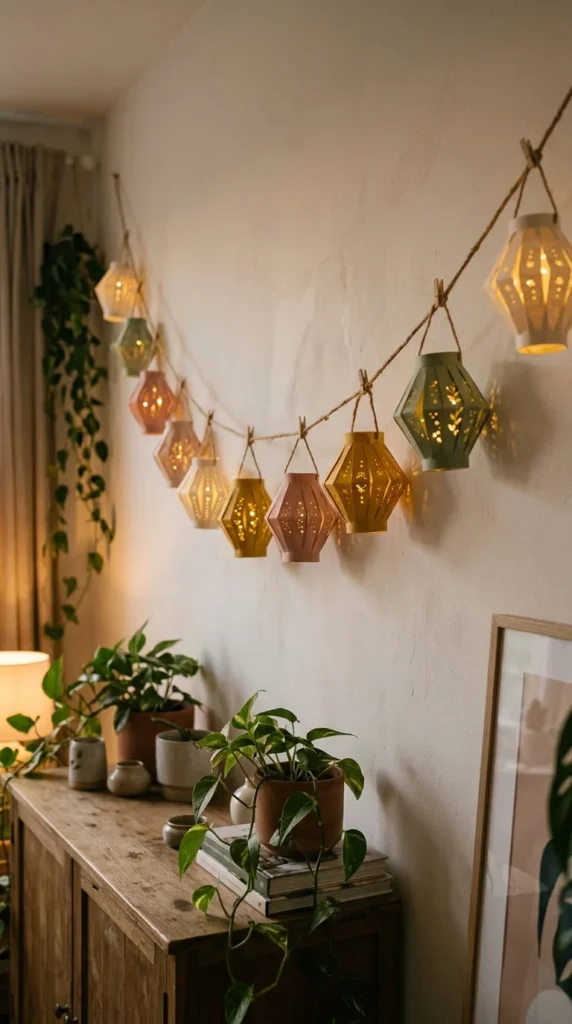
Paper lantern garlands add color to birthday celebrations, bedroom walls, craft rooms, and seasonal displays. They can be made from inexpensive colored paper and adjusted to suit different themes.
Cut several rectangles from lightweight cardstock or construction paper. Fold each rectangle in half lengthwise, then make evenly spaced cuts from the folded edge toward the opposite edge, stopping before the end. Open the paper and roll it into a cylinder, securing the short edges with glue or paper tape.
Add a narrow paper strip across the top to create a handle. Make several lanterns in different colors and sizes, then attach them to a length of twine using small paper loops or clips.
Measure the spacing before hanging the garland. Even gaps between lanterns create a tidy appearance, while varied colors keep the display playful.
For a birthday party, choose colors that match the table decorations. For everyday home décor, use a more restrained palette and a shorter garland.
Paper lanterns should be treated as decorative ornaments, not lighting fixtures. Keep them away from candles, heaters, and open flames. If you want illumination, use a suitable cool-running LED string designed for the intended display and follow its safety instructions.
The finished garland can be stored flat or with the lanterns gently compressed for future celebrations.
18. Craft a Beaded Phone or Bag Charm
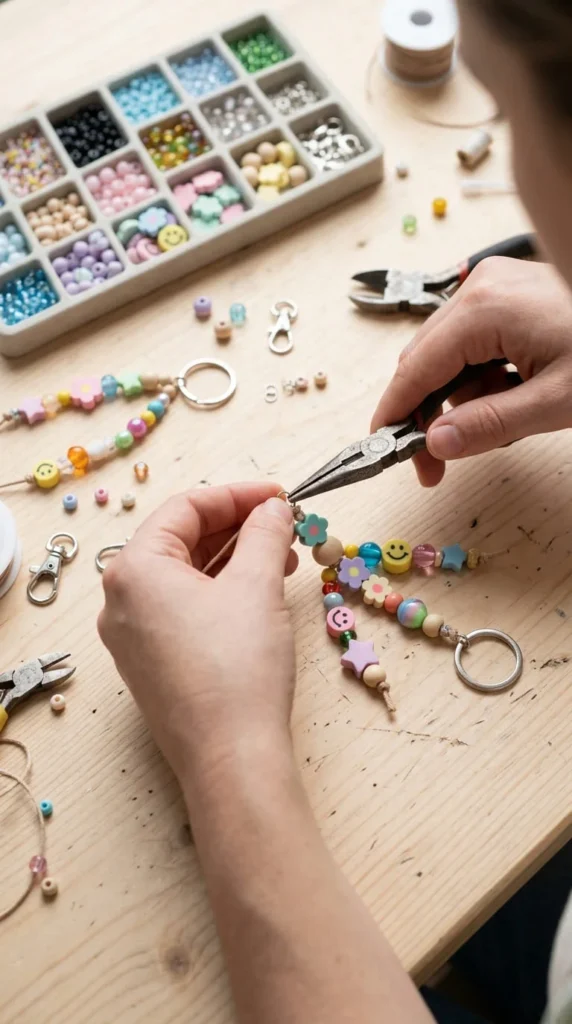
Beaded charms offer a quick way to personalize a bag, pencil case, or suitable phone accessory. They are also a practical introduction to basic jewelry-making techniques.
Gather beads in different sizes, a strong cord or suitable jewelry wire, and a clasp or key ring. Arrange the beads on the table before threading them so you can test the colors and pattern.
Try alternating small and large beads, repeating two colors, or placing one distinctive bead in the center. For a playful design, combine wooden beads with colorful polymer clay shapes.
Thread the pieces onto your chosen material and secure the ends with a knot or jewelry finding designed for that material. Test the connection gently before attaching the charm to a bag or accessory.
Choose durable materials for items that will be handled frequently. A charm attached to a heavy bag may require stronger hardware than one used as a light decorative accent.
For phone accessories, use an attachment compatible with the phone case. Do not attach a charm where it could interfere with buttons, charging ports, or safe handling.
Small beads can pose a choking hazard, so keep them away from young children and pets. For a handmade gift, package the finished charm in a small paper pouch with matching colors.
19. Build a Nature-Inspired Leaf Print Artwork
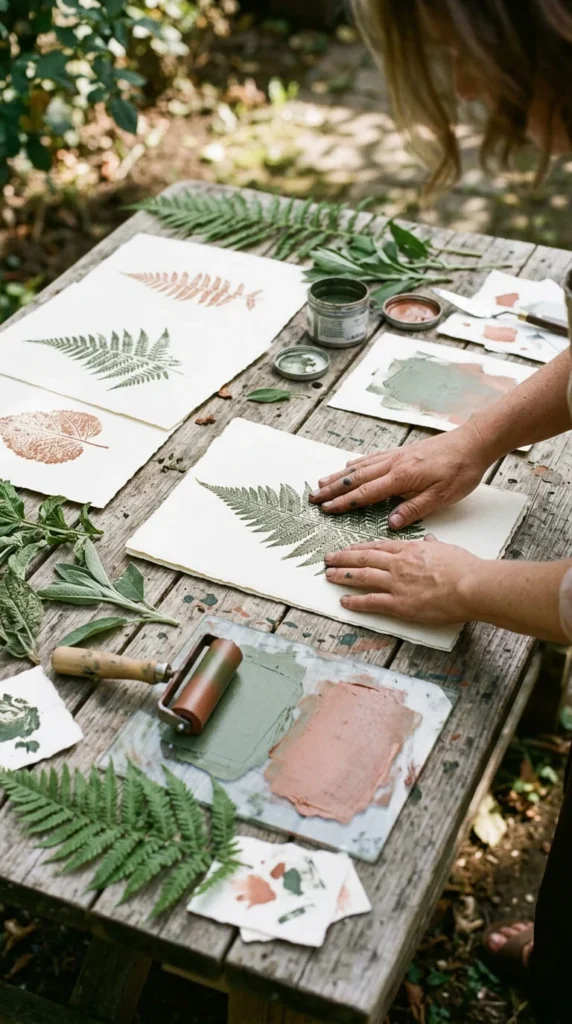
Leaf printing creates natural patterns that can be used for wall art, greeting cards, wrapping paper, and handmade stationery. It is a good project for exploring shapes and textures found in your garden or local outdoor spaces.
Collect a few fallen leaves with visible veins and interesting outlines. Avoid taking plants from protected areas or picking leaves from private gardens without permission. Wipe away dirt and choose leaves that are still flexible enough to lie flat.
Apply a thin layer of suitable printing paint to the textured side of a leaf. Place it paint-side down on paper, cover it with scrap paper, and press gently with your fingers or a clean roller. Lift the leaf carefully to reveal the print.
Experiment with different leaf shapes and color combinations. Ferns create delicate patterns, while broad leaves produce bold silhouettes.
Use less paint than you think you need. A thin, even layer helps preserve the natural veins instead of filling the details with excess color.
Allow the prints to dry completely before framing or stacking them. If you want a larger artwork, arrange several prints in a grid or create a loose botanical pattern across the page.
This nature craft is inexpensive and offers a way to make personalized artwork without advanced drawing skills.
20. Sew a Simple Fabric Bookmark
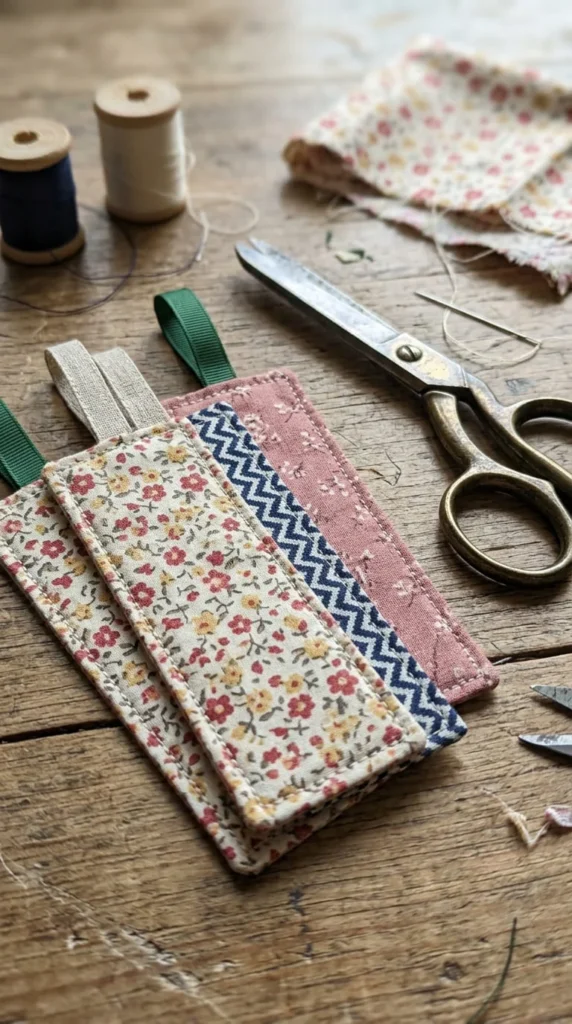
Fabric bookmarks are useful handmade gifts for book lovers and a practical way to use small pieces of leftover cotton. They are lightweight, easy to store, and suitable for sewing beginners.
Cut two narrow rectangles of cotton fabric in the same size. If the fabric is very thin, add a lightweight interfacing layer to help the bookmark keep its shape. Place the fabric pieces together with their patterned sides facing inward.
Sew around the edges, leaving a small opening at one end. Turn the bookmark right-side out, gently push out the corners, and close the opening with small stitches. Press the fabric according to its care instructions.
Add a short ribbon loop at the top if desired. Choose a ribbon that is narrow enough to sit comfortably inside a closed book.
Keep the bookmark thin and flexible. Thick embellishments may damage delicate pages or make the book difficult to close.
For a coordinated gift, select fabric that matches a notebook cover or tote bag. You can also make a set using different patterns from the same fabric collection.
If you do not have a sewing machine, hand-stitch the edges using small, even stitches. Take care with needles and scissors, and store them safely after use.
This project turns small fabric remnants into a practical accessory that can be enjoyed every time someone opens a book.
21. Make a Decorative Upcycled Tin Pencil Holder
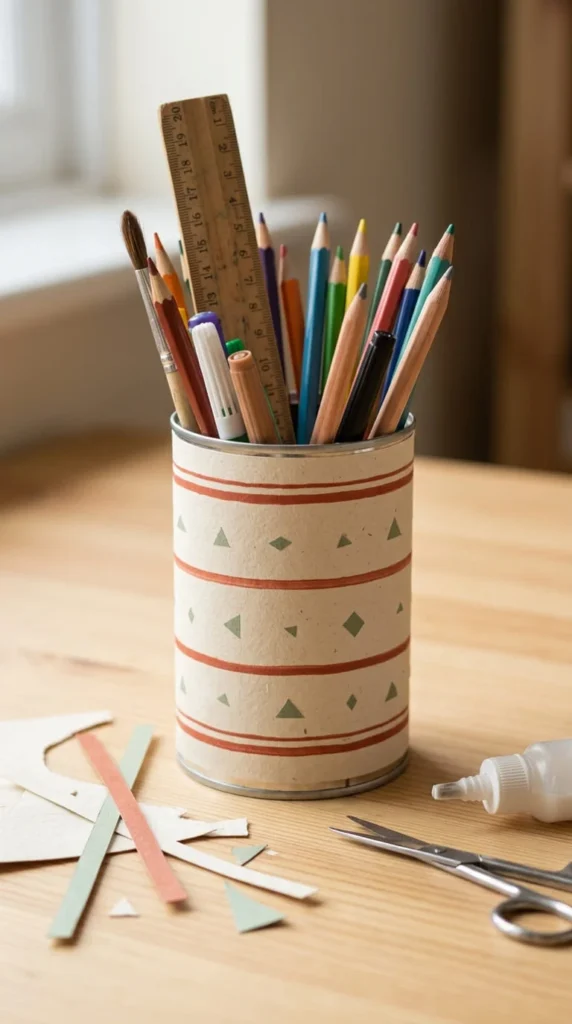
An upcycled tin pencil holder is a simple way to organize school supplies, art materials, or office stationery. It also offers a second use for a clean container that might otherwise be thrown away.
Select a sturdy tin with no rust, dents, or sharp exposed edges. Wash and dry it completely. If the rim is rough or damaged, choose another container rather than attempting to use it.
Measure the height and circumference of the tin. Cut decorative paper to fit around the outside, leaving the rim uncovered. Attach the paper with a suitable adhesive and smooth it gently to remove air bubbles.
You can use plain cardstock, leftover wrapping paper, or small pieces of patterned paper arranged like a collage. For a more textured look, add a narrow strip of fabric around the middle.
Make the holder stable by choosing a container with a broad base. This helps prevent it from tipping when filled with longer pencils or brushes.
Let the adhesive dry fully before adding supplies. Avoid placing wet brushes inside if the paper covering is not water-resistant.
Create a matching set with different heights for pencils, paintbrushes, rulers, and scissors. Grouping the containers on a tray can make a worktable look more organized while keeping frequently used tools within reach.
22. Create a Handmade Vision Board With Recycled Paper
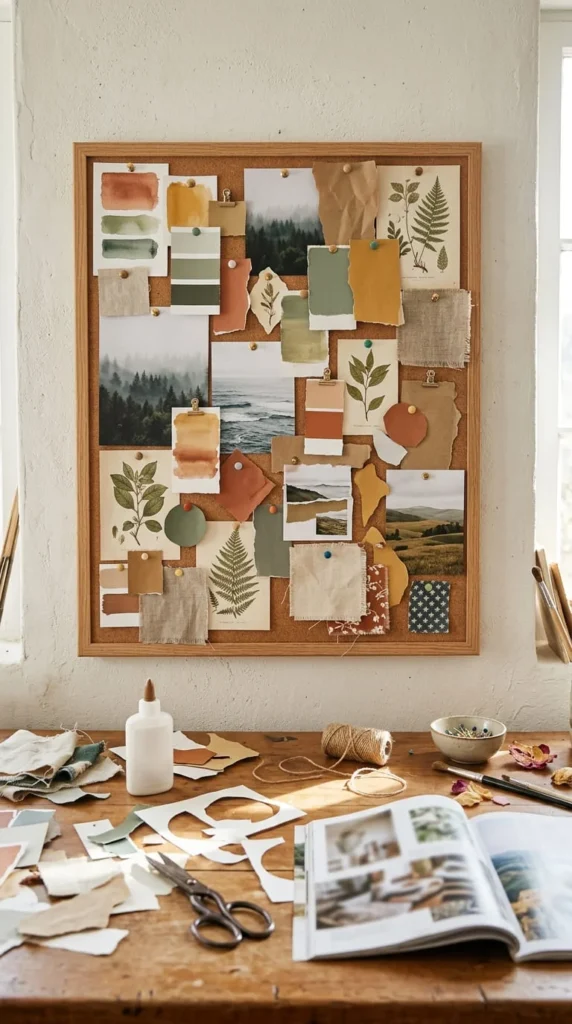
A vision board is a collection of images, colors, and visual reminders that represent goals, interests, or the kind of life you want to work toward. Making one can also be an enjoyable exercise in collage and personal design.
Start with a sheet of cardboard, a corkboard, or a sturdy piece of recycled packaging. Collect images from old magazines, printed photographs, fabric samples, and colored paper.
Choose a theme before arranging the pieces. It might focus on learning a new skill, organizing a room, planning a garden, or setting aside time for creative hobbies.
Arrange the images in small groups, leaving some empty space so the board does not feel overcrowded. Use paper clips, removable adhesive, or pins suited to the backing material.
Make the board practical by connecting visual inspiration with actions. For example, a picture of a craft table could remind you to organize supplies, while a photograph of a garden might inspire a weekend planting project.
You do not need to buy special stickers or printed decorations. Recycled packaging, old calendars, and paper scraps can provide plenty of material.
Place the finished board somewhere you will see it regularly. You can update it as your interests change, replacing images and colors rather than making an entirely new board.
23. Make a Small Crochet Plant Pot Cover
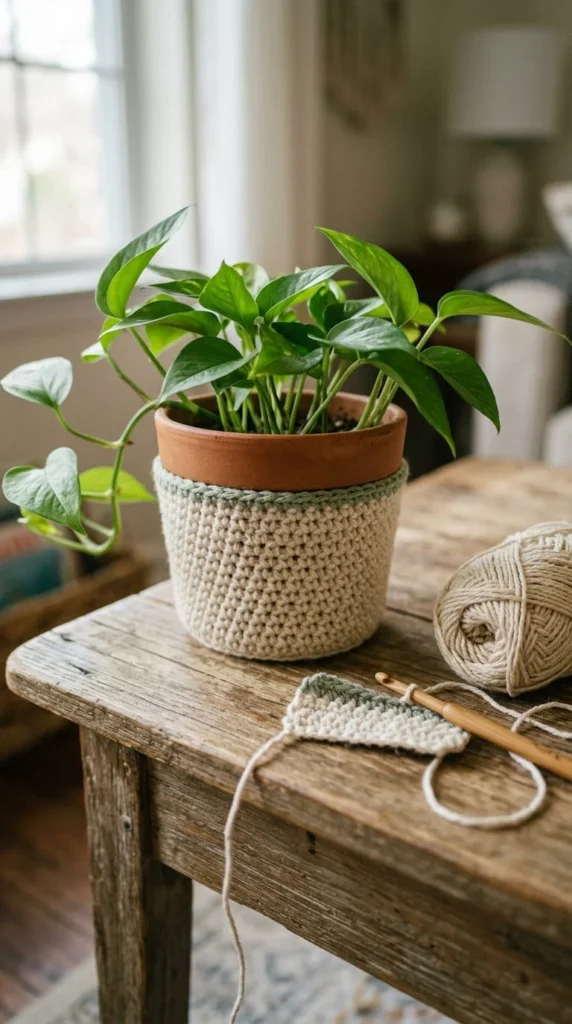
A crochet plant pot cover adds a soft textile detail to a shelf or windowsill. It is a good project for beginners who have learned basic crochet stitches and want to make something useful.
Measure the outside of a small nursery pot or decorative container. Choose cotton yarn that can hold its shape, and use a crochet hook recommended for the yarn weight.
Begin with a flat circle for the base, then work additional rounds to create the sides. If you are following a beginner pattern, check the stitch count regularly so the cover does not become too tight or loose.
Try a simple single-crochet texture for your first version. A contrasting border can add color without requiring a complicated stitch pattern.
Keep the plant’s watering routine separate from the yarn cover. Crochet fabric can absorb water and remain damp, so use a removable nursery pot with drainage holes inside the cover. Take it out when watering and let excess water drain before returning it.
Choose washable yarn if you expect the cover to collect dust. Avoid making the fit so tight that removing it becomes difficult.
A small cover can be completed with relatively little yarn, making this an appealing way to use leftover skeins from earlier projects. It also pairs nicely with a handmade plant marker or decorated pot.
24. Create a Mini Handmade Gift Basket
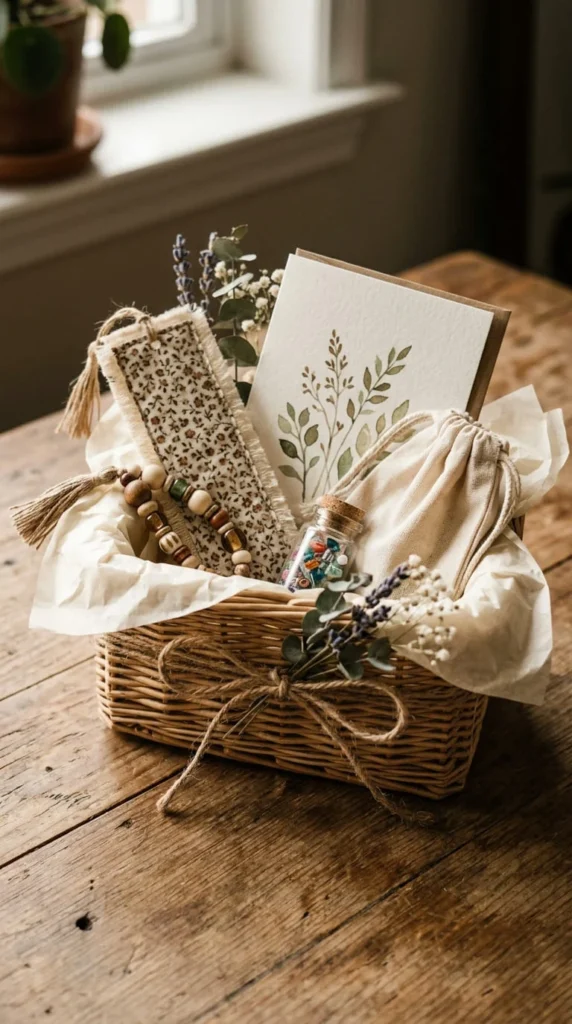
A handmade gift basket brings several small DIY creations together into one thoughtful present. It works for birthdays, thank-you gifts, teacher appreciation, and other everyday celebrations.
Choose a small basket, sturdy cardboard box, or reusable container. Add tissue paper or a clean fabric lining to support the items and create a tidy base.
Select two or three handmade pieces that suit the recipient. A reader might enjoy a fabric bookmark and paper journal, while someone who likes gardening could appreciate a painted plant pot and botanical card.
Place taller items at the back and smaller pieces toward the front. Use folded paper or fabric to stop lightweight objects from shifting. If the items are fragile, wrap them individually.
Keep the basket focused on a single theme. A few useful, coordinated gifts often feel more personal than a large collection of unrelated objects.
You can decorate the handle or outside with ribbon, twine, or a small handmade paper flower. Avoid covering the contents so completely that the recipient cannot see what is inside.
For a budget-friendly version, use a container you already own and make the decorations from leftover craft supplies. A handwritten note can add a personal touch without increasing the cost.
This project is a good way to use several smaller crafting ideas together and create a gift that feels carefully prepared.
25. Make a Seasonal Window Decoration With Pressed Leaves
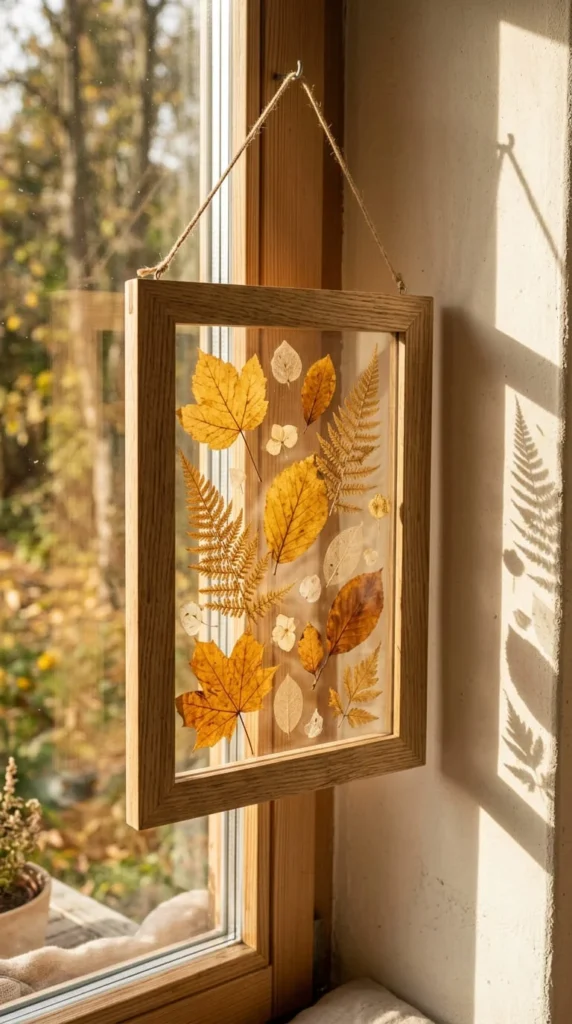
Pressed-leaf window art brings the changing seasons indoors. It is an affordable project for autumn, spring, or any time you find attractive fallen leaves and want to preserve their shapes.
Collect a range of leaves with different outlines and colors. Choose fallen leaves where possible, and avoid material that is wet, moldy, or beginning to decay. Press the leaves between absorbent paper inside a heavy book until they are dry and flat.
Arrange the leaves on a clear frame insert, transparent craft film, or another suitable display surface. Leave small gaps between the shapes so light can pass through and highlight their outlines.
For an autumn design, combine gold, brown, and muted red leaves. Spring displays can use delicate green leaves and small pressed flowers.
Keep the composition simple. A few well-spaced leaves often create a more attractive display than a crowded arrangement.
Use materials suitable for your chosen frame and follow any adhesive instructions. Avoid placing the finished decoration where it will be exposed to condensation or excessive moisture, which can damage the plant material.
Hang the display near a bright window, but keep delicate pressed leaves out of prolonged direct sunlight to reduce fading.
You can update the arrangement each season, turning the same frame into a changing piece of handmade nature décor.
Conclusion
Creative projects do not have to involve expensive tools, complicated techniques, or an entire room dedicated to crafting. With paper scraps, glass jars, fabric remnants, clay, yarn, and natural materials, you can make useful organizers, thoughtful handmade gifts, personal keepsakes, and decorations that reflect your style.
If you are new to DIY, begin with a simple project such as a paper flower, a decorated jar, or a handmade bookmark. Once you feel comfortable with the materials, experiment with embroidery, crochet, patchwork, or other crafts that interest you. Reusing household items can also help keep costs down while giving everyday objects a new purpose.
Choose one of these crafting ideas, set aside a little time, and gather the supplies you already have. Your first project does not have to be perfect to be worth making. Save your favorite ideas, share your finished creation with friends, and keep exploring new ways to turn ordinary materials into something personal and useful.